
Containerizing Your CI/CD: Docker, Jenkins, and Git Working Together

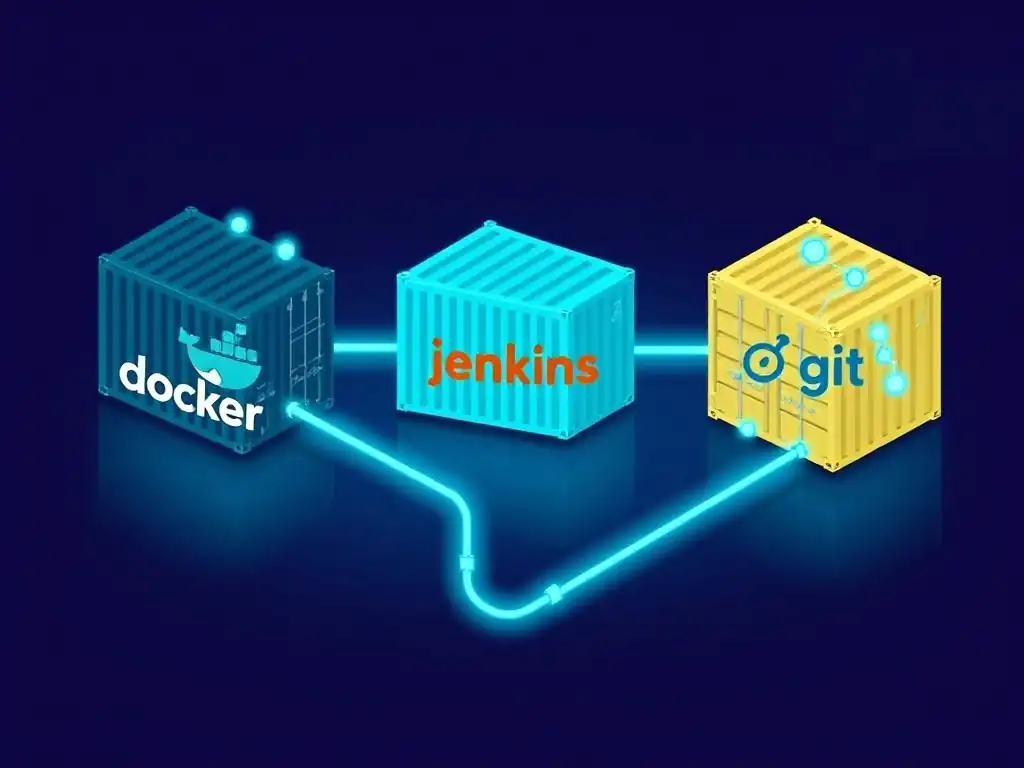
Welcome to Git and Version Control Hub, your central resource for mastering the power of Git!
Dive into the world of efficient collaboration and streamlined workflows, whether you're a solo coder or part of a bustling development team. Ever wondered how to truly unlock the potential of Git in your automated pipelines? Our latest article explores just that, revealing the secrets of CI/CD with Docker and Git. Discover how to containerize your CI/CD process using Docker, Jenkins, and Git, creating a robust and scalable solution. Intrigued? Let's get started and revolutionize your development cycle!
Containerizing Your CI/CD: Docker, Jenkins, and Git Working Together
- Introduction to CI/CD with Docker and Git
- Setting Up Your Docker Environment for CI/CD
- Integrating Git with Your Jenkins CI/CD Pipeline
- Building a Containerized CI/CD Pipeline with Jenkins
- Advanced CI/CD Containerization Techniques
- Best Practices for CI/CD with Docker, Jenkins, and Git
- Troubleshooting Common Issues in Containerized CI/CD
- Conclusion: Streamlining Your Workflow with Containerized CI/CD
-
Frequently Asked Questions
- How does Docker help with CI/CD pipelines?
- What role does Jenkins play in a CI/CD pipeline with Docker and Git?
- Why is Git essential for a CI/CD pipeline involving Docker and Jenkins?
- What are the benefits of using Docker for CI/CD compared to traditional methods?
- How can I integrate Docker with Jenkins for running tests in my CI/CD pipeline?
- Final Reflection: Embracing the Fluidity of Continuous Integration
- Unleash Your CI/CD Potential Now!
Introduction to CI/CD with Docker and Git
Understanding the Benefits of Containerized CI/CD Pipelines
Containerized CI/CD pipelines represent a significant evolution in software development and deployment practices. By leveraging containerization technologies like Docker, teams can achieve unprecedented levels of consistency, efficiency, and scalability in their continuous integration and continuous delivery (CI/CD) processes. Traditional CI/CD setups often face challenges related to environment inconsistencies between development, testing, and production stages.
These inconsistencies can lead to the dreaded "works on my machine" syndrome, where applications behave differently in various environments, causing delays and complications in the release cycle. Containerization directly addresses this issue by encapsulating applications and their dependencies into isolated containers, ensuring that the runtime environment is identical across all stages of the CI/CD pipeline.
The use of containers in CI/CD pipelines brings numerous advantages. Firstly, it significantly reduces environment configuration overhead. Developers can define the exact runtime environment, including operating system libraries, language runtimes, and application dependencies, within a Dockerfile. This specification becomes the blueprint for creating consistent container images that can be used throughout the pipeline, from building and testing to staging and production deployments. Secondly, containerization enhances portability.
Docker containers can run on virtually any infrastructure that supports Docker, be it on-premises servers, cloud platforms, or even local development machines. This portability ensures that the CI/CD pipeline remains consistent regardless of the underlying infrastructure, simplifying deployments across diverse environments. Furthermore, containers promote resource efficiency. They are lightweight and share the host operating system kernel, resulting in lower resource consumption compared to virtual machines. This efficiency translates to faster build and deployment times, as well as reduced infrastructure costs.
Why Docker, Jenkins, and Git are a Powerful Combination for Automation
The synergy between Docker, Jenkins, and Git forms a robust foundation for building and managing automated CI/CD pipelines. Each technology plays a crucial role, and their combined capabilities create a powerful ecosystem for modern software development. Git, as a distributed version control system, serves as the cornerstone for tracking changes to the codebase. It enables collaboration among developers, facilitates branching and merging strategies for managing features and releases, and provides a complete history of code modifications.
Jenkins, on the other hand, is a leading open-source automation server that orchestrates the CI/CD pipeline. It can monitor Git repositories for code changes, trigger automated builds and tests, and manage the deployment process. Jenkins' extensive plugin ecosystem allows for seamless integration with various tools and technologies, including Docker.
Docker complements Git and Jenkins by providing the containerization platform necessary for building and running consistent, portable applications. Docker enables the creation of container images that encapsulate the application and its runtime environment, ensuring that the application behaves predictably across different stages of the CI/CD pipeline. Jenkins can leverage Docker to build, test, and deploy containerized applications.
For instance, Jenkins can use Docker to create build environments, run unit and integration tests within containers, and package the application into a Docker image for deployment. This integration streamlines the entire CI/CD process, from code commit to production deployment. The combination of Git for version control, Jenkins for automation orchestration, and Docker for containerization offers a comprehensive and efficient solution for modern CI/CD workflows, empowering development teams to deliver software faster, more reliably, and with greater confidence.
Setting Up Your Docker Environment for CI/CD
Installing Docker and Docker Compose
Before embarking on containerizing your CI/CD pipeline, the first crucial step is setting up your Docker environment. This involves installing both Docker Engine and Docker Compose on the machines that will be part of your CI/CD infrastructure, typically including your Jenkins server and build agents. Docker Engine is the core component that allows you to build, run, and manage Docker containers.
Docker Compose, on the other hand, is a tool for defining and running multi-container Docker applications. While not strictly necessary for basic CI/CD pipelines, Docker Compose simplifies the management of complex applications with multiple services, especially when it comes to integration testing.
The installation process for Docker and Docker Compose varies depending on your operating system. For Linux distributions like Ubuntu or CentOS, Docker provides convenient installation scripts and package repositories. For example, on Ubuntu, you can typically install Docker Engine using apt-get after adding Docker's official GPG key and repository. Similarly, Docker Compose can be installed by downloading the Compose binary from Docker's GitHub repository and placing it in a directory included in your system's PATH, such as /usr/local/bin. For macOS and Windows, Docker Desktop provides an all-in-one installation package that includes Docker Engine, Docker Compose, and the Docker CLI. After installation, it's essential to verify that Docker and Docker Compose are installed correctly by running commands like docker --version and docker-compose --version in your terminal. These commands should output the installed versions of Docker and Docker Compose, confirming successful installation. Ensuring Docker is properly set up is fundamental for the subsequent steps in building a containerized CI/CD pipeline.
Writing a Dockerfile for Your Application
The Dockerfile is the blueprint for creating a Docker image. It's a text file that contains a series of instructions that Docker executes to assemble an image. Writing an efficient and well-structured Dockerfile is paramount for creating optimized container images that are small in size, secure, and performant. A Dockerfile typically starts with a FROM instruction, which specifies the base image to build upon. For example, FROM ubuntu:latest would use the latest version of the Ubuntu base image. Choosing the right base image is crucial; leaner base images like alpine can significantly reduce the final image size, which is beneficial for faster downloads and deployments.
Subsequent instructions in a Dockerfile define the steps to customize the base image to create the application image. Common instructions include RUN, COPY, ADD, WORKDIR, ENV, EXPOSE, and CMD. RUN is used to execute commands within the container during the image build process, such as installing packages or compiling code. For instance, RUN apt-get update && apt-get install -y nodejs npm would update the package lists and install Node.js and npm on an Ubuntu-based image. COPY and ADD are used to copy files and directories from the host machine into the container image. WORKDIR sets the working directory inside the container. ENV sets environment variables. EXPOSE declares ports that the container will listen on at runtime. Finally, CMD specifies the default command to execute when a container is started from the image. For a Node.js application, CMD ["npm", "start"] might be used to start the application server. Carefully crafting the Dockerfile, optimizing layers, and minimizing image size are key considerations in creating effective container images for CI/CD.
Creating a Docker Image for Your Project
Once you have a well-defined Dockerfile, the next step is to build a Docker image from it. This process transforms the instructions in the Dockerfile into a runnable container image. To build a Docker image, you use the docker build command from your terminal, navigating to the directory containing your Dockerfile. The basic syntax for the command is docker build -t <image-name>:<tag> ., where <image-name> is the desired name for your image and <tag> is an optional tag, often used to version images. The . at the end specifies the build context, which is the current directory in this case.
For example, if your application is named "my-app" and you want to tag the image as "latest", you would run docker build -t my-app:latest .. Docker will then read the Dockerfile in the current directory and execute the instructions sequentially. Each instruction in the Dockerfile creates a new layer in the image. Docker leverages caching to optimize the build process; if a layer hasn't changed since the last build, Docker will reuse the cached layer, significantly speeding up subsequent builds. After the build process completes successfully, you can verify the creation of your image by running docker images. This command lists all Docker images available on your system, and your newly built image "my-app:latest" should be among them. Now you have a container image ready to be used in your CI/CD pipeline, ensuring consistency and portability across your development, testing, and production environments.
Integrating Git with Your Jenkins CI/CD Pipeline
Connecting Your Git Repository to Jenkins
Seamless integration between Git and Jenkins is fundamental for automating your CI/CD pipeline. Jenkins needs to be able to access your Git repository to monitor for code changes and trigger builds whenever new commits are pushed. Establishing this connection involves configuring Jenkins to access your repository, whether it's hosted on platforms like GitHub, GitLab, Bitbucket, or a self-hosted Git server. Within Jenkins, you'll typically configure a new project or modify an existing one to specify your Git repository details. This usually involves providing the repository URL, credentials if the repository is private, and branch information.
When configuring a Jenkins project to connect to Git, you will typically use the "Source Code Management" section of the project configuration. Select "Git" as the source code management system and then enter the "Repository URL". For public repositories, you can directly use the HTTPS or Git URL. For private repositories, you'll need to add credentials to Jenkins. Jenkins supports various credential types, including username and password, SSH keys, and secret text.
You can manage credentials in Jenkins under "Credentials" in the main Jenkins menu. Once you've added the necessary credentials, you can select them in the repository configuration. You also need to specify which branch Jenkins should monitor and build from, typically "main" or "master" for the primary branch, or feature branches as needed. After saving the configuration, Jenkins will be able to communicate with your Git repository, enabling automated builds based on Git events.
Configuring Jenkins to Trigger Builds on Git Commits
Automating the build process upon code commits is a core aspect of CI/CD. Jenkins offers several ways to trigger builds automatically when changes are pushed to your Git repository. The most common and efficient method is using webhooks. Webhooks are HTTP callbacks triggered by events in your Git repository. When a developer pushes code to the repository, the Git platform (e.g., GitHub, GitLab) sends a webhook notification to Jenkins, which then initiates a new build. This approach is real-time and eliminates the need for Jenkins to periodically poll the repository for changes.
To configure webhook-based triggers, you need to set up a webhook in your Git repository settings that points to your Jenkins server's webhook endpoint. The specific webhook URL in Jenkins is usually provided in the project configuration under "Build Triggers" when you select "GitHub hook trigger for GITScm polling" or "GitLab hook trigger for GITScm polling" depending on your Git platform. You'll need to copy this URL and paste it into the webhook configuration in your Git repository settings.
For example, in GitHub, you would go to your repository settings, then "Webhooks," and add a new webhook. Choose "application/json" as the Content type and paste the Jenkins webhook URL. Ensure the webhook is configured to trigger on "push" events.
On the Jenkins side, in your project configuration, under "Build Triggers," check the appropriate webhook trigger option. With webhooks configured, every time code is pushed to your Git repository, Jenkins will receive a notification and automatically start a new build of your CI/CD pipeline, ensuring continuous integration.
Using Git Branching Strategies for CI/CD
Git branching strategies play a crucial role in structuring your CI/CD pipeline and managing different development workflows, such as feature development, hotfixes, and releases. Different branching models, like Gitflow or GitHub Flow, dictate how branches are used and how changes are integrated. In a CI/CD context, branches can be mapped to different stages of the pipeline.
For example, you might configure Jenkins to automatically build and test code pushed to feature branches, deploy to a staging environment from a "develop" branch, and deploy to production from a "main" or "master" branch. This branch-based CI/CD approach provides a clear separation of environments and workflows.
For instance, using Gitflow, you might have a "develop" branch for ongoing integration of feature branches and a "release" branch for preparing releases. Jenkins can be configured to trigger a build and run unit tests whenever a pull request is merged into the "develop" branch. Upon merging into "release," Jenkins could trigger integration tests and deployment to a staging environment.
Finally, merging the "release" branch into "main" (and "develop") could trigger the final deployment to production. GitHub Flow, a simpler branching model, typically uses a single "main" branch for production and feature branches for development.
In this case, Jenkins might be configured to run unit tests and integration tests for every push to a feature branch, and upon merging to "main," trigger deployment to both staging and production environments. Properly aligning your Git branching strategy with your CI/CD pipeline in Jenkins allows for a well-organized and automated software delivery process, supporting different release cadences and development workflows effectively.
Building a Containerized CI/CD Pipeline with Jenkins
Defining Your Jenkins Pipeline as Code (Jenkinsfile)
Jenkins Pipeline as Code is a transformative approach to defining CI/CD pipelines. Instead of configuring pipelines through the Jenkins web UI, you define them in a text file called Jenkinsfile, which is version-controlled alongside your application code in your Git repository. This practice brings several advantages. It treats your pipeline configuration just like any other code artifact, enabling version control, code review, and collaboration. It also makes your pipeline portable and reproducible; anyone can easily set up the same pipeline by simply checking out the repository. Jenkins Pipelines are written using Groovy DSL (Domain Specific Language), offering a flexible and powerful way to orchestrate complex CI/CD workflows.
A Jenkinsfile typically defines stages, each representing a logical phase in your CI/CD process, such as "Build," "Test," and "Deploy." Within each stage, you define steps, which are the actual actions to be performed, like compiling code, running tests, or deploying to a server. For example, a simple Jenkinsfile might look like this:
pipeline {
    agent any
    stages {
        stage('Build') {
            steps {
                sh 'mvn clean install' // Example Maven build command
            }
        }
        stage('Test') {
            steps {
                sh 'mvn test' // Example Maven test command
            }
        }
        stage('Deploy') {
            steps {
                sh 'kubectl apply -f deployment.yaml' // Example Kubernetes deployment
            }
        }
    }
}
This declarative pipeline defines three stages: "Build," "Test," and "Deploy," with shell commands executed in each stage. By defining your CI/CD pipeline as code in a Jenkinsfile, you ensure consistency, version control, and ease of maintenance for your automation workflows.
Utilizing Docker in Your Jenkins Pipeline Stages
Integrating Docker into your Jenkins pipeline stages is crucial for building a containerized CI/CD workflow. Docker can be used in various stages of the pipeline to create consistent build environments, run tests in isolated containers, and build and push Docker images. In a Jenkins Pipeline, you can use the docker pipeline step to interact with Docker. This step allows you to execute Docker commands within your pipeline stages, such as building images, running containers, and pushing images to registries.
For example, in the "Build" stage of your pipeline, you might use Docker to create a build environment based on a specific Docker image containing all the necessary build tools and dependencies. This ensures that the build process is consistent regardless of the Jenkins agent's environment. You can use the docker run command within a sh step to execute build commands inside a Docker container. In the "Test" stage, you can similarly use Docker to run your unit and integration tests within isolated containers, ensuring consistent test environments and preventing dependencies conflicts. To build a Docker image of your application, you would typically use the docker build command in a "Build Image" stage. The docker.build() pipeline step provides a more integrated way to build Docker images within Jenkins pipelines, allowing you to specify build arguments and tags directly. By leveraging Docker in your Jenkins pipeline stages, you can achieve a fully containerized CI/CD process, ensuring consistency and portability across all stages.
Building and Testing Your Docker Image in Jenkins
A key stage in a containerized CI/CD pipeline is building and testing the Docker image of your application. Jenkins can automate this process seamlessly. In your Jenkinsfile, you would typically have a dedicated stage for building the Docker image and another for testing it. The build stage involves using the docker build command to create the image from your Dockerfile, as discussed earlier. You can use the docker.build() step in your Jenkins pipeline for this purpose. This step allows you to specify the image tag and build context, which is usually the directory containing your Dockerfile.
After building the Docker image, it's crucial to test it to ensure it functions as expected before deploying it. Testing a Docker image in Jenkins can involve various types of tests, such as unit tests, integration tests, and smoke tests. You can run these tests within a Docker container derived from your newly built image. For instance, you can use the docker run command to start a container from your image and execute test commands within it. If your application exposes an HTTP endpoint, you can run smoke tests using tools like curl or wget to verify that the application is running correctly inside the container. You can incorporate these test commands into a "Test Image" stage in your Jenkins pipeline. If the tests pass, the pipeline can proceed to the next stage, such as pushing the image to a registry. If tests fail, the pipeline should fail, preventing a potentially broken image from being deployed.
Pushing Your Docker Image to a Registry (e.g., Docker Hub, AWS ECR)
Once your Docker image has been built and successfully tested in Jenkins, the final step in the build and test phase is to push it to a Docker registry. A Docker registry is a storage and distribution system for Docker images. Public registries like Docker Hub are commonly used for sharing public images, while private registries like AWS ECR (Elastic Container Registry), Google GCR (Google Container Registry), or self-hosted registries are used for storing private or proprietary images. Pushing your Docker image to a registry makes it accessible for deployment to various environments, such as staging or production.
In your Jenkins pipeline, you can use the docker push command to push your Docker image to a registry. Before pushing, you typically need to log in to the registry using docker login. For secure registry access, it's best practice to use Jenkins credentials management to store registry credentials, rather than hardcoding them in your Jenkinsfile. You can use the withCredentials step in your Jenkins pipeline to securely pass credentials to the docker login command. After logging in, you can use docker push <image-name>:<tag> to push your image. For example, if you want to push an image named "my-app" with the tag "latest" to Docker Hub under your username "myusername," you would use docker push myusername/my-app:latest. For private registries like AWS ECR, the image name will typically include the registry URL and region. After successfully pushing the image, it will be available in your chosen registry, ready for deployment to your target environment.
Advanced CI/CD Containerization Techniques
Multi-Stage Docker Builds for Optimized Images
Multi-stage Docker builds are an advanced technique for creating optimized Docker images, particularly beneficial for CI/CD pipelines. Traditional Docker builds can result in large images because they often include build tools, dependencies, and intermediate artifacts that are not needed in the final runtime image. Multi-stage builds address this by using multiple FROM statements in a single Dockerfile. Each FROM statement starts a new build stage, and you can selectively copy artifacts from previous stages into later stages. This allows you to use a build stage with all the necessary build tools and dependencies, and then copy only the essential application artifacts to a final, leaner runtime image.
For example, consider a Java application built with Maven. A multi-stage Dockerfile might have a first stage based on a Maven image to build the application:
FROM maven:3.6.3-jdk-11 AS builder
WORKDIR /app
COPY pom.xml .
COPY src ./src
RUN mvn clean install
And a second stage based on a minimal JRE image for the runtime environment:
FROM openjdk:11-jre-slim
WORKDIR /app
COPY --from=builder /app/target/*.jar app.jar
EXPOSE 8080
CMD ["java", "-jar", "app.jar"]
In this example, the first stage, named "builder," uses a Maven image to build the Java application. The second stage uses a slim JRE image and copies only the built JAR file from the "builder" stage. The final image contains only the runtime environment and the application JAR, significantly reducing its size. Multi-stage builds lead to smaller, more secure, and faster-to-deploy Docker images, optimizing your CI/CD pipeline efficiency.
Leveraging Docker Compose for Integration Testing
Docker Compose is a powerful tool for defining and running multi-container Docker applications. In the context of CI/CD, Docker Compose is particularly useful for setting up integration testing environments. Integration tests often require multiple services to be running and interconnected, such as a web application, a database, and a message queue. Docker Compose allows you to define these services and their dependencies in a docker-compose.yml file and easily start and stop them together. This simplifies the setup and teardown of complex integration testing environments within your CI/CD pipeline.
For example, a docker-compose.yml file for integration testing a web application might define services for the web application, a PostgreSQL database, and Redis:
version: "3.9"
services:
  web-app:
    build: .
    ports:
      - "8080:8080"
    depends_on:
      - db
      - redis
  db:
    image: postgres:13
    environment:
      POSTGRES_USER: testuser
      POSTGRES_PASSWORD: testpassword
  redis:
    image: redis:6.2
In your Jenkins pipeline's integration test stage, you can use Docker Compose to start these services using the docker-compose up -d command. After the services are running, you can execute your integration tests against the web application. Once the tests are complete, you can tear down the environment using docker-compose down. Docker Compose provides a convenient and reproducible way to manage complex integration testing environments within your containerized CI/CD pipeline, ensuring thorough testing of your application's interactions with its dependencies.
Implementing Automated Rollbacks with Docker and Jenkins
Automated rollbacks are a crucial aspect of robust CI/CD pipelines, especially in production environments. In case a new deployment introduces issues, automated rollbacks allow you to quickly revert to the previous stable version, minimizing downtime and impact on users. Docker and Jenkins can be effectively used to implement automated rollbacks in a containerized CI/CD pipeline. The key is to maintain a history of deployed Docker images and have a mechanism to easily redeploy a previous version if needed.
One common approach is to tag your Docker images with version numbers or commit hashes when pushing them to a registry. In your Jenkins pipeline, before deploying a new version, you can store the tag of the currently deployed version. If, after deployment, monitoring systems detect issues or automated tests fail in production, you can trigger a rollback pipeline in Jenkins. This rollback pipeline would retrieve the tag of the previously deployed version from storage and redeploy that version using docker run with the stored tag. For orchestration platforms like Kubernetes, you can use deployment strategies like rolling updates with rollback capabilities. Kubernetes deployments track revision history, making it straightforward to rollback to a previous deployment revision using kubectl rollout undo deployment/<deployment-name>. Jenkins can automate this rollback process based on monitoring alerts or manual triggers, ensuring rapid recovery from problematic deployments in a containerized environment.
Best Practices for CI/CD with Docker, Jenkins, and Git
Version Controlling Your Dockerfiles and Jenkinsfiles
Version control is a cornerstone of good software development practices, and it's equally crucial for your CI/CD infrastructure. Just as you version control your application code using Git, you should also version control your Dockerfiles and Jenkinsfiles. Dockerfiles define how your container images are built, and Jenkinsfiles define your CI/CD pipeline logic. Storing these files in Git repositories alongside your application code ensures that any changes to your build process or pipeline are tracked, auditable, and reversible. This practice promotes consistency, collaboration, and reproducibility in your CI/CD workflows.
By version controlling your Dockerfiles, you can track changes to your image build process, easily revert to previous Dockerfile versions if needed, and collaborate on Dockerfile improvements with your team using Git's branching and merging mechanisms. Similarly, version controlling your Jenkinsfiles allows you to manage changes to your CI/CD pipeline as code. You can use branches to experiment with pipeline modifications, create pull requests for pipeline changes, and maintain a history of pipeline evolution.
This "pipeline as code" approach, combined with version control, makes your CI/CD setup more robust, maintainable, and collaborative. It also allows you to align specific versions of your application code with the corresponding Dockerfile and Jenkinsfile versions, ensuring that builds and deployments are always consistent and reproducible across different environments and over time.
Securing Your Docker Images and CI/CD Pipeline
Security is paramount in any software development process, and CI/CD pipelines are no exception. Securing your Docker images and CI/CD pipeline is crucial to prevent vulnerabilities from being introduced into your applications and to protect sensitive information. Several best practices should be followed to enhance security in a containerized CI/CD environment. Firstly, regularly scan your Docker images for vulnerabilities using image scanning tools like Clair, Trivy, or Anchore.
These tools can identify known vulnerabilities in your base images and application dependencies, allowing you to address them proactively. Secondly, minimize the size of your Docker images by using multi-stage builds and choosing minimal base images. Smaller images reduce the attack surface and potentially contain fewer vulnerabilities.
Thirdly, apply the principle of least privilege to your containerized applications. Run containers as non-root users whenever possible to limit the impact of potential security breaches. Fourthly, secure your Jenkins server and pipeline. Implement access control, use strong authentication, and regularly update Jenkins and its plugins to patch security vulnerabilities.
Protect sensitive credentials used in your pipeline, such as registry credentials or deployment keys, using Jenkins' credential management system and avoid hardcoding secrets in your Jenkinsfiles. Finally, implement network segmentation to isolate your CI/CD environment from production and other sensitive networks. By implementing these security best practices, you can significantly reduce the risk of security incidents in your containerized CI/CD pipeline and ensure the integrity of your software delivery process.
Monitoring and Logging Your Containerized CI/CD Process
Effective monitoring and logging are essential for maintaining the health and performance of your CI/CD pipeline and for quickly identifying and resolving issues. Monitoring your CI/CD process involves tracking key metrics such as build times, test durations, deployment frequencies, and error rates. Tools like Jenkins' built-in monitoring features, Prometheus, or Grafana can be used to visualize these metrics and set up alerts for anomalies. Monitoring allows you to proactively identify bottlenecks, optimize pipeline performance, and ensure that your CI/CD process is running smoothly.
Logging is equally important for troubleshooting and auditing your CI/CD pipeline. Collect logs from all stages of your pipeline, including build logs, test logs, and deployment logs. Centralized logging systems like ELK stack (Elasticsearch, Logstash, Kibana) or Splunk can be used to aggregate, index, and search logs from your entire CI/CD infrastructure. Detailed logs provide valuable insights into pipeline execution, allowing you to diagnose build failures, test failures, or deployment issues quickly.
Implement structured logging to make logs easier to parse and analyze. Include timestamps, log levels, and relevant context information in your logs. By implementing robust monitoring and logging practices, you gain visibility into your containerized CI/CD pipeline, enabling you to optimize its performance, ensure its reliability, and troubleshoot issues effectively, ultimately leading to faster and more reliable software delivery.
Troubleshooting Common Issues in Containerized CI/CD
Resolving Docker Build Failures in Jenkins
Docker build failures in Jenkins pipelines are a common occurrence, and troubleshooting them efficiently is crucial to maintain a smooth CI/CD process. When a Docker build fails in Jenkins, the first step is to examine the Jenkins build logs. The logs will typically contain detailed output from the docker build command, including error messages and stack traces. Carefully analyze the logs to identify the specific step in the Dockerfile that caused the failure. Common causes of Docker build failures include syntax errors in the Dockerfile, missing dependencies, network connectivity issues during package downloads, or insufficient resources on the Jenkins agent.
If the error message points to a specific line in your Dockerfile, double-check the syntax and commands in that line. Ensure that all required dependencies are correctly specified and that the base image you are using is valid and accessible. Network connectivity issues can prevent Docker from downloading base images or packages during the build process.
Verify that your Jenkins agent has internet access and that there are no firewall rules blocking Docker's network requests. Resource constraints, such as insufficient disk space or memory on the Jenkins agent, can also lead to build failures. Monitor resource usage on your agent and consider increasing resources if needed.
For complex Dockerfiles, try building the image locally on your development machine first to isolate and debug issues before running the build in Jenkins. By systematically analyzing the Jenkins build logs and addressing the common causes of Docker build failures, you can effectively resolve these issues and ensure the smooth execution of your CI/CD pipeline.
Addressing Git Integration Problems with Jenkins
Git integration issues in Jenkins can disrupt your CI/CD pipeline by preventing Jenkins from accessing your repository, triggering builds on code changes, or correctly checking out code. Common Git integration problems include authentication failures, repository connectivity issues, incorrect repository URLs, or misconfigured webhook triggers. If Jenkins is unable to connect to your Git repository, the first step is to verify the repository URL and credentials configured in your Jenkins project. Ensure that the URL is correct and that the credentials (username/password, SSH key, or access token) are valid and have the necessary permissions to access the repository.
If authentication is not the issue, check network connectivity between your Jenkins server and your Git repository. Ensure that there are no firewall rules blocking communication and that DNS resolution is working correctly. If you are using webhooks to trigger builds on Git commits, verify that the webhook is correctly configured in your Git repository settings and that it points to the correct Jenkins webhook endpoint.
Test the webhook by manually triggering a push event in your repository and check if Jenkins receives the webhook notification and starts a build. If Jenkins is able to connect to Git but encounters issues during code checkout, ensure that the specified branch and commit are valid and exist in the repository.
Check for any Git-related errors in the Jenkins build logs, such as "fatal: repository not found" or "Authentication failed." By systematically troubleshooting authentication, connectivity, webhook configuration, and code checkout issues, you can effectively resolve Git integration problems and ensure seamless integration between Git and Jenkins in your CI/CD pipeline.
Debugging Container Runtime Errors in Your CI/CD Pipeline
Container runtime errors occur when a Docker container fails to start or crashes during execution in your CI/CD pipeline. These errors can stem from various sources, such as application code defects, incorrect container configurations, resource limitations, or dependency issues within the container environment. When debugging container runtime errors in your CI/CD pipeline, the first step is to examine the container logs. Docker provides commands like docker logs <container-id> to retrieve the logs of a container. In Jenkins, you can often access container logs directly from the build output if you are running containers within your pipeline stages. Analyze the container logs for error messages, stack traces, or exceptions that can pinpoint the cause of the runtime error.
If the logs don't provide sufficient information, you can try running the Docker container interactively on your Jenkins agent or a local development machine to further investigate the issue. Use docker run -it <image-name> /bin/bash (or sh) to start a container in interactive mode and access a shell within the container. From inside the container, you can inspect the application environment, check configuration files, run commands, and try to reproduce the error manually. Resource limitations, such as insufficient memory or CPU allocated to the container, can also cause runtime errors. Monitor resource usage on your Jenkins agent or container runtime environment and ensure that containers have adequate resources. Dependency issues, such as missing libraries or incorrect versions of dependencies within the container, can also lead to runtime errors. Verify that your Dockerfile correctly specifies all necessary dependencies and that they are installed correctly during the image build process. By analyzing container logs, running containers interactively, and addressing resource and dependency issues, you can effectively debug container runtime errors and ensure the reliable execution of your containerized CI/CD pipeline.
Conclusion: Streamlining Your Workflow with Containerized CI/CD
The Future of CI/CD with Docker and Version Control
The future of CI/CD is inextricably linked with containerization and version control. Docker and Git have revolutionized software development and deployment, and their influence on CI/CD practices will only continue to grow. As cloud-native architectures and microservices become increasingly prevalent, containerized CI/CD pipelines are becoming the de facto standard for building and deploying modern applications. The benefits of consistency, portability, scalability, and efficiency offered by containerization are indispensable for organizations striving for agility and speed in software delivery.
Version control, with Git at its forefront, remains the bedrock of collaborative and traceable software development. The integration of Git with CI/CD pipelines ensures that every change is tracked, auditable, and reproducible. "Pipeline as code" and GitOps principles are further solidifying the role of version control in CI/CD, treating infrastructure and pipeline configurations as code that is managed and versioned alongside application code.
Looking ahead, we can expect further advancements in containerization technologies, CI/CD automation tools, and Git workflows, leading to even more streamlined, efficient, and secure software delivery processes. The convergence of these technologies will empower development teams to deliver high-quality software faster and more reliably, driving innovation and business agility.
Resources for Further Learning on Docker, Jenkins, and Git
To deepen your understanding and skills in containerized CI/CD with Docker, Jenkins, and Git, numerous resources are available for further learning. For Docker, the official Docker documentation (docs.docker.com) provides comprehensive guides, tutorials, and reference materials covering all aspects of Docker, from basic concepts to advanced features. Docker also offers interactive tutorials and online courses on their website and platforms like Docker Hub.
For Jenkins, the official Jenkins documentation (www.jenkins.io/doc/) is an excellent resource for learning about Jenkins features, pipeline syntax, plugin ecosystem, and best practices. Jenkins also has a vibrant community forum and numerous online tutorials and courses available on platforms like Udemy and Coursera.
For Git, the official Git documentation (git-scm.com/doc) offers in-depth information on Git concepts, commands, and workflows. Platforms like GitHub and GitLab provide extensive documentation on Git and version control best practices. Interactive Git tutorials and games, such as Learn Git Branching (learngitbranching.js.org), can be helpful for mastering Git concepts in a hands-on manner.
Additionally, online platforms like Coursera, edX, and Udacity offer courses and specializations on DevOps, CI/CD, and containerization, often covering Docker, Jenkins, and Git in detail. Exploring these resources will equip you with the knowledge and skills necessary to effectively implement and manage containerized CI/CD pipelines, enhancing your software development and deployment capabilities.
Frequently Asked Questions
How does Docker help with CI/CD pipelines?
Docker provides consistent environments across the pipeline. It ensures that builds and tests are run in the same containerized setup, reducing "it works on my machine" issues and improving reliability.
What role does Jenkins play in a CI/CD pipeline with Docker and Git?
Jenkins acts as the orchestration tool. It automates the build, test, and deployment processes triggered by Git commits, using Docker containers to execute these tasks.
Why is Git essential for a CI/CD pipeline involving Docker and Jenkins?
Git is the version control system that tracks code changes. It triggers the CI/CD pipeline in Jenkins when new commits are pushed, initiating builds and deployments based on the latest code.
What are the benefits of using Docker for CI/CD compared to traditional methods?
Docker offers improved portability and reproducibility. This leads to faster builds, consistent deployments, and easier scaling compared to relying on manually configured server environments.
How can I integrate Docker with Jenkins for running tests in my CI/CD pipeline?
You can configure Jenkins to use the Docker plugin. This allows you to build Docker images, run containers for testing, and then destroy them, creating a clean and isolated testing environment for each build.
Final Reflection: Embracing the Fluidity of Continuous Integration
The journey we've explored, detailing the synergy of Docker, Jenkins, and Git in CI/CD pipelines, isn't just a technical exercise; it's a testament to the power of adaptability and efficiency in modern software development. In today's rapidly evolving technological landscape, the ability to quickly iterate, test, and deploy code is no longer a luxury, but a necessity for survival and innovation. This containerized approach provides the agility needed to thrive.
The impact of streamlined CI/CD extends far beyond mere code deployment. It fosters a culture of collaboration, reduces errors, and ultimately, allows developers to focus on what they do best: building exceptional software. My own experience has shown me that embracing these practices dramatically improves team morale and reduces the stress associated with releases. Continuous integration doesn't get rid of bugs, but it does make them dramatically easier to find and remove.
- Martin Fowler. This quote perfectly encapsulates the transformative power of this approach.
As you consider the principles and practices outlined in this article, I invite you to reflect on your own development workflows. How can you leverage the power of containerization and automation to build more robust, reliable, and rapidly deployable software? Embrace the fluidity of continuous integration, and unlock the full potential of your team and your code.
Alright, here's a CTA for the end of a web article titled "Containerizing Your CI/CD: Docker, Jenkins, and Git Working Together," targeting GitAndVersionControlHub.com:
Unleash Your CI/CD Potential Now!
Thank you for exploring the power of containerization in CI/CD! We hope you've gained valuable insights into streamlining your development workflow. Now, it's time to put that knowledge into action and revolutionize your own processes.
Ready to take the next step?
- Implement a Docker-based CI/CD pipeline today using Jenkins and Git – start small with a sample project and gradually scale up.
- Explore advanced Docker networking options to optimize communication between your containers in Jenkins. Consider using Docker Compose for managing multi-container applications.
- Share your containerization journey with other developers! Document your process, challenges, and successes in a blog post or forum thread.
What innovative containerization strategies are you planning to integrate into your existing CI/CD pipeline? Let us know in the comments below!