
Deep Dive into Git Staging: Understanding the Power of the Staging Area

Welcome to Git and Version Control Hub!
Are you ready to unlock the full potential of Git? This site is your comprehensive guide to mastering version control, whether you're a solo coder or part of a large team. Dive in and discover how Git can revolutionize your workflow and collaboration. And speaking of mastering Git, let's demystify a crucial concept: the Git staging area.
Ever wondered exactly what it is and how it works? Our in-depth article, " Git staging area explained," breaks down this vital component of Git, offering clarity and practical examples. Understanding the staging area is fundamental to effective version control. Ready to take your Git skills to the next level?
Streamlining Software Development: Mastering the Git Staging Area
- Introduction to Git Staging and Its Importance
- Understanding the Git Staging Area
- Mastering Git Add: Adding Changes to the Staging Area
- Fine-Grained Control: Staging Parts of a File with git add -p
- Checking Staging Area Status with git status
- Removing Changes from the Staging Area: Using git reset
- Ignoring Files: Preventing Unwanted Files from Being Staged
- Advanced Git Staging Techniques
- Git Staging Area Best Practices for Team Collaboration
- Conclusion: The Git Staging Area – Key to Effective Version Control
-
Frequently Asked Questions
- What exactly is the Git staging area, and what is its primary function?
- Why is the Git staging area considered a crucial part of the Git workflow?
- How do I add files to the Git staging area using the command line?
- How can I see what files are currently in the Git staging area?
- What's the difference between git add . and git commit -a and when would you use each?
- Final Reflection: Mastering the Art of Git Staging
- Unveil Your Git Mastery: Take Control Now!
Introduction to Git Staging and Its Importance
Enhancing Collaboration and Code Quality Through Effective Staging
In the realm of modern software development, version control systems are indispensable tools for managing codebases, tracking changes, and facilitating team collaboration. Among these systems, Git stands out as the most widely adopted, renowned for its flexibility, efficiency, and robust feature set. At the heart of Git's powerful version control mechanism lies the concept of the staging area, a crucial intermediary step that significantly enhances collaboration and code quality. Understanding and mastering the Git staging area is paramount for any developer seeking to leverage Git effectively, whether working on solo projects or contributing to large, collaborative endeavors.
The staging area, often referred to as the "index," acts as a preparatory space where developers curate changes before committing them to the project history. This deliberate separation between the working directory and the repository’s history empowers developers to meticulously organize their contributions. By selectively staging changes, developers gain granular control over what gets included in each commit, ensuring that commits are logical, focused, and represent meaningful units of work.
This precision not only results in a cleaner and more understandable project history but also significantly reduces the likelihood of introducing bugs or inconsistencies into the codebase. Effectively utilizing the Git staging area is therefore not merely a technical detail but a cornerstone of good software development practice, directly impacting both the quality of the code and the efficiency of team collaboration.
Workflow Overview: Working Directory, Staging Area, and Local Repository
To fully appreciate the role of the Git staging area, it’s essential to understand its place within the broader Git workflow. Git organizes project management into three distinct areas: the working directory, the staging area, and the local repository. The working directory is where developers actively modify files, representing the current state of the project on their local machine. Changes made here are initially untracked by Git until explicitly added to the staging area.
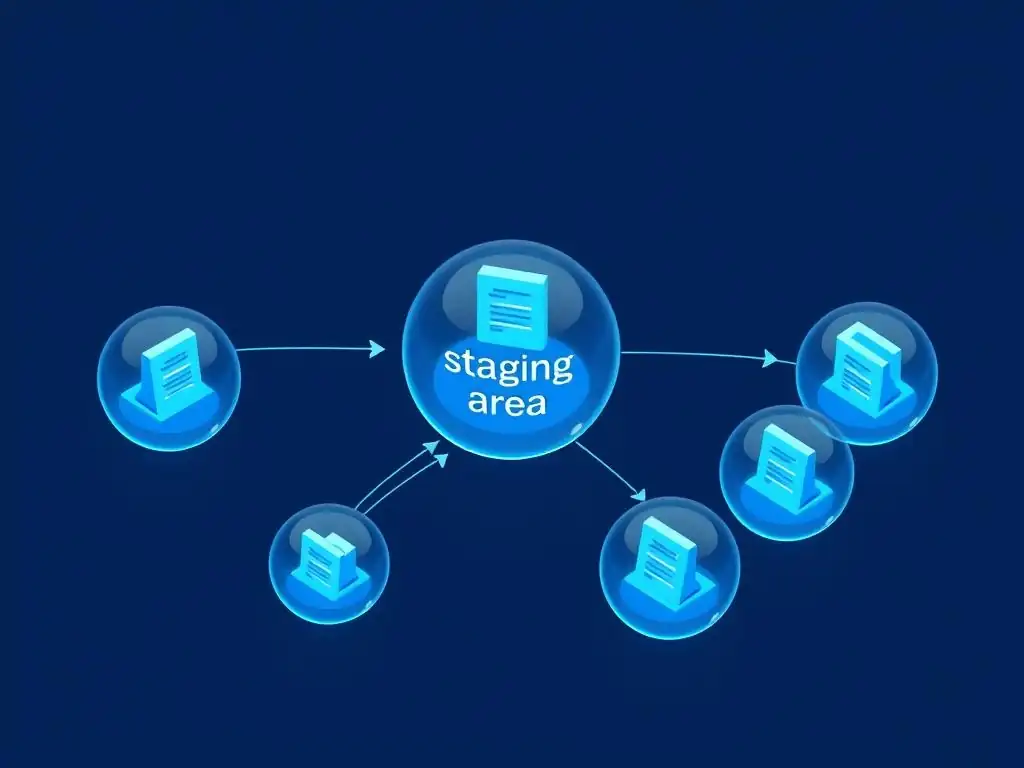
The staging area acts as a buffer zone, residing between the working directory and the local repository. It’s where developers prepare a snapshot of changes they intend to commit. Think of it as a draft space where you assemble the changes you want to include in your next commit. Once changes are staged, they are recorded in the staging area, ready to be committed.
Finally, the local repository is where Git stores the project's history as a series of commits. Each commit represents a saved snapshot of the staged changes at a particular point in time. This structured workflow – working directory to staging area to local repository – allows for a controlled and deliberate process of version control, ensuring that only intended changes are permanently recorded in the project's history.
Understanding the Git Staging Area
Defining the Staging Area: A Preparatory Step for Commits
The Git staging area, in essence, is a file that resides within your Git repository (specifically in the .git/index file). It's not a directory you can directly navigate to in your file system, but rather a conceptual space that Git uses to manage changes that are ready to be included in the next commit. The staging area acts as a dynamic index, representing a proposed next commit. It's a crucial intermediary because it allows developers to review and refine changes before making them a permanent part of the project history.
Consider the staging area as a preparation zone before you officially save your work. Imagine writing a document; you might make several edits and revisions. Before finalizing and saving the document, you'd likely review all the changes to ensure they are exactly as intended. The Git staging area serves a similar purpose for code changes.
It allows developers to selectively choose which modifications from their working directory they want to include in their next commit. This preparatory step is vital for creating clean, focused commits that represent logical units of work, making the project history more understandable and maintainable. The Git staging area explained simply is the area where you prepare your next commit.
The Role of the Index: Tracking Changes for Future Commits
The staging area is technically implemented as an "index," which is a binary file that lists all files in the current branch, along with metadata like timestamps and file modes. More importantly, the index tracks two key pieces of information for each file: the version in the last commit (HEAD) and the version in the staging area. This dual tracking mechanism is what enables Git to efficiently determine which files have been modified and whether those modifications have been staged.
When you make changes in your working directory, Git compares these changes against the version of the files in the staging area. If you then use git add, Git updates the staging area with the current version of the selected files from your working directory. This update to the index signals to Git that these changes are intended for the next commit. Therefore, the index, or staging area, is not just a passive list of files; it's an active component of Git that continuously tracks the differences between your working directory, the staging area itself, and the last commit. This detailed tracking system is fundamental to Git's ability to manage versions and facilitate collaboration effectively, allowing developers to precisely control what changes are included in each commit and maintain a clear and organized project history.
Mastering Git Add: Adding Changes to the Staging Area
Selectively Staging Modifications with git add
The git add command is the primary tool for interacting with the Git staging area. It's used to add changes from your working directory to the staging area, preparing them for the next commit. One of the key strengths of git add is its ability to selectively stage modifications. This means you don't have to stage all changes at once; you can choose to stage specific files or even parts of files, giving you fine-grained control over your commits.
For instance, imagine you've been working on a feature and have modified several files, but also made some experimental changes in another file that you're not ready to commit yet. With git add, you can selectively stage only the files related to the feature you're completing, leaving the experimental changes unstaged. To stage a specific file, you simply use the command git add <filename>. You can stage multiple files at once by listing them after the command, separated by spaces, like git add file1.txt file2.py. This selective staging is crucial for creating commits that are focused on specific, logical changes, making the commit history cleaner and easier to understand. This selective approach to staging using git add is fundamental to the power and flexibility of Git.
Staging New Files: Integrating Untracked Content
When you create a new file in your working directory, Git initially doesn't track it. This means Git is unaware of the new file, and it won't be included in commits unless you explicitly tell Git to track it. To stage a new file, you also use the git add command. When you run git add <new_filename> on a file that Git is not currently tracking, Git will add it to the staging area and begin tracking its changes.
This action essentially tells Git, "Hey, I want to start managing this new file under version control." After staging a new file with git add, it will be included in your next commit. Until you stage a new file, it remains in an "untracked" state, meaning Git will ignore it for version control purposes. Staging new files is a fundamental step in incorporating new content into your Git repository and ensuring that it becomes part of the project's version history, allowing you to track its evolution and collaborate on it with others.
Staging Modified Files: Capturing Updates to Existing Code
The most common use case for git add is to stage changes made to existing files that are already under Git's version control. When you modify a file that Git is tracking, Git detects these changes in your working directory. However, these modifications are not automatically staged. To prepare these changes for a commit, you must explicitly stage them using git add <modified_filename>.
This command takes the current version of the modified file from your working directory and places it in the staging area. By staging modified files, you are essentially telling Git, "These are the updates I want to include in my next snapshot of the project." You can stage multiple modified files at once using git add followed by a list of filenames. Staging modified files is an essential step in the Git workflow, as it allows you to capture and version control the ongoing evolution of your codebase, ensuring that all important changes are tracked and can be reverted to if needed.
Staging Deleted Files: Removing Files from Version Control
Git also allows you to track file deletions. If you delete a file in your working directory that is under Git's version control, Git recognizes this deletion as a change. To stage a file deletion, you use the same git add command, but this time you specify the deleted file's name. Running git add <deleted_filename> stages the deletion, indicating to Git that you intend to remove this file from version control in your next commit.
It might seem counterintuitive to "add" a deletion, but in Git's terminology, git add means "stage the current version of the file," and in the case of a deleted file, the "current version" is the deletion itself. Once a file deletion is staged, it will be recorded as a removal in your next commit. If you accidentally delete a file and stage the deletion, you can undo this by unstaging the deletion before committing (using git reset HEAD <deleted_filename>), effectively restoring the file to the staging area and allowing you to recover it from your working directory if needed. Staging deleted files ensures that file removals are also tracked and version controlled, maintaining consistency and accuracy in your project's history.
Comprehensive Staging with git add . and git add -A
For situations where you want to stage all changes in your working directory quickly, Git provides convenient shortcuts: git add . and git add -A. git add . (git add dot) stages all changes in the current directory and its subdirectories, including modifications to existing files and new files. However, it does not stage deleted files. It's important to note that git add . only considers changes within the current directory and its descendants.
git add -A (git add all), on the other hand, is even more comprehensive. It stages all changes in the entire working directory, regardless of the current directory. This includes new files, modified files, and deleted files. git add -A is often the most straightforward way to stage all your changes before a commit, especially when you've made modifications across different parts of your project. However, it's crucial to use these commands with caution, particularly in large projects, to avoid accidentally staging unintended changes. Always double-check the output of git status after using git add . or git add -A to ensure you are staging exactly what you intend to commit.
Fine-Grained Control: Staging Parts of a File with git add -p
Interactively Staging Changes in Patch Mode
While git add is powerful for staging entire files, Git also offers even finer control through git add -p (or git add --patch). This command opens Git's patch mode, allowing you to interactively review changes within a file and choose to stage specific parts, or "hunks," of those changes. Patch mode is invaluable when you've made multiple unrelated changes within a single file and want to commit them separately in distinct, focused commits.
When you run git add -p <filename>, Git displays the changes in the specified file, broken down into hunks. Each hunk represents a contiguous block of added or removed lines. For each hunk, Git prompts you with a series of options, allowing you to decide whether to stage this particular hunk, skip it, edit it, or get further help. This interactive process provides an unprecedented level of control over the staging process, enabling you to create highly granular and meaningful commits.
Reviewing and Selecting Code Hunks for Staging
In patch mode, Git presents each hunk of changes with a prompt asking you what to do. The most common options are: y (yes, stage this hunk), n (no, do not stage this hunk), s (split the hunk further), e (edit the hunk manually), and q (quit and exit patch mode). By reviewing each hunk individually, you can selectively stage only the changes that are relevant to your current commit.
For example, if you've been refactoring code and fixing a bug in the same file, patch mode allows you to stage the bug fix in one commit and the refactoring changes in another. If a hunk contains both changes you want to stage and changes you don't, you can use the s option to split the hunk into smaller hunks, allowing for even more precise selection. The e option is particularly powerful as it lets you manually edit the hunk before staging, giving you ultimate control over the content of the staging area. This granular review and selection of code hunks ensures that commits are highly focused and represent logical units of change.
Customizing the Staging Process for Precise Commits
git add -p and its interactive hunk selection capabilities empower developers to create exceptionally precise commits. This level of control is particularly beneficial in complex projects or when working on features that involve changes across multiple aspects of the codebase. By carefully reviewing and selecting hunks, you can ensure that each commit is atomic, meaning it represents a single, well-defined change. Atomic commits are easier to understand, review, and revert if necessary, contributing to a cleaner and more maintainable project history.
Furthermore, git add -p can be used to stage different parts of the same file for different commits. This allows you to break down large changes into smaller, more manageable units, improving the clarity and organization of your commit history. For instance, you might use patch mode to stage bug fixes separately from feature enhancements within the same file, or to stage code formatting changes separately from functional modifications. This granular staging process, facilitated by git add -p, is a hallmark of effective Git usage and a key to maintaining a clean and understandable project history.
Checking Staging Area Status with git status
Interpreting git status Output: Understanding the Staging Area's State
The git status command is your go-to tool for understanding the current state of your working directory, staging area, and local repository. It provides a concise overview of which files have been modified, staged, or are untracked, giving you essential insights into the state of your Git repository at any given moment. Understanding how to interpret the output of git status is crucial for effectively managing your changes with Git.
When you run git status, Git compares your working directory and staging area against the last commit (HEAD). It then presents information categorized into different sections, indicating the status of files. Files in the "Changes to be committed" section are those that are currently in the staging area and will be included in your next commit. Files in the "Changes not staged for commit" section are files that have been modified in your working directory but have not yet been added to the staging area. "Untracked files" are files in your working directory that Git is not currently tracking and are not in the staging area. By carefully reading and understanding the output of git status, you can gain a clear picture of what changes are staged, unstaged, and untracked, allowing you to make informed decisions about your next steps in the Git workflow.
Identifying Staged vs. Unstaged Changes
One of the primary uses of git status is to distinguish between staged and unstaged changes. As mentioned earlier, the output of git status clearly separates changes into "Changes to be committed" (staged) and "Changes not staged for commit" (unstaged) sections. This distinction is vital for ensuring that you commit only the intended changes. Files listed under "Changes to be committed" are ready to be included in the next commit, while files under "Changes not staged for commit" are modifications in your working directory that are not yet prepared for a commit.
By running git status before committing, you can quickly verify that you have staged all the necessary changes and haven't accidentally staged any unintended modifications. If you find unstaged changes that you want to include in your commit, you can then use git add to stage them. Conversely, if you see staged changes that you don't want to commit, you can use git reset to unstage them. The clear separation of staged and unstaged changes in git status output provides a crucial visual confirmation of the state of your staging area, enabling you to maintain control over your commits.
Monitoring Changes Before Committing
git status is an indispensable tool for monitoring your changes throughout your development process, particularly just before making a commit. It serves as a final checkpoint to review all staged changes before they become a permanent part of your project history. By running git status before every commit, you can ensure that you are committing exactly what you intend to commit and avoid accidentally including unintended changes.
This practice is especially important in collaborative projects where mistakes can have broader implications. Reviewing the git status output allows you to catch errors, ensure that all relevant changes are staged, and confirm that your commit message accurately reflects the staged changes. Using git status as a regular part of your workflow, especially before committing, is a best practice that significantly reduces the risk of errors and contributes to a cleaner, more reliable project history. It's a simple yet powerful command that provides crucial visibility into the state of your staging area and working directory.
Removing Changes from the Staging Area: Using git reset
Unstaging Specific Files with git reset HEAD <file>
Sometimes, you might accidentally stage a file or realize that you've staged changes you don't want to include in your next commit. Git provides the git reset command to remove files from the staging area, effectively "unstaging" them. To unstage a specific file, you use the command git reset HEAD <filename>. The HEAD here refers to the last commit, indicating that you want to reset the staging area to match the state of the last commit for the specified file.
Running git reset HEAD <filename> removes the file from the staging area but does not discard the changes you made in your working directory. The file remains modified in your working directory, but it is no longer staged and will not be included in the next commit unless you stage it again. This command is incredibly useful for correcting accidental staging or for selectively removing changes from the staging area when you decide to postpone committing certain modifications. It gives you the flexibility to refine your staged changes before finalizing a commit.
Undoing Accidental Staging: Reverting to the Working Directory
While git reset HEAD <filename> unstages a file, it leaves the changes in your working directory intact. However, if you want to completely undo the changes in your working directory to match the staged version (or the last commit if the file was not staged), you can use git checkout -- <filename>. This command overwrites the file in your working directory with the version from the staging area (or the last commit if not staged).
It's crucial to use git checkout -- <filename> with caution, as it permanently discards any changes you've made in your working directory for the specified file. Unlike git reset, which only affects the staging area, git checkout -- <filename> modifies your working directory. Therefore, it's essential to be sure you want to discard your working directory changes before using this command. However, in cases of accidental edits or when you want to revert a file in your working directory to its staged state, git checkout -- <filename> can be a useful tool.
Differentiating git reset and git checkout in Relation to the Staging Area
It's important to understand the distinct roles of git reset and git checkout in relation to the staging area. git reset HEAD <filename> unstages a file. It modifies the staging area to remove the specified file, but it does not change your working directory. The changes you made in your working directory remain, but they are no longer staged. In essence, git reset operates on the staging area.
git checkout -- <filename>, on the other hand, modifies your working directory. It overwrites the file in your working directory with the version from the staging area (or the last commit if not staged). While it can indirectly affect the staging area if the file was staged and you revert it to the committed version, its primary action is on the working directory. Therefore, git reset is used for unstaging changes, while git checkout -- is used for discarding changes in your working directory. Understanding this distinction is crucial for effectively managing changes and manipulating the staging area and working directory in Git.
Ignoring Files: Preventing Unwanted Files from Being Staged
Creating and Configuring a .gitignore File
In any Git repository, there are often files and directories that you don't want to track under version control. These might include temporary files, build artifacts, log files, or sensitive information. Git provides a mechanism to ignore these files using a .gitignore file. This file, placed in the root of your repository or in any subdirectory, specifies patterns that Git uses to determine which files and directories to ignore.
To create a .gitignore file, simply create a text file named .gitignore in your repository. Inside this file, you list patterns, one per line, that describe the files or directories you want Git to ignore. These patterns can be specific filenames, directory names, or use wildcards to match multiple files or directories. For example, *.log will ignore all files ending in .log, temp/ will ignore the temp directory and its contents, and config.ini will ignore a specific file named config.ini. Git will automatically read and apply the rules defined in .gitignore to determine which files to ignore during staging and other operations.
Excluding Files and Directories from Version Control
The .gitignore file is powerful because it allows you to systematically exclude files and directories from version control. Once you add patterns to your .gitignore file, Git will no longer track files and directories that match those patterns. This means that these ignored files will not be shown in git status as untracked, and you won't accidentally stage them using commands like git add . or git add -A.
Ignoring files is essential for keeping your repository clean and focused on relevant source code and project assets. It prevents unnecessary files from cluttering your commit history and ensures that sensitive or temporary files are not accidentally committed to the repository. Furthermore, .gitignore files are themselves version controlled, meaning that the ignore rules are shared among all collaborators on the project, ensuring consistent ignoring behavior across the team.
Managing Ignored Files Effectively
To manage ignored files effectively, it's important to carefully consider which files and directories should be included in your .gitignore file. Generally, you should ignore files that are automatically generated, specific to your local development environment, or contain sensitive information. Common examples include build output directories (like bin/ or build/), dependency installation directories (like node_modules/ or venv/), temporary files, log files, and configuration files that might contain passwords or API keys.
It's also important to place the .gitignore file in the correct location. A .gitignore file in the root of your repository applies to the entire repository. You can also create .gitignore files in subdirectories, and these rules will apply only to that subdirectory and its descendants. When troubleshooting ignoring issues, the command git check-ignore -v <filename> is helpful. It tells you if a file is being ignored and which rule in which .gitignore file is causing it to be ignored. Effective management of .gitignore files is crucial for maintaining a clean and efficient Git repository and ensuring that only relevant files are tracked under version control.
Advanced Git Staging Techniques
Staging Changes from Cherry-Picked Commits
Cherry-picking in Git allows you to selectively apply changes from one commit to your current branch. When you cherry-pick a commit, Git attempts to apply the changes introduced by that commit to your working directory and staging area. After a successful cherry-pick, the changes are staged, ready for you to create a new commit that incorporates those changes.
This staging behavior is important because it allows you to review and potentially modify the cherry-picked changes before committing them to your branch. For instance, you might need to resolve conflicts that arise during the cherry-pick process, or you might want to make minor adjustments to the cherry-picked changes to better integrate them into your current branch. The staging area provides this buffer, allowing you to fine-tune the cherry-picked changes before making them a permanent part of your branch's history. The staged changes from a cherry-pick are then committed using the standard git commit command.
Resolving Merge Conflicts Effectively Using the Staging Area
Merge conflicts occur when Git cannot automatically integrate changes from different branches. When a merge conflict arises, Git marks the conflicting files in your working directory and staging area, indicating the areas where manual resolution is required. The staging area plays a crucial role in resolving merge conflicts. After you manually edit the conflicting files to resolve the conflicts, you must then stage the resolved files using git add <resolved_filename>.
Staging a resolved file tells Git that you have addressed the conflicts in that file and that it is now ready to be included in the merge commit. Git uses the staging area to track which files have been resolved and are ready for the merge to be finalized. Once all conflicting files are resolved and staged, you can complete the merge commit using git commit. The staging area, therefore, is not only a preparatory area for regular commits but also an essential component in the merge conflict resolution process, serving as a marker for resolved files and facilitating the completion of the merge operation.
Optimizing Workflow Through Efficient Staging
Efficient staging practices are key to optimizing your Git workflow. By mastering the techniques discussed, such as selective staging with git add, patch mode staging with git add -p, and using .gitignore effectively, you can streamline your development process and create a cleaner, more manageable project history. Efficient staging allows you to create focused commits that are easier to understand, review, and revert. It also reduces the risk of accidentally committing unintended changes or sensitive information.
Furthermore, efficient staging contributes to better collaboration within teams. By creating well-defined commits, developers can more easily understand each other's changes and track the evolution of the project. Practicing efficient staging techniques, such as frequently staging small, logical units of work, and reviewing the staging area with git status before each commit, leads to a more organized and productive development workflow, ultimately enhancing code quality and team collaboration.
Git Staging Area Best Practices for Team Collaboration
Communicating Staging Strategies within a Team
In a team environment, it's crucial to establish and communicate clear staging strategies to ensure consistent and effective collaboration. Teams should agree on conventions for commit granularity, staging practices, and the use of .gitignore. For example, teams might agree to strive for atomic commits, staging changes frequently and reviewing git status before each commit.
Communicating these strategies helps to prevent misunderstandings and ensures that all team members are on the same page regarding Git workflow. This can be achieved through team meetings, documentation, or coding style guides. Clear communication about staging practices fosters a shared understanding of how Git should be used within the team, leading to smoother collaboration and a more consistent project history. Open discussions and agreed-upon guidelines for staging are essential for successful team-based software development using Git.
Avoiding Staging Mistakes in Collaborative Projects
In collaborative projects, staging mistakes can have a more significant impact as they can affect other team members. Accidentally staging and committing incorrect or incomplete changes can lead to integration issues and require additional effort to correct. To avoid staging mistakes, team members should be diligent in reviewing the staging area using git status before each commit. They should also be cautious when using commands like git add . or git add -A, especially in large projects, and prefer selective staging when possible.
Furthermore, utilizing patch mode staging with git add -p for more complex changes can help prevent accidental staging of unintended modifications. Code reviews also play a crucial role in catching staging mistakes. By having team members review each other's commits, including the staged changes, before they are pushed to shared branches, teams can minimize the risk of staging-related errors and maintain a high level of code quality and repository integrity.
Leveraging the Staging Area for Code Reviews
The Git staging area can be effectively leveraged to enhance the code review process. When submitting code for review, developers should ensure that their commits are focused and logically organized, reflecting well-staged changes. By reviewing the staged changes in a commit, reviewers can gain a clear understanding of the modifications being proposed. Tools that display diffs against the staging area can be particularly helpful for code reviews, allowing reviewers to see exactly what changes are included in a commit.
Well-staged commits make code reviews more efficient and effective. Reviewers can focus on the specific changes introduced in each commit, rather than having to sift through a large, disorganized set of modifications. By emphasizing the importance of the staging area in code review workflows, teams can improve the quality of code reviews, catch potential issues earlier, and foster a culture of code quality and collaboration. The staging area, therefore, becomes an integral part of the code review process, facilitating clearer communication and more effective feedback.
Conclusion: The Git Staging Area – Key to Effective Version Control
Recap of the Importance of the Git Staging Area
The Git staging area is far more than just a technical detail; it is a fundamental concept that underpins effective version control and streamlined software development. As we have explored, the staging area provides a crucial intermediary space between the working directory and the local repository, enabling developers to meticulously prepare and curate their changes before committing them. This deliberate staging process allows for granular control over commits, resulting in cleaner, more focused, and understandable project histories.
Mastering the Git staging area, including commands like git add, git reset, git status, and advanced techniques like patch mode staging, empowers developers to create atomic commits, manage complex changes, and collaborate more effectively within teams. Understanding the Git staging area explained is therefore not just about learning Git commands, but about embracing a workflow that promotes code quality, reduces errors, and facilitates efficient version control practices.
Further Resources for Mastering Git Staging
To further deepen your understanding and mastery of the Git staging area, numerous resources are available. The official Git documentation provides comprehensive information on all Git commands and concepts, including detailed explanations of the staging area and its role in the Git workflow. Online tutorials and interactive Git learning platforms offer practical exercises and real-world examples to solidify your understanding.
Exploring blog posts and articles from experienced Git users can also provide valuable insights and best practices for efficient staging techniques. Experimenting with Git commands in a safe, practice repository is highly recommended to gain hands-on experience and develop a strong intuition for how the staging area works. By continuously learning and practicing, developers can fully unlock the power of the Git staging area and elevate their version control skills to the next level, contributing to more robust and maintainable software projects.
Frequently Asked Questions
What exactly is the Git staging area, and what is its primary function?
The Git staging area, also known as the index, is an intermediate area between your working directory and the Git repository. Its primary function is to prepare changes for your next commit.
Why is the Git staging area considered a crucial part of the Git workflow?
The staging area allows you to selectively add changes to a commit, rather than committing everything at once. This provides more control over your commits and allows for cleaner, more focused commit messages.
How do I add files to the Git staging area using the command line?
You use the git add command. For example, git add filename.txt adds a specific file, and git add . adds all modified and new files in the current directory.
How can I see what files are currently in the Git staging area?
You can use the git status command. It will display which files are staged for commit, as well as any untracked or modified files that are not yet staged.
What's the difference between git add . and git commit -a and when would you use each?
git add . stages all modified and new files. git commit -a commits all tracked files that have been modified, bypassing the staging area. Use git add . for more granular control.
Final Reflection: Mastering the Art of Git Staging
The intricacies of the Git staging area, often overlooked in the rush to commit, are fundamental to collaborative and controlled software development. Understanding its power is not just about writing better code; it's about fostering a more thoughtful and deliberate approach to building complex systems, a skill increasingly vital in today's fast-paced tech landscape.
The impact of a well-managed staging area extends far beyond individual projects. It shapes the entire development workflow, influencing team communication, code review processes, and ultimately, the quality of the final product. My own journey with Git has been profoundly shaped by appreciating the staging area's nuances, allowing for more focused commits and clearer project histories. Good code is its own best documentation. As you're about to add a feature, ask yourself, 'How can I make this easy to understand?'
- Martin Fowler. This quote perfectly encapsulates the spirit of using the staging area to craft meaningful, self-documenting commits.
Now, consider the power you wield with this knowledge. Don't just blindly commit; meticulously stage your changes. Reflect on the story each commit tells, and craft a narrative that future developers, including your future self, will appreciate. Embrace the staging area as a tool for clarity, collaboration, and ultimately, for building software that stands the test of time.
Unveil Your Git Mastery: Take Control Now!
Thank you for exploring the depths of Git staging with us. We hope you've gained a clearer understanding of how the staging area can revolutionize your version control workflow. Now, it's time to put that knowledge into action and truly master Git.
Here are a few steps you can take to deepen your understanding and become a Git staging pro:
- Practice, practice, practice! Experiment with the staging area on a personal project or a test repository. This is the best way to solidify your understanding and build confidence.
- Share your newfound knowledge! Help others understand the power of the staging area by explaining it to a colleague or writing a short blog post about your experience.
- Delve into advanced staging techniques. Explore the power of
git add -p(patch mode) to stage specific parts of a file and fine-tune your commits.
What creative ways have you used the Git staging area to manage complex changes in your projects? Share your tips and tricks in the comments below!