
Connecting to a Remote Git Repository: Your First Steps to Collaboration

Welcome to Git and Version Control Hub!
Ready to unlock the power of collaborative coding? This site is your comprehensive guide to mastering Git. Dive into our latest article, " Connecting to a Remote Git Repository: Your First Steps to Collaboration," and discover how to seamlessly share and manage your projects. Learn the essential techniques to establish that crucial connection and kickstart your journey into efficient teamwork. Intrigued? Keep reading to unlock the secrets of remote repositories and transform your workflow!
Collaborating with Remote Git: Connecting to GitHub
- Introduction: Why Use Remote Git Collaboration?
- Prerequisites: Setting Up for GitHub Access
- Step-by-Step Guide: Connecting to a GitHub Repository
- Working with GitHub Repositories: Core Operations
- Managing Remote Connections: Practical Tips
- Troubleshooting Common GitHub Connection Issues
- Best Practices for GitHub Collaboration
- Conclusion: Mastering Remote Git for Effective Collaboration
-
Frequently Asked Questions
- How do I initialize a local Git repository before connecting to a remote one?
- What's the difference between git clone and git remote add?
- How do I specify the URL of the remote Git repository?
- After connecting to a remote repository, how do I retrieve the latest changes?
- How do I push my local changes to the remote Git repository?
- Final Reflection: Embracing Collaborative Code
- Unlock Your Collaborative Power!
Introduction: Why Use Remote Git Collaboration?
Git, as a version control system, shines brightest when used for collaboration. While local repositories are excellent for personal projects and tracking individual progress, the true power of Git unfolds when you connect to remote Git repositories. Platforms like GitHub, GitLab, and Bitbucket provide the infrastructure for hosting these remote repositories, enabling teams distributed across the globe to work together seamlessly on the same codebase.
Imagine a scenario where developers in different time zones are contributing features, fixing bugs, and reviewing each other's code, all within a unified and version-controlled environment. This is the reality that connecting to a remote Git repository facilitates.
Understanding Remote Repositories with GitHub
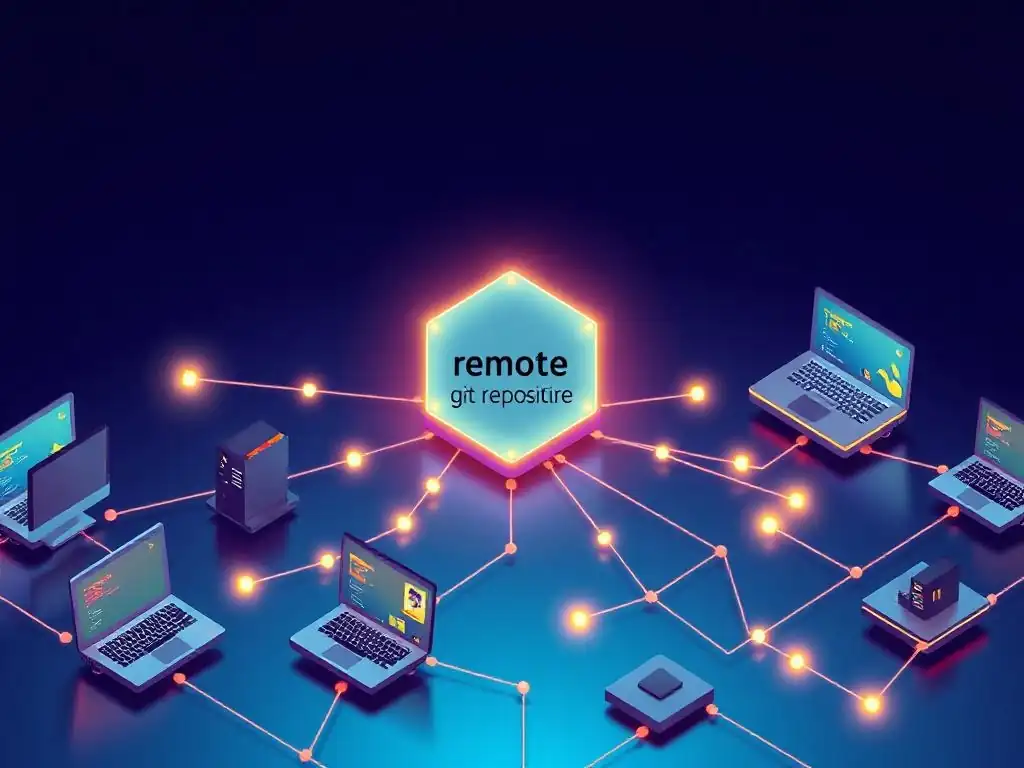
A remote repository, in essence, is a Git repository hosted on a server, accessible over a network, typically the internet. GitHub, the focus of this guide, is a leading platform that provides hosting for Git repositories. Think of GitHub as a central hub where your project's code lives online.
It's not just about storage; GitHub enhances collaboration by offering tools for issue tracking, pull requests, and project management, all tightly integrated with your Git repository. When you connect to a remote Git repository on GitHub, you are essentially establishing a link between your local development environment and this central, shared codebase. This connection allows you to share your work, receive updates from others, and participate in a collaborative development workflow.
Benefits of Collaborative Version Control
The advantages of using remote Git repositories for collaborative version control are numerous and transformative for software development teams. Firstly, it enables teamwork on a scale impossible with local-only Git. Multiple developers can work concurrently on different aspects of a project, pushing their changes to the remote repository and pulling updates from their colleagues.
This parallel development significantly accelerates project timelines. Secondly, remote repositories act as a centralized backup of your codebase. In case of local machine failures or data loss, the remote repository on GitHub remains intact, ensuring the project's continuity.
Furthermore, collaborative version control fosters transparency and accountability. Every change is tracked, attributed to a specific author, and easily reviewable, promoting better code quality and reducing the risk of errors. Finally, platforms like GitHub enhance collaboration beyond just code sharing, offering features like issue tracking to manage bugs and feature requests, and pull requests for code review workflows, streamlining the entire development lifecycle.
Prerequisites: Setting Up for GitHub Access
Before you can successfully connect to a remote Git repository on GitHub and start collaborating, you need to ensure your local environment is properly set up. This involves installing Git on your machine, creating a GitHub account, and configuring SSH keys for secure and seamless authentication. These steps are foundational and only need to be performed once to prepare your system for interacting with remote Git repositories.
Installing Git
The first step is to install Git on your local machine. Git is the command-line tool that you will use to interact with both local and remote repositories. Installation instructions vary slightly depending on your operating system. For macOS, you can easily install Git using Homebrew with the command brew install git. On Windows, you can download the Git for Windows installer from the official Git website ( https://git-scm.com/download/win ). Linux distributions typically offer Git through their package managers, for example, on Debian or Ubuntu, you can use sudo apt-get install git. Once installed, you can verify the installation by opening your terminal or command prompt and typing git --version. This command should display the installed Git version, confirming that Git is correctly installed and accessible from your command line.
Creating a GitHub Account
To interact with GitHub and connect to remote Git repositories hosted there, you need a GitHub account. Navigate to the GitHub website ( https://github.com ) and click on the "Sign up" button. You will be prompted to choose a username, provide your email address, and create a strong password. Follow the on-screen instructions to complete the account creation process. GitHub offers both free and paid plans. For most individuals and small teams starting with collaborative Git, the free plan provides ample resources and features, including unlimited public repositories and private repositories with limited collaborators. Having a GitHub account is essential as it serves as your identity on the platform, allowing you to create repositories, contribute to projects, and collaborate with other developers.
Configuring SSH Keys for Secure Connection
For secure and password-less authentication when you connect to remote Git repositories, configuring SSH keys is highly recommended. SSH keys provide a more secure alternative to using HTTPS URLs with username and password every time you interact with GitHub. To generate SSH keys, open your terminal and use the command ssh-keygen -t rsa -b 4096 -C "your_email@example.com", replacing "your_email@example.com" with the email address associated with your GitHub account. This command will generate a pair of keys: a private key and a public key. You will be prompted to choose a file location to save the keys (the default location is usually fine) and optionally set a passphrase for added security. Once generated, you need to add the public key to your GitHub account. Copy the contents of the public key file (usually named id_rsa.pub and located in the .ssh directory in your user home directory). Then, go to your GitHub account settings, navigate to "SSH and GPG keys," and click "New SSH key." Paste your public key into the "Key" field, give it a descriptive title, and click "Add SSH key." Now, you can use SSH URLs to connect to remote Git repositories on GitHub, enabling secure and authenticated communication without repeatedly entering your credentials.
Step-by-Step Guide: Connecting to a GitHub Repository
Now that you have the prerequisites in place, let's walk through the step-by-step process of connecting to a remote Git repository on GitHub. We will cover two primary scenarios: creating a new repository on GitHub and cloning it to your local machine, and adding an existing local repository to GitHub. Understanding both scenarios is crucial for effectively initiating and managing collaborative Git projects.
1. Creating a New Repository on GitHub
If you are starting a new project and want to host it on GitHub for collaboration, the first step is to create a new repository directly on the GitHub platform. Log in to your GitHub account and click the "+" icon in the top right corner, then select "New repository." On the "Create a new repository" page, you will need to provide a repository name, which should be descriptive and relevant to your project. You can also add a brief description to explain the purpose of the repository. Choose whether you want the repository to be public (visible to everyone) or private (accessible only to collaborators you invite). For collaborative projects, private repositories are often preferred. You have the option to initialize the repository with a README file, which is a good practice to provide an overview of your project. You can also choose to add a .gitignore file to specify intentionally untracked files that Git should ignore, and select a license for your project. After filling in the necessary details, click the "Create repository" button. GitHub will then create your new remote repository, providing you with the repository URL, which you will use to connect to this remote Git repository from your local machine.
2. Cloning a GitHub Repository
Cloning a repository means creating a local copy of a remote repository on your computer. This is the most common way to connect to a remote Git repository when you want to contribute to an existing project hosted on GitHub or simply work on a project locally.
Using the git clone Command
The git clone command is the fundamental command for downloading a remote repository to your local machine. Open your terminal or command prompt, navigate to the directory where you want to store your local project copy, and use the command git clone <repository_url>. Replace <repository_url> with the URL of the GitHub repository you want to clone. You can find this URL on the GitHub repository page, usually under a green "Code" button. Clicking this button will reveal both HTTPS and SSH URLs. For example, if the repository URL is https://github.com/username/repository-name.git, the command would be git clone https://github.com/username/repository-name.git. After executing this command, Git will download all the files and the entire commit history of the remote repository into a new directory named repository-name in your current working directory. You are now connected to the remote Git repository and have a fully functional local copy to work with.
Understanding the Clone URL (HTTPS vs. SSH)
When cloning a repository, you will typically be presented with two types of URLs: HTTPS and SSH. Both URLs allow you to connect to the remote Git repository, but they use different authentication methods. HTTPS URLs are simpler to use initially as they generally work without any additional setup, but for every push or pull operation, you might be prompted to enter your GitHub username and password (or a personal access token).
SSH URLs, on the other hand, require SSH key configuration, as described in the prerequisites section. Once SSH keys are set up, SSH URLs provide password-less authentication, making interactions with the remote repository more seamless and secure. For collaborative workflows, especially when you frequently push changes, using SSH URLs is generally recommended due to the enhanced security and convenience of not having to repeatedly enter credentials.
Verifying the Clone: Checking Out the Initial Branch
After successfully cloning a repository, it's good practice to verify that the clone was successful and understand your current working state. Navigate into the newly created repository directory using cd repository-name. Then, use the command git branch to list the branches in your local repository. You should see at least one branch, usually named main or master, marked with an asterisk (*) indicating the currently active branch. This confirms that you have successfully cloned the repository and are currently working on the initial branch. You can also use git remote -v to verify that the remote repository, named origin by default, is correctly set up and pointing to the GitHub repository URL you cloned from. These checks ensure that you are indeed connected to the remote Git repository and ready to start working on the project.
3. Adding an Existing Local Repository to GitHub
Sometimes, you might have already started a project locally using Git and then decide to share it on GitHub for collaboration or backup. In this scenario, you need to add your existing local repository to GitHub. This process involves initializing a Git repository in your local project directory (if you haven't already), creating a new repository on GitHub (as described earlier), and then linking your local repository to the newly created remote repository on GitHub.
Initializing a Local Git Repository ( git init)
If you haven't already initialized your local project as a Git repository, navigate to your project's root directory in your terminal or command prompt and run the command git init. This command creates a new .git subdirectory in your project directory, which contains all the necessary Git repository metadata. Initializing a Git repository is the first step in tracking changes in your project and eventually connecting to a remote Git repository. After running git init, you can start adding files to your repository using git add <filename> or git add . to add all files, and then commit your initial changes using git commit -m "Initial commit".
Adding a Remote Origin ( git remote add origin)
Once your local repository is initialized and has some commits, you need to connect it to the remote Git repository you created on GitHub. This is done using the git remote add origin <repository_url> command. origin is a conventional name for the remote repository you will be primarily interacting with. Replace <repository_url> with the URL of your repository on GitHub. For example, if your GitHub repository URL is https://github.com/username/repository-name.git, the command would be git remote add origin https://github.com/username/repository-name.git. This command establishes a connection between your local repository and the remote repository on GitHub, associating the remote repository URL with the name origin.
Setting the GitHub Repository URL
While git remote add origin is the standard command, you might sometimes need to explicitly set or change the URL of the remote repository. You can use the command git remote set-url origin <new_repository_url> to update the URL associated with the origin remote. This can be useful if you initially used an incorrect URL or if the remote repository URL has changed. Ensuring the correct GitHub repository URL is set is crucial for successfully connecting to the remote Git repository and performing operations like pushing and pulling changes.
Pushing Your Local Repository to GitHub ( git push -u origin main)
After adding the remote origin, the final step to connect to the remote Git repository and upload your local repository to GitHub is to push your local commits to the remote repository. Use the command git push -u origin main. This command pushes the commits from your currently active local branch (usually main or master) to the origin remote, specifically to the main branch on the remote repository. The -u flag, which stands for --set-upstream, is used to set up a tracking connection between your local main branch and the remote origin/main branch. This means that in future, you can simply use git push and git pull without specifying the remote and branch names, as Git will remember the upstream tracking branch.
Understanding git push -u
The -u flag in git push -u origin main is a one-time setup command that establishes a tracking relationship between your local branch and the remote branch. When you use git push -u origin main for the first time, Git not only pushes your local main branch to the remote origin repository's main branch but also sets up "upstream tracking". This tracking means that your local main branch is now configured to track the remote origin/main branch. After this initial push with -u, subsequent git push commands from your local main branch will automatically push to the tracked remote branch ( origin/main) without needing to specify origin main again. Similarly, git pull will automatically pull from the tracked remote branch. This simplifies future push and pull operations, making your workflow more efficient once you have connected to the remote Git repository and set up upstream tracking.
Working with GitHub Repositories: Core Operations
Once you are successfully connected to a remote Git repository on GitHub, understanding the core operations for collaborating with it is essential. These operations primarily involve fetching changes from the remote repository, pulling changes to integrate them into your local repository, and pushing your local changes back to the remote repository. Mastering these operations forms the foundation of collaborative Git workflows.
Fetching Changes from GitHub ( git fetch)
The git fetch command is used to retrieve changes from a remote repository without automatically merging them into your local working branch. When you run git fetch origin, Git will download all the commits, branches, and tags from the origin remote that you don't already have locally. These fetched changes are stored as remote branches in your local repository, typically accessible as origin/main, origin/develop, etc. Fetching allows you to see what changes have been made in the remote repository by your collaborators without immediately impacting your local working branch. This is useful for reviewing remote changes before deciding to merge them into your local codebase. After fetching, you can inspect the fetched remote branches using git branch -r and compare them to your local branches before merging.
Understanding git fetch vs. git pull
It's crucial to distinguish between git fetch and git pull, as they are both used to update your local repository with changes from a remote repository, but they do so in different ways. git fetch only downloads the changes from the remote repository to your local repository as remote branches. It does not automatically merge these changes into your local working branch. In contrast, git pull is essentially a combination of git fetch followed by git merge. When you run git pull origin main, Git fetches the changes from the origin remote's main branch and then automatically merges them into your current local branch. Therefore, git fetch is a safer option when you want to review remote changes before integrating them, while git pull is a more convenient option when you want to quickly update your local branch with the latest remote changes, assuming you are ready to merge them immediately.
Pulling Changes from GitHub ( git pull)
The git pull command is used to both fetch and merge changes from a remote repository into your current local branch. When you run git pull origin main, Git will first fetch the latest commits from the origin remote's main branch, and then it will attempt to automatically merge these fetched commits into your currently active local branch. git pull is a convenient command for keeping your local branch synchronized with the remote branch, especially when you are actively collaborating and want to incorporate changes made by your team members. However, it's important to be aware that git pull automatically merges changes, which can sometimes lead to merge conflicts if there are conflicting changes between your local branch and the remote branch.
Resolving Conflicts During a Pull
Merge conflicts can occur when git pull attempts to automatically merge remote changes into your local branch, and Git detects conflicting modifications in the same lines of code in both the remote and local versions. When a merge conflict occurs, Git will pause the merge process and indicate the conflicting files. You will need to manually resolve these conflicts by editing the conflicting files. Git will insert conflict markers ( <<<<<<<, =======, >>>>>>>) in the files to highlight the conflicting sections from both branches. You need to manually edit the file, choose which changes to keep, or combine them, and remove the conflict markers. After resolving all conflicts in a file, use git add <resolved_file> to stage the resolved file and then continue the merge process with git commit. Successfully resolving merge conflicts is a crucial skill when working collaboratively with Git and ensures that changes from different developers are properly integrated.
Pushing Changes to GitHub ( git push)
The git push command is used to upload your local commits to a remote repository, making your changes available to your collaborators. When you run git push origin main, Git will push the commits from your current local main branch to the main branch of the origin remote repository. Before pushing, it's essential to ensure that your local branch is up-to-date with the remote branch by fetching and pulling changes first. Pushing without pulling first can lead to rejected pushes if the remote branch has diverged from your local branch. After making local commits and ensuring you are synchronized with the remote repository, git push is the command you use to share your contributions with the rest of your team on GitHub.
Understanding Permissions and Access Control
When working with remote Git repositories on GitHub, understanding permissions and access control is crucial for collaborative security. GitHub repositories can be either public or private. Public repositories are visible to everyone, and anyone can clone them. However, contributions to public repositories typically require maintainer approval through pull requests. Private repositories, on the other hand, are only accessible to collaborators who have been explicitly invited by the repository owner.
Access control is managed through roles and permissions. Repository owners have full administrative access. Collaborators can be granted different levels of access, such as read-only, write access, or admin access, depending on their role and responsibilities in the project. Understanding and properly managing permissions ensures that only authorized individuals can make changes to the remote repository, safeguarding the integrity and security of the codebase.
Managing Remote Connections: Practical Tips
Once you are comfortable with the core operations of fetching, pulling, and pushing, there are several commands for managing your remote connections in Git that can be helpful for more advanced workflows and repository management. These commands allow you to list your configured remotes, rename them, remove them, and change their URLs, providing flexibility in how you interact with remote repositories.
Listing Remote Repositories ( git remote -v)
The git remote -v command is used to list all the remote repositories that are currently configured for your local repository. The -v flag (for "verbose") shows not only the names of the remotes but also their corresponding URLs. By default, after cloning a repository, you will typically have a remote named origin configured, pointing to the URL of the repository you cloned from. Running git remote -v will display a list of remotes and their URLs, for example:
origin  https://github.com/username/repository-name.git (fetch)
origin  https://github.com/username/repository-name.git (push)
This output shows that you have a remote named origin configured for both fetching and pushing, and it points to the specified GitHub repository URL. Listing remotes is useful for verifying your remote connections and ensuring they are correctly set up.
Renaming a Remote Repository ( git remote rename)
In some situations, you might want to rename a remote repository in your local Git configuration. For example, you might want to change the name origin to something more descriptive, or you might need to rename a remote to avoid naming conflicts. The git remote rename <old_name> <new_name> command is used to rename a remote. For instance, to rename the remote origin to github, you would use the command git remote rename origin github. After renaming, you can use git remote -v to verify that the remote has been renamed successfully and that the URL remains unchanged. Renaming remotes is a less common operation but can be useful for organizing your remote configurations, especially when working with multiple remotes.
If you no longer need to interact with a particular remote repository, you can remove it from your local Git configuration using the git remote remove <remote_name> command. For example, to remove the remote named github, you would use the command git remote remove github. Removing a remote does not delete the remote repository itself on GitHub or any other hosting platform; it only removes the local configuration that points to that remote. After removing a remote, you will no longer be able to fetch from or push to that remote using its name. You can verify the removal by running git remote -v, which should no longer list the removed remote. Removing remotes can be useful for cleaning up your local configuration when you are no longer collaborating with a specific remote repository.
Changing the Remote Repository URL ( git remote set-url)
If the URL of a remote repository on GitHub changes, or if you initially configured the remote with an incorrect URL, you can update the remote repository URL in your local Git configuration using the git remote set-url <remote_name> <new_url> command. For example, to change the URL of the origin remote to a new URL, you would use the command git remote set-url origin <new_repository_url>. This command updates the URL associated with the specified remote name. After changing the URL, you can verify the change using git remote -v. Changing the remote URL is essential when the location of the remote repository changes, ensuring that your local repository remains connected to the remote Git repository at its correct address.
Troubleshooting Common GitHub Connection Issues
When connecting to remote Git repositories on GitHub, you might occasionally encounter issues that prevent you from successfully interacting with the remote repository. These issues often fall into categories such as authentication problems, connection errors, and permission problems. Understanding these common issues and how to troubleshoot them is crucial for maintaining a smooth collaborative workflow.
Authentication Problems: SSH Key Issues and HTTPS Credentials
Authentication problems are common when connecting to remote Git repositories. If you are using SSH URLs, issues often arise from incorrect SSH key configuration. Ensure that you have correctly generated SSH keys, added the public key to your GitHub account, and are using the correct SSH URL for cloning or interacting with the repository. You can test your SSH connection to GitHub using ssh -T git@github.com. If you are using HTTPS URLs, authentication problems might stem from incorrect username or password entry, or if you are using two-factor authentication, you might need to use a personal access token instead of your password. Double-check your credentials and ensure that you are using the correct authentication method for your chosen URL type (HTTPS or SSH).
Connection Refused Errors: Firewall and Network Configuration
"Connection refused" errors often indicate network-related issues preventing you from connecting to the remote Git repository. These errors can be caused by firewall restrictions, network configuration problems, or even temporary outages on the GitHub side. Check your firewall settings to ensure that Git and SSH (port 22 for SSH, port 443 for HTTPS) are allowed to communicate through the firewall.
Verify your network connection and ensure you have internet access. If you are behind a proxy, you might need to configure Git to use the proxy settings. In some cases, the issue might be temporary on GitHub's end, so waiting for a short period and trying again might resolve the problem.
Permission Denied Errors: Access Rights and Repository Settings
"Permission denied" errors typically occur when you are trying to perform an action on a remote repository for which you do not have the necessary access rights. This can happen when you are trying to push to a repository where you only have read-only access, or if you are trying to access a private repository without being granted collaborator status. Verify your access rights to the repository on GitHub.
If you are supposed to have write access, confirm with the repository owner or administrator that you have been correctly added as a collaborator with the appropriate permissions. If you are trying to push to a branch that is protected by branch protection rules, you might need to create a pull request instead of pushing directly. Understanding and respecting repository permissions is crucial for collaborative Git workflows.
Best Practices for GitHub Collaboration
To maximize the effectiveness and minimize potential issues when connecting to remote Git repositories for collaboration, it's essential to follow best practices for Git workflows. These practices include using branches for feature development, committing frequently with clear messages, regularly synchronizing your local repository with the remote, and communicating effectively with your team. Adhering to these best practices promotes a smooth, efficient, and collaborative development environment.
Using Branches for Feature Development
Branching is a core Git concept that is fundamental for effective collaboration. When working on new features or bug fixes, always create a new branch specifically for that work, instead of directly working on the main branch ( main or master). Feature branches isolate your changes and prevent them from directly impacting the stable main branch until they are reviewed and merged. Create a branch using git checkout -b feature-branch-name. After completing your work on the feature branch, merge it back into the main branch through a pull request on GitHub. Using feature branches keeps the main branch clean and stable, simplifies code reviews, and facilitates parallel development by multiple team members.
Committing Frequently and Writing Clear Commit Messages
Commit frequently and write clear, concise, and informative commit messages. Frequent commits create a detailed history of changes, making it easier to track progress, revert changes if necessary, and understand the evolution of the codebase. Each commit should represent a logical and self-contained change. Commit messages should clearly explain the purpose and nature of the changes introduced in the commit. A good commit message typically includes a short summary line followed by a more detailed explanation if needed. Well-written commit messages improve code understandability, facilitate code reviews, and enhance collaboration by providing context to changes made by different developers.
Regularly Fetching and Pulling Changes
Regularly fetch and pull changes from the remote repository to keep your local repository synchronized with the latest changes made by your team members. Use git fetch to review remote changes and git pull to integrate them into your local branch. Staying synchronized minimizes the risk of merge conflicts and ensures that you are always working with the most up-to-date codebase. Develop a habit of fetching and pulling changes at the beginning of each work session and before pushing your own changes to the remote repository. Regular synchronization is crucial for avoiding integration issues and maintaining a consistent codebase across the team.
Communicating with Your Team
Effective communication is paramount for successful GitHub collaboration. When working on collaborative projects, communicate proactively with your team members about your work, planned changes, and any potential conflicts or issues. Use GitHub's issue tracking system to discuss bugs, feature requests, and project tasks. Utilize pull requests for code reviews and discussions. Engage in constructive feedback during code reviews and be open to suggestions from your team. Clear and consistent communication ensures that everyone is on the same page, reduces misunderstandings, and fosters a collaborative and productive development environment.
Conclusion: Mastering Remote Git for Effective Collaboration
Connecting to remote Git repositories with GitHub is a fundamental skill for modern software development and collaborative version control. By understanding the concepts and steps outlined in this guide, you are well-equipped to establish and manage remote connections, collaborate effectively with teams, and leverage the power of Git for version control in a distributed environment.
Key Takeaways: Connecting and Collaborating with Git
Mastering remote Git collaboration involves several key takeaways. First, understanding the benefits of remote repositories for teamwork, backup, and version history is crucial. Second, properly setting up prerequisites like Git installation, GitHub account creation, and SSH key configuration is essential for seamless connectivity.
Third, knowing how to create, clone, and connect local repositories to remote repositories on GitHub forms the basis of collaborative workflows. Fourth, mastering core operations like fetching, pulling, and pushing changes is vital for synchronizing codebases and sharing contributions. Finally, adhering to best practices such as branching, frequent commits, regular synchronization, and effective communication ensures a smooth and productive collaborative development experience when connecting to remote Git repositories.
Next Steps: Exploring Advanced Git Workflows [e.g., Branching, Merging, Pull Requests]
With a solid understanding of how to connect to remote Git repositories and perform basic collaborative operations, you are now ready to explore more advanced Git workflows. Delving into branching strategies like Gitflow or GitHub Flow will further enhance your team's collaboration and release management processes. Mastering merging and rebasing techniques will provide more control over commit history and integration of changes.
Deepening your knowledge of pull requests and code review workflows will improve code quality and team collaboration. Exploring advanced Git features like submodules, hooks, and interactive staging will further expand your Git expertise and enable you to tackle more complex version control scenarios. Continuous learning and exploration of Git's capabilities are key to becoming a proficient and effective collaborator in software development.
Frequently Asked Questions
How do I initialize a local Git repository before connecting to a remote one?
You first need to create a local repository using git init. This command creates a .git directory in your project, making it a Git repository and allowing you to track changes.
What's the difference between git clone and git remote add?
git clone creates a local copy of an existing remote repository. git remote add establishes a connection to a remote repository without downloading its contents initially.
How do I specify the URL of the remote Git repository?
The URL is specified when using git clone or git remote add. It usually starts with git://, https://, or ssh://, indicating the protocol used to connect to the remote repository.
After connecting to a remote repository, how do I retrieve the latest changes?
Use the git pull command. This command fetches changes from the remote and merges them into your current branch.
How do I push my local changes to the remote Git repository?
Use the git push command. This command uploads your committed changes from your local branch to the specified remote repository branch.
Final Reflection: Embracing Collaborative Code
The ability to seamlessly connect to a remote Git repository is no longer a luxury, but a fundamental requirement for modern software development. The principles outlined in this article, from initial setup to pushing your first changes, represent the very foundation upon which collaborative coding thrives, enabling teams across geographical boundaries to build complex and innovative solutions together.
This journey into remote Git repositories has profoundly shaped the way we approach software creation. It's a testament to the power of shared knowledge and distributed effort, fostering a culture of continuous integration and improvement. The strength of the team is each individual member. The strength of each member is the team.
– Phil Jackson. This quote perfectly encapsulates the essence of collaborative coding; each contribution, no matter how small, strengthens the collective whole.
Now, armed with the knowledge of how to connect to a remote Git repository, I invite you to reflect on the possibilities that open up. Consider how you can leverage these skills to contribute to open-source projects, collaborate with colleagues on groundbreaking innovations, or simply streamline your own personal coding workflow. Embrace the power of shared code, and let's build a future where collaboration knows no bounds.
Unlock Your Collaborative Power!
Thank you for reading "Connecting to a Remote Git Repository: Your First Steps to Collaboration"! Now that you understand the fundamentals, it's time to put your knowledge into practice and experience the power of collaborative development.
Ready to get started? Here's what you can do:
- Create your first remote repository on platforms like GitHub, GitLab, or Bitbucket, and connect to it using the techniques you just learned. This is the first step to real-world collaboration.
- Experiment with branching and merging in your remote repository to fully grasp the collaborative workflow. Learning from mistakes is part of the process!
- Share this article with a friend or colleague to help them begin their Git journey.
Excited to start collaborating? Tell us about the project you'll be working on in the comments below!