
Collaborative Code Review with Git Pull Requests: A Workflow Guide

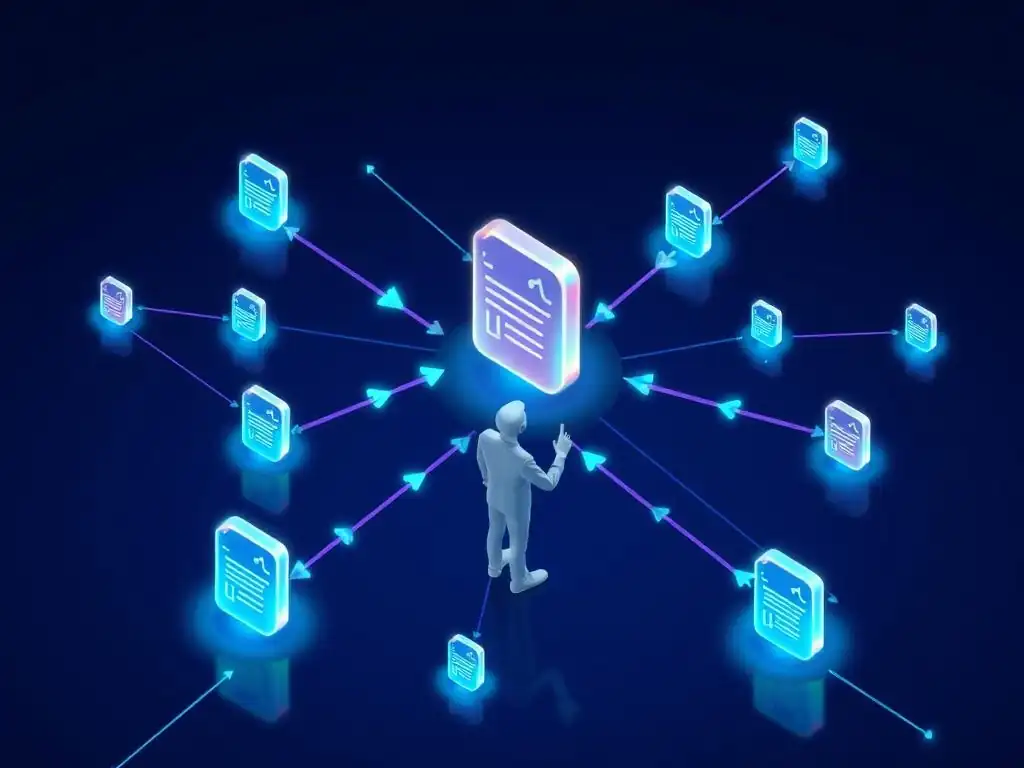
Welcome to Git and Version Control Hub!
Are you ready to elevate your collaborative coding game? Dive into our Git pull request workflow guide and discover how to streamline code reviews, foster seamless teamwork, and ensure code quality. Uncover the secrets to efficient branching, clear communication, and effortless merging. This isn't just about commands; it's about building a better development process. Curious to learn how pull requests can transform your team's workflow? Let's get started!
Collaborative Code Review with Git Pull Requests: A Workflow Guide
- Understanding Git Pull Requests for Code Review
- Setting Up Your Git Environment for Pull Requests
- Creating a Git Pull Request: A Step-by-Step Guide
- Performing Effective Code Reviews on Git Pull Requests
- Addressing Feedback and Updating Your Git Pull Request
- Merging the Git Pull Request
- Advanced Git Pull Request Workflows
- Troubleshooting Common Git Pull Request Issues
- Git Pull Request Workflow: Best Practices and Tips
- Conclusion: Mastering Collaborative Code Review with Git Pull Requests
- Frequently Asked Questions
- Final Reflection: Embracing Collaborative Growth Through Code
- Supercharge Your Code: Level Up Your Review Process!
Understanding Git Pull Requests for Code Review
What is a Git Pull Request (PR)?
A Git pull request (PR) is a feature offered by platforms like GitHub, GitLab, Bitbucket, and Azure DevOps, designed to facilitate collaborative code review within Git-based workflows. At its core, a pull request is a request to merge code from one branch into another. However, it's much more than just a merge operation. It's a structured, formalized process that allows team members to review and discuss proposed changes before they are integrated into the main codebase.
Imagine a team working on a new feature. Instead of directly committing their code changes to the shared main branch, a developer creates a new branch dedicated to this feature. Once the feature is implemented, the developer doesn't immediately merge it. Instead, they open a pull request targeting the main branch.
This action signals to the team that the code is ready for review. The pull request visually presents the changes made in the feature branch, line by line, making it easy for reviewers to understand the modifications. It also provides a dedicated space for discussions, comments, and feedback on the proposed changes, ensuring that code quality is maintained and knowledge is shared across the team before integration.
Benefits of Using Pull Requests in Your Git Workflow
Integrating pull requests into your Git workflow offers a multitude of advantages, significantly enhancing code quality, team collaboration, and project stability. One of the primary benefits is improved code quality. By subjecting code changes to review before merging, teams can catch potential bugs, identify logical errors, and ensure adherence to coding standards.
Studies have shown that code reviews can reduce defect density by as much as 15% to 85%, depending on the rigor and methodology applied. For instance, a study at Cisco Systems found that formal code inspections reduced defects in released products by approximately 85% compared to projects without inspections.
Furthermore, pull requests foster knowledge sharing within the team. During the review process, team members gain insights into different parts of the codebase, learn new techniques, and understand the reasoning behind specific code implementations. This cross-pollination of knowledge is invaluable, especially in larger teams where individuals may specialize in different areas. Pull requests also act as a form of documentation, providing a historical record of code changes and the rationale behind them.
The discussions and decisions made within pull requests can be invaluable for future reference, helping to understand the evolution of the codebase and the context behind specific code segments. Finally, pull requests encourage a more collaborative development environment. They promote open communication and constructive feedback, fostering a culture of shared responsibility for code quality and project success.
Pull Request vs. Other Code Review Methods
While pull requests are a highly effective method for code review, it's beneficial to understand how they compare to other approaches. Traditional code review methods often include pair programming, over-the-shoulder reviews, and email-based code reviews. Pair programming, where two developers work together on the same code in real-time, offers immediate feedback and knowledge sharing.
However, it can be resource-intensive, requiring two developers for every coding task. Over-the-shoulder reviews, where a developer asks a colleague to quickly review their code, are less formal and faster but may lack depth and thoroughness. Email-based code reviews, involving sending code patches via email, are cumbersome and lack the integrated tooling and collaborative features of pull requests.
In contrast, pull requests offer a structured and asynchronous approach to code review. They don't require reviewers to be available at the same time as the code author, allowing for review at the reviewer's convenience. Platforms like GitHub and GitLab provide sophisticated tools within the pull request interface, such as inline comments, diff views, and status checks, which streamline the review process.
These tools are specifically designed for code review, making it easier to identify changes, provide feedback precisely, and track the review progress. While pair programming and over-the-shoulder reviews can be valuable in certain contexts, pull requests offer a more scalable, documented, and feature-rich solution for code review, particularly in distributed teams or projects that require a high degree of code quality and collaboration.
Setting Up Your Git Environment for Pull Requests
Configuring Your Local Git Repository
Before diving into pull requests, ensuring your local Git environment is properly configured is crucial for a smooth workflow. This typically involves setting up your user identity and potentially configuring your Git editor. The most fundamental step is to configure your user name and email. Git uses this information to attribute commits to you. You can set these globally for all your Git repositories using the commands:
git config --global user.name "Your Name"
git config --global user.email "your.email@example.com"
Replace "Your Name" and "your.email@example.com" with your actual name and email address. These settings are stored in your global Git configuration file, usually located at ~/.gitconfig. You can also set these configurations specifically for a particular repository by omitting the --global flag when running these commands from within the repository's directory. This is useful if you need to use different identities for different projects.
Optionally, you might want to configure your default text editor for Git operations like commit message editing. Git usually defaults to Vim or Vi, but you can change it to your preferred editor. For example, to set VS Code as your default editor, you can use:
git config --global core.editor "code --wait"
This command instructs Git to use VS Code ( code) and wait for the editor to be closed ( --wait) before proceeding with the Git operation. Properly configuring your local Git environment ensures that your commits are correctly attributed and that you have a comfortable editing environment for Git-related tasks, setting the stage for an efficient pull request workflow.
Forking a Repository on GitHub/GitLab (If Applicable)
In certain scenarios, particularly when contributing to open-source projects or working in organizations with specific permission models, you might need to fork a repository before creating a pull request. Forking creates a personal copy of the original repository under your own account on platforms like GitHub or GitLab. This is often necessary when you don't have direct write access to the main repository, which is common in open-source contributions and in organizations that restrict direct pushes to protected branches.
When you fork a repository, you essentially create a remote copy that you control. You can then clone this forked repository to your local machine, make your changes, and push them back to your forked repository. The pull request process then involves requesting to merge changes from your forked repository into the original repository. This workflow ensures that maintainers of the original repository retain control over contributions and can review changes before they are integrated.
To fork a repository on GitHub or GitLab, you typically navigate to the repository's page and click the "Fork" button, usually located in the top right corner. The platform then handles the forking process, creating a copy under your account. After forking, you would clone your forked repository to your local machine to start working. The remote URL for your forked repository will be different from the original repository's URL, reflecting that it's now under your ownership. Forking is a fundamental concept in collaborative Git workflows, enabling contributions without requiring direct write access to the upstream repository.
Creating a New Branch for Your Feature or Bug Fix
A cornerstone of effective Git workflows, especially when using pull requests, is the practice of branching. Before starting work on a new feature or bug fix, it's crucial to create a dedicated branch. This branch acts as an isolated environment where you can develop your changes without directly affecting the main codebase (typically the main or develop branch). Branching promotes parallel development, allows for experimentation without risk, and makes the pull request process cleaner and more manageable.
To create a new branch, you typically start from the main or develop branch, ensuring your local copy is up-to-date. Then, you use the git checkout -b command followed by a descriptive branch name. For example, to create a branch named feature/add-user-authentication from your current branch, you would run:
git checkout -b feature/add-user-authentication
This command creates a new branch and immediately switches you to it. Branch names should be descriptive and concise, clearly indicating the purpose of the branch, whether it's for a new feature, a bug fix, or another type of change. Common branch naming conventions include prefixes like feature/, bugfix/, or hotfix/. Working on a dedicated branch ensures that your changes are logically grouped and separated from other work, making it easier to review and integrate them via a pull request. It also allows you to easily discard or rework your changes without impacting the stability of the main codebase if needed.
Creating a Git Pull Request: A Step-by-Step Guide
Writing Clear and Concise Commit Messages
The journey to a successful pull request begins long before you actually create it on GitHub or GitLab. It starts with writing clear and concise commit messages. Well-crafted commit messages are essential for effective code review and for understanding the history of changes in your Git repository. They provide context to reviewers, helping them quickly grasp the purpose and scope of each change. A good commit message follows a few key principles.
First, it should have a short summary (typically under 50 characters) in the first line, acting as a title for the commit. This summary should concisely describe the change. Second, following the summary, there should be a blank line, separating the summary from the body.
The body of the commit message (optional but highly recommended) should provide more detailed information about why the change was made, what was changed, and how it was implemented, especially if the change is complex or not immediately obvious from the code itself. Using imperative mood in the summary line (e.g., "Fix bug in user login," not "Fixed bug...") is a common convention. For example, a good commit message might look like this:
Fix: Prevent users from submitting empty forms

This commit addresses an issue where users were able to submit forms
without filling in any required fields, leading to errors on the server-side.

The validation logic has been updated to check for empty fields before
form submission.  Added client-side validation using JavaScript and
server-side validation in the backend API.
Writing effective commit messages is not just good practice; it significantly enhances the value of your pull requests and the overall maintainability of your project.
Pushing Your Branch to the Remote Repository
Once you have completed your work on your feature or bug fix branch and have created meaningful commits, the next step is to push your branch to the remote repository. This makes your changes accessible to your team and allows you to initiate the pull request process on platforms like GitHub or GitLab. Pushing your branch essentially uploads your local branch and its commits to the remote repository, making it visible to others.
To push your branch, you typically use the git push command followed by the remote name and your branch name. Assuming your remote repository is named origin (which is the default when you clone a repository) and your branch is named feature/add-user-authentication, the command would be:
git push origin feature/add-user-authentication
If this is the first time you are pushing this branch to the remote, you might need to use the --set-upstream option (or -u for short) to establish a tracking connection between your local branch and the remote branch. This makes subsequent git push and git pull commands simpler, as Git will remember the remote branch associated with your local branch. So, the first push might look like:
git push -u origin feature/add-user-authentication
After successfully pushing your branch, it will be available on the remote repository, and you can proceed to create a pull request to merge it into the target branch, such as main or develop.
Initiating the Pull Request on GitHub/GitLab
With your feature branch pushed to the remote repository, you are now ready to initiate the pull request on your chosen platform, such as GitHub or GitLab. The process is generally similar across these platforms, typically involving navigating to your repository on the web interface and finding a "Pull Requests" or "Merge Requests" tab.
On GitHub, after pushing a new branch, you will often see a prompt to "Compare & pull request" directly on the repository's main page. Clicking this button will take you directly to the pull request creation form. Alternatively, you can go to the "Pull requests" tab and click "New pull request." You will then be presented with options to select the base branch (the branch you want to merge into, usually main or develop) and the compare branch (your feature branch that you want to merge). Ensure you select the correct branches.
Similarly, on GitLab, you would navigate to "Merge requests" in the left sidebar and click "New merge request." You will then select the source branch (your feature branch) and the target branch (the branch you want to merge into). Once you have selected the branches, you will be taken to the pull request creation page where you can fill in the details and submit your request for review. Initiating the pull request is the formal step that signals to your team that your code is ready for review and potential integration.
Filling Out the Pull Request Template
To ensure consistency and provide reviewers with all the necessary information, projects often utilize pull request templates. These templates are pre-defined Markdown files (e.g., .github/pull_request_template.md on GitHub) that automatically populate the pull request description field with a structured format. Filling out the pull request template thoroughly is crucial for a smooth and efficient review process. A well-completed template guides reviewers, making it easier for them to understand the context, purpose, and impact of your changes.
When creating a pull request, you will typically see the template content pre-filled in the description field. Carefully review each section of the template and provide the requested information. This might include:
Pull Request Template Fields
Common fields found in pull request templates include:
- Title: A concise and descriptive title summarizing the changes. Often, this is pre-filled based on your branch name or the first commit message, but you can refine it for clarity.
- Description: A more detailed explanation of what the pull request does, why it's necessary, and how it addresses the intended goal. This is often the most important part of the template.
- Related Issues: Links to any issue tracking system tickets (e.g., Jira, GitHub Issues, GitLab Issues) that this pull request addresses. Linking issues provides context and traceability.
- Type of Changes: Categorization of changes, such as "feature," "bug fix," "refactoring," "documentation," etc. This helps reviewers understand the nature of the changes.
- Screenshots/GIFs (If Applicable): Visual aids for UI changes or new features that are visually demonstrable.
- Testing Performed: Details about the testing you have conducted to ensure the changes are working correctly and don't introduce regressions. This might include unit tests, integration tests, manual testing steps, etc.
- Checklist: A list of items to verify before submitting the pull request, such as "Code is properly formatted," "Tests are passing," "Documentation is updated," etc.
By diligently filling out the pull request template, you provide reviewers with a clear and comprehensive overview of your changes, significantly improving the efficiency and effectiveness of the code review process.
Performing Effective Code Reviews on Git Pull Requests
Understanding the Code Reviewer's Role
The code reviewer plays a critical role in the pull request workflow. Their responsibility extends beyond simply finding bugs. The reviewer's primary goal is to ensure the quality, maintainability, and security of the codebase. They act as gatekeepers, helping to prevent defects from entering the main branch and promoting consistent coding standards across the project. A reviewer needs to approach the code with a critical but constructive mindset, aiming to improve the code while also supporting the author's growth and development.
Specifically, a code reviewer should focus on several key aspects:
- Functionality: Does the code achieve its intended purpose? Does it correctly implement the requirements or fix the bug it's supposed to address?
- Code Quality: Is the code well-written, readable, and understandable? Is it efficient and performant? Does it adhere to the project's coding style guidelines?
- Maintainability: Is the code easy to maintain and modify in the future? Is it modular and well-structured? Is it properly documented?
- Security: Does the code introduce any security vulnerabilities? Does it handle user input safely? Does it follow secure coding practices?
- Testability: Is the code testable? Are there sufficient unit tests or integration tests to cover the changes?
- Overall Design: Does the code fit well within the existing architecture of the project? Is the design sound and scalable?
The reviewer's role is not just about finding flaws; it's also about knowledge sharing and mentorship. By providing feedback and suggesting improvements, reviewers help other team members learn and grow as developers, contributing to a stronger and more skilled team overall.
Best Practices for Code Reviewing Pull Requests
To conduct effective code reviews on pull requests, reviewers should adhere to certain best practices. These practices ensure that reviews are thorough, constructive, and contribute positively to the development process.
Focus on Code Quality and Maintainability
When reviewing code, prioritize code quality and maintainability. Assess whether the code is easy to read, understand, and modify. Look for areas where the code could be simplified, refactored, or made more modular. Consider whether the code follows established coding standards and best practices.
For example, check for overly complex logic, deeply nested conditional statements, or magic numbers that should be replaced with named constants. Ensure that variable and function names are descriptive and meaningful. Evaluate if the code is well-documented, especially for complex or non-obvious logic. Focus on the long-term maintainability of the codebase, not just on whether the code "works" in the short term.
Check for Potential Bugs and Security Vulnerabilities
A crucial aspect of code review is actively checking for potential bugs and security vulnerabilities. Examine the code for logical errors, edge cases that might not be handled, and potential race conditions or concurrency issues. Look for common coding mistakes that could lead to bugs, such as off-by-one errors, incorrect null checks, or resource leaks.
Pay special attention to areas that interact with external systems, databases, or user input, as these are often points of vulnerability. Review for common security flaws like SQL injection, cross-site scripting (XSS), or insecure password handling. Utilize static analysis tools or security linters if available to automate some of these checks.
Ensure Code Style Consistency
Maintaining code style consistency across the project is important for readability and collaboration. Code reviews are a good opportunity to enforce these style guidelines. Check if the code adheres to the project's coding style conventions, whether they are formally documented or implicitly understood.
This includes aspects like indentation, line length, naming conventions, and code formatting. Using automated code formatters like Prettier or linters like ESLint can help enforce code style automatically and reduce the burden on reviewers to manually check for style issues. Consistency in code style makes it easier for all team members to read and understand the codebase, regardless of who wrote a particular piece of code.
Provide Constructive Feedback
The way feedback is given is as important as the feedback itself. Reviewers should strive to provide constructive feedback that is helpful, specific, and respectful. Focus on the code itself, not on the author personally. Frame feedback in a positive and encouraging manner.
Instead of saying "This code is bad," try "Could we refactor this section to be more readable by breaking it down into smaller functions?" Be specific in your comments, pointing to particular lines of code and explaining why you are suggesting a change or asking a question. Ask clarifying questions rather than making declarative statements when you are unsure about the intent of the code. Remember that the goal of code review is to improve the code and help the author learn, not to criticize or discourage.
Using GitHub/GitLab's Code Review Tools
GitHub, GitLab, and similar platforms provide a rich set of tools specifically designed to facilitate code reviews within pull requests. Leveraging these tools effectively can significantly enhance the efficiency and clarity of the review process.
Leaving Comments on Specific Lines of Code
One of the most powerful features is the ability to leave comments directly on specific lines of code. This allows reviewers to provide precise feedback, ask questions about particular code segments, or suggest alternative implementations in a highly contextual manner. When viewing a pull request on GitHub or GitLab, you can simply click on a line number in the diff view to add a comment.
These comments are associated with that specific line and are visible to all participants in the pull request. Inline comments make it easy to pinpoint areas of concern and discuss them directly within the code context, leading to clearer communication and more effective feedback.
Requesting Changes and Approving Pull Requests
GitHub and GitLab provide clear mechanisms for reviewers to request changes or approve pull requests. After reviewing the code, a reviewer can indicate their overall assessment. If changes are needed, the reviewer can "Request Changes," which flags the pull request as requiring further work from the author.
This usually triggers a notification to the author to address the feedback and update the pull request. Once the reviewer is satisfied with the changes, they can "Approve" the pull request, indicating that the code is ready to be merged. These explicit actions provide a clear status for the pull request and help manage the review workflow.
Resolving Conversations
As discussions unfold within a pull request, especially through inline comments, it's important to resolve conversations once they are addressed or no longer relevant. GitHub and GitLab allow reviewers and authors to "resolve" comments. This typically hides the resolved comment by default, keeping the pull request interface clean and focused on unresolved issues.
Resolving conversations helps track progress, ensure that all feedback has been considered, and prevent discussions from becoming overwhelming or cluttered. It's good practice to resolve comments once the suggested changes have been implemented or the questions have been answered to the satisfaction of the reviewer and author.
Addressing Feedback and Updating Your Git Pull Request
Incorporating Reviewer Suggestions
After receiving feedback from reviewers on your pull request, the next crucial step is to incorporate their suggestions. This involves carefully reviewing each comment, understanding the feedback, and making the necessary code modifications. The review process is a collaborative effort to improve the code, so it's important to take reviewer feedback seriously and address it thoughtfully.
Start by going through each comment in your pull request. Read the feedback carefully and make sure you understand the reviewer's point. If you are unclear about a comment, don't hesitate to ask for clarification directly in the pull request thread. Once you understand the feedback, start making the necessary changes to your code in your local branch. This might involve refactoring code, fixing bugs, adding tests, improving documentation, or addressing security concerns, as suggested by the reviewers.
It's generally a good practice to address all valid points raised by reviewers. However, there might be situations where you disagree with a suggestion or believe that a particular change is not necessary or appropriate. In such cases, engage in a constructive discussion with the reviewer in the pull request thread. Explain your reasoning and try to reach a mutual understanding or compromise. Remember that the goal is to improve the code collaboratively, and open communication is key to resolving disagreements and arriving at the best solution.
Resolving Merge Conflicts (If Any)
During the process of addressing feedback and updating your pull request, you might encounter merge conflicts. Merge conflicts occur when the target branch (e.g., main or develop) has been updated since you created your feature branch, and some of those changes conflict with the changes in your branch. Git will indicate these conflicts when you try to merge or rebase your branch.
Resolving merge conflicts is a standard part of the Git workflow. Git will mark the files with conflicts, using special markers ( <<<<<<<, =======, >>>>>>>) to indicate the conflicting sections. You need to manually edit these files, decide which changes to keep (yours, theirs, or a combination), and remove the conflict markers. After resolving the conflicts in each file, you need to stage the resolved files using git add and then continue with the merge or rebase operation.
Merge conflicts can sometimes be complex, especially in large files or when there are significant changes in both branches. Using a visual merge tool can be very helpful in visualizing and resolving conflicts. Tools like VS Code, SourceTree, and GitKraken have built-in merge conflict resolution features that can simplify the process. It's important to resolve merge conflicts carefully to avoid introducing errors and ensure that the merged code is correct and consistent.
Updating the Pull Request with New Commits
After incorporating reviewer suggestions and resolving any merge conflicts, you need to update your pull request with these changes. This is typically done by committing your changes to your feature branch and then pushing the updated branch to the remote repository. When you push changes to the same branch that is associated with an open pull request, the pull request is automatically updated with the new commits.
Simply commit your changes locally in your feature branch as you normally would, using git add and git commit. Ensure that your commit messages are clear and describe the changes you made in response to the review feedback. Once you have committed your changes, push your branch to the remote repository using git push origin your-feature-branch. The pull request on GitHub or GitLab will automatically reflect these new commits. Reviewers will then be able to see the updated code and verify that their feedback has been addressed.
Updating the pull request with new commits keeps the review process iterative and allows for continuous feedback and improvement. It's common to have multiple rounds of feedback and updates before a pull request is finally approved and merged.
Keeping the Pull Request Branch Up-to-Date
To ensure a smooth merge and avoid potential integration issues, it's important to keep your pull request branch up-to-date with the target branch (e.g., main or develop). As development progresses, the target branch might receive new commits from other team members. If your feature branch becomes significantly out of sync with the target branch, it can lead to more complex merge conflicts and integration problems later on.
There are two main ways to keep your branch up-to-date: merging and rebasing. Merging the target branch into your feature branch creates a merge commit in your branch's history. This approach preserves the history of your branch and the target branch. To merge, you would typically switch to your feature branch and run git merge origin/main (assuming main is your target branch).
Rebasing your feature branch onto the target branch, on the other hand, rewrites your branch's history by replaying your commits on top of the latest commits from the target branch. This results in a cleaner, linear history without merge commits. To rebase, you would switch to your feature branch and run git rebase origin/main. Rebasing should be done with caution, especially on branches that are shared with others, as it changes the commit history. However, for feature branches that are primarily used for pull requests, rebasing is often preferred as it leads to a cleaner project history after merging.
Regularly keeping your pull request branch up-to-date, whether through merging or rebasing, minimizes the risk of merge conflicts and ensures a smoother integration process when your pull request is eventually merged.
Merging the Git Pull Request
Understanding the Different Merge Strategies
Once your pull request has been reviewed, approved, and is up-to-date, the final step is merging it into the target branch. Git offers several merge strategies, and platforms like GitHub and GitLab often provide options for how pull requests are merged. Understanding these strategies is important for choosing the right approach for your project and workflow.
Common merge strategies include:
- Merge Commit (Standard Merge): This is the default strategy. It creates a new merge commit in the target branch that combines the changes from the feature branch. This strategy preserves the entire history of both branches, including the feature branch's commits and the merge point.
- Squash Merge: This strategy collapses all commits from the feature branch into a single new commit in the target branch. The history of the feature branch is not preserved in the target branch's history. This results in a cleaner, linear history in the target branch, with each merge representing a single logical change.
- Rebase and Merge: This strategy first rebases the feature branch onto the target branch (if it's not already rebased) and then performs a fast-forward merge if possible, or a standard merge if necessary. A fast-forward merge occurs when the target branch hasn't diverged since the feature branch was created, resulting in a linear history without a merge commit. If a fast-forward merge is not possible, it behaves like a standard merge.
The choice of merge strategy depends on your project's history preferences and workflow. Merge commits preserve detailed history but can make the history more complex. Squash merges create a cleaner, linear history but lose the detailed commit history of the feature branch in the target branch. Rebase and merge aims for a linear history while potentially using merge commits if needed.
Squashing Commits Before Merging (Optional)
Squashing commits before merging is a common practice, especially when using the squash merge strategy. Squashing combines multiple commits from a feature branch into a single, consolidated commit when merging into the target branch. This is often done to create a cleaner and more linear commit history in the target branch.
Feature branches often contain numerous small commits that represent incremental changes, work in progress, or fixes to previous commits within the feature branch. While these granular commits are useful during development and review, they might not be necessary or desirable to keep in the main branch's history. Squashing allows you to consolidate these into a single commit that represents the entire feature or bug fix as a logical unit of change in the target branch.
For example, if your feature branch has five commits like "Implement basic feature," "Fix typo in feature," "Add unit tests," "Refactor feature code," and "Update documentation," you could squash these into a single commit like "feat: Implement user authentication feature" when merging to main. This makes the main branch history cleaner and easier to understand at a higher level, focusing on the major features and changes rather than the detailed development steps. Platforms like GitHub and GitLab typically offer a "Squash and merge" option when completing a pull request.
Completing the Pull Request and Merging the Code
The final step in the pull request workflow is completing the pull request and merging the code. Once reviewers have approved the pull request and all feedback has been addressed, and you have chosen your merge strategy (e.g., merge commit, squash merge), you can proceed to merge.
On GitHub and GitLab, you typically click the "Merge pull request" or "Merge merge request" button on the pull request page. You might be prompted to confirm your merge strategy if there are options available. After confirming, the platform will perform the merge operation according to the chosen strategy. If you selected "Squash and merge," the commits will be squashed into a single commit. If you selected "Merge commit," a merge commit will be created.
Once the merge is complete, the code from your feature branch is now integrated into the target branch. The pull request is typically closed automatically after a successful merge. Notifications are usually sent to the pull request author and reviewers to confirm the merge. After merging, it's important to ensure that your local target branch is also updated with the merged changes by pulling from the remote repository (e.g., git checkout main && git pull origin main).
Deleting the Feature Branch After Merging
After a pull request has been successfully merged, it's good practice to delete the feature branch, both locally and remotely. Once the feature branch's code is integrated into the target branch, the feature branch itself is no longer needed and can become clutter over time. Deleting branches that are no longer actively used helps keep your repository clean and organized.
To delete the remote branch on GitHub or GitLab, you often have an option to "Delete branch" directly after merging the pull request. Alternatively, you can delete the remote branch from your local Git command line using:
git push origin --delete your-feature-branch
To delete your local branch, you first need to switch to a different branch (e.g., main) and then use the command:
git branch -d your-feature-branch
Deleting both remote and local feature branches after merging is a good housekeeping practice that contributes to a cleaner and more manageable Git repository.
Advanced Git Pull Request Workflows
Using Draft Pull Requests
For scenarios where you want to share work in progress, get early feedback, or collaborate on code that's not yet fully ready for review, draft pull requests (also known as "Work in Progress" or WIP pull requests) are a valuable feature. Draft pull requests allow you to create a pull request early in the development cycle, even before the code is complete or fully tested.
By marking a pull request as a draft (often done during creation on platforms like GitHub), you signal to reviewers that the code is still under development and not yet ready for final review or merging. This allows for early feedback on architectural decisions, approach, or specific code segments while the work is still in progress. Reviewers can provide comments and suggestions at an earlier stage, potentially saving time and effort by catching issues or suggesting improvements before significant development has been completed.
Draft pull requests are particularly useful for:
- Seeking early feedback on complex features: Share your initial code implementation to get input on the overall design and approach before completing all details.
- Collaborating with team members: Use draft pull requests as a shared workspace to collaborate on code development with other team members.
- Tracking progress on long-running features: Create a draft pull request early on to document the planned work and track progress as you develop the feature.
Once the work is complete and you are ready for formal review, you can convert the draft pull request to a regular pull request (often by clicking a "Ready for review" button on GitHub). This signals to reviewers that the code is now ready for thorough review and potential merging.
Continuous Integration (CI) Integration with Pull Requests
Integrating Continuous Integration (CI) systems with your pull request workflow is a powerful way to automate code quality checks and ensure that changes are safe to merge. CI systems automatically build, test, and validate code changes whenever a pull request is created or updated. This provides early feedback on code quality and helps prevent regressions from being introduced into the codebase.
Popular CI systems like Jenkins, GitHub Actions, GitLab CI, CircleCI, and Travis CI can be configured to run automated checks on pull requests. These checks typically include:
- Building the code: Compiling the code to ensure it builds successfully.
- Running unit tests and integration tests: Executing automated tests to verify the functionality of the code and detect regressions.
- Running linters and static analyzers: Analyzing the code for style violations, potential bugs, and security vulnerabilities.
- Performing security scans: Scanning the code for known security vulnerabilities.
- Deploying to a staging environment (optional): Deploying the changes to a test environment for further testing and validation.
CI systems provide feedback directly within the pull request interface, often using status checks that indicate whether the checks have passed or failed. Pull requests can be configured to require all CI checks to pass before they can be merged, ensuring a high level of code quality and stability. CI integration is an essential part of a robust pull request workflow, especially for larger projects and teams.
Automating Code Review with Linters and Static Analyzers
While human code review is crucial, automating parts of the code review process using linters and static analyzers can significantly enhance efficiency and consistency. Linters and static analyzers are tools that automatically scan code for style violations, potential bugs, security vulnerabilities, and code quality issues. Integrating these tools into your pull request workflow can catch many common issues automatically, freeing up human reviewers to focus on more complex and nuanced aspects of code review, such as design, architecture, and business logic.
Examples of linters and static analyzers include:
- Linters: ESLint (for JavaScript), Pylint (for Python), Checkstyle (for Java), RuboCop (for Ruby). Linters enforce code style guidelines and detect basic syntax errors and style violations.
- Static Analyzers: SonarQube, Code Climate, Coverity, Semgrep. Static analyzers perform more in-depth code analysis, detecting potential bugs, security vulnerabilities, code complexity issues, and code duplication.
These tools can be integrated into your CI pipeline to run automatically on every pull request. They can also be configured to provide feedback directly within the pull request interface, often as inline comments or status checks. Automating code review with linters and static analyzers helps enforce code quality standards consistently, catch issues early in the development cycle, and improve the overall efficiency of the code review process.
Pull Request Templates for Different Types of Changes
To further streamline the pull request process and ensure that reviewers have the appropriate context for different types of changes, you can utilize pull request templates tailored to specific change types. Instead of using a single generic pull request template for all changes, you can create different templates for features, bug fixes, documentation updates, refactoring, etc.
For example, a pull request template for a new feature might include sections like:
- Feature Description: Detailed explanation of the new feature.
- User Story: Link to the user story or requirement document.
- Implementation Details: Explanation of the technical implementation.
- UI/UX Changes (if applicable): Screenshots or GIFs of UI changes.
- Testing Plan: Description of testing performed for the feature.
A pull request template for a bug fix might include sections like:
- Bug Description: Detailed description of the bug.
- Steps to Reproduce: Steps to reproduce the bug.
- Root Cause Analysis: Explanation of the root cause of the bug.
- Fix Implementation: Description of how the bug was fixed.
- Regression Testing: Details about regression testing to ensure the fix doesn't introduce new issues.
By using specific templates for different types of changes, you ensure that pull request authors provide the relevant information that reviewers need for each type of change. This makes the review process more focused and efficient, as reviewers have the right context and information readily available. Platforms like GitHub and GitLab allow you to define multiple pull request templates that can be selected when creating a new pull request.
Troubleshooting Common Git Pull Request Issues
Dealing with Merge Conflicts
Merge conflicts are a common challenge in Git pull request workflows, especially when working on long-lived feature branches or in fast-paced development environments. As discussed earlier, merge conflicts arise when changes in your feature branch conflict with changes in the target branch. Effectively resolving merge conflicts is crucial to keep your pull request moving forward.
When you encounter merge conflicts, Git will indicate the conflicted files. The first step is to open these files in your text editor or IDE. Git will have inserted conflict markers ( <<<<<<<, =======, >>>>>>>) to delineate the conflicting sections. You need to manually edit these sections, carefully reviewing both versions of the code and deciding how to resolve the conflict. This might involve choosing to keep one version over the other, merging parts of both versions, or rewriting the code entirely to reconcile the changes.
After resolving the conflicts in each file, you need to stage the resolved files using git add <file> and then continue with the merge or rebase operation using git rebase --continue or git merge --continue. If you make a mistake during conflict resolution or want to start over, you can use git rebase --abort or git merge --abort to undo the operation and revert to the state before the merge or rebase attempt.
Using a visual merge tool can significantly simplify the process of resolving merge conflicts, especially for complex conflicts. These tools provide a side-by-side view of the conflicting versions and allow you to visually select and merge changes, making conflict resolution more intuitive and less error-prone.
Resolving Code Review Disputes
Code review disputes can arise when reviewers and authors have differing opinions on code implementation, design choices, or coding style. While constructive feedback is essential, disagreements can sometimes occur. Resolving these disputes constructively and professionally is crucial for maintaining a positive and collaborative team environment.
When a dispute arises, the first step is to engage in open and respectful communication. In the pull request thread, clearly explain your reasoning behind your code or design choices. Listen attentively to the reviewer's concerns and try to understand their perspective. Ask clarifying questions to ensure you fully understand the feedback. Focus on the technical merits of the code and the project's goals, rather than personal preferences.
If a disagreement persists, consider seeking a third opinion from another team member or a senior developer. Having a neutral party review the code and provide input can help break the deadlock and lead to a resolution. Sometimes, a brief video call or in-person discussion can be more effective for resolving complex disputes than text-based communication in the pull request thread.
Ultimately, the goal is to find the best solution for the project, even if it requires compromise or adopting a different approach than initially envisioned. Remember that code review is a collaborative process, and resolving disputes constructively is part of that process.
Debugging CI/CD Failures
CI/CD failures in pull requests can be frustrating but are often a valuable early warning sign of potential issues. When CI checks fail on a pull request, it usually indicates that something is wrong with the code changes, such as build errors, test failures, linting violations, or security vulnerabilities. Debugging these failures is essential before merging the pull request.
The first step in debugging CI failures is to examine the CI logs. CI systems typically provide detailed logs of the build, test, and analysis processes. Review these logs carefully to identify the specific step that failed and the error messages or output generated. Look for error messages related to compilation, test failures, linting errors, or security scan findings.
Once you have identified the cause of the failure from the logs, try to reproduce the failure locally. Run the same build commands, tests, or linters locally that are failing in the CI environment. Reproducing the failure locally allows you to debug it more effectively using your local development tools and IDE. Fix the issues in your code based on the error messages and debugging results.
After fixing the issues locally, commit your changes and push them to your pull request branch. The CI system will automatically re-run the checks on the updated pull request. Continue debugging and fixing issues until all CI checks pass. If you are unsure about the cause of a CI failure, don't hesitate to ask for help from team members or DevOps engineers who are familiar with the CI/CD setup.
Git Pull Request Workflow: Best Practices and Tips
Establish Clear Code Review Guidelines
To ensure effective and consistent code reviews, it's essential to establish clear code review guidelines for your team or project. These guidelines define the expectations for code quality, review process, and feedback. Well-defined guidelines help reviewers understand what to look for during reviews and ensure that reviews are focused and productive.
Code review guidelines should cover aspects like:
- Code Style: Specify coding style conventions, formatting rules, and linting configurations.
- Code Quality Standards: Define criteria for code readability, maintainability, and complexity.
- Security Best Practices: Outline security considerations and secure coding practices to be followed.
- Testing Requirements: Specify expectations for unit tests, integration tests, and test coverage.
- Review Process: Define the steps in the code review process, including who should review, how many reviewers are required, and the expected turnaround time for reviews.
- Feedback Guidelines: Provide guidance on how to give constructive feedback, resolve disputes, and maintain a positive review culture.
Document these guidelines clearly and make them easily accessible to all team members. Regularly review and update the guidelines as needed based on project needs and team feedback. Having clear code review guidelines promotes consistency, reduces ambiguity, and improves the overall effectiveness of your pull request workflow.
Encourage Frequent Code Reviews
Frequent code reviews are a key factor in maximizing the benefits of pull requests. Smaller, more frequent pull requests are generally easier to review and integrate than large, infrequent ones. Encouraging frequent code reviews helps catch issues earlier in the development cycle, reduces the risk of merge conflicts, and promotes continuous integration.
Aim for small, focused pull requests that address specific features or bug fixes. Break down large features into smaller, manageable chunks that can be reviewed and merged incrementally. Encourage developers to create pull requests early and often, even for work in progress (using draft pull requests). Set expectations for reviewers to provide timely feedback and keep the review process moving efficiently. Frequent code reviews not only improve code quality but also facilitate knowledge sharing, collaboration, and a faster development pace.
Use Automated Tools to Enhance Code Quality
Leveraging automated tools to enhance code quality is a best practice that significantly improves the efficiency and effectiveness of your pull request workflow. As discussed earlier, linters, static analyzers, code formatters, and CI/CD systems can automate many aspects of code quality checks and validation.
Integrate linters and static analyzers into your CI pipeline to automatically scan code for style violations, potential bugs, security vulnerabilities, and code complexity issues on every pull request. Use code formatters to automatically enforce code style consistency. Set up CI/CD pipelines to automatically build, test, and deploy code changes. Automate security scanning and dependency vulnerability checks.
By automating these tasks, you free up human reviewers to focus on higher-level aspects of code review, such as design, architecture, and business logic. Automated tools provide consistent and objective feedback, catch issues early, and help maintain a high standard of code quality across your project.
Automating Code Review with GitHub Actions
GitHub Actions provides a powerful platform for automating various aspects of your development workflow, including code review. You can use GitHub Actions to automate tasks like running linters, static analyzers, running tests, and even automating parts of the code review feedback process.
For example, you can create a GitHub Actions workflow that runs ESLint and Prettier on every pull request to check for JavaScript code style and formatting issues. You can also use GitHub Actions to run static analysis tools like SonarQube or CodeQL to detect potential bugs and security vulnerabilities. Workflows can be configured to automatically add comments to pull requests based on the output of these tools, providing automated feedback directly to the pull request author.
Here's a basic example of a GitHub Actions workflow to run ESLint on pull requests:
name: ESLint Check

on:
  pull_request:
    branches: [ main ]

jobs:
  eslint:
    runs-on: ubuntu-latest
    steps:
      - uses: actions/checkout@v3
      - name: Set up Node.js
        uses: actions/setup-node@v3
        with:
          node-version: 16
      - name: Install dependencies
        run: npm install
      - name: Run ESLint
        run: npm run lint # Assuming you have a "lint" script in your package.json
This workflow checks out the code, sets up Node.js, installs dependencies, and runs the lint script (which should execute ESLint). You can adapt this workflow to integrate other linters, static analyzers, and testing tools, effectively automating parts of your code review process and enhancing code quality.
Conclusion: Mastering Collaborative Code Review with Git Pull Requests
Mastering collaborative code review with Git pull requests is essential for modern software development teams. By implementing a well-defined pull request workflow, teams can significantly enhance code quality, foster knowledge sharing, reduce bugs, and improve overall project stability. This guide has provided a comprehensive overview of Git pull request workflows, from understanding the fundamentals to implementing advanced techniques and troubleshooting common issues.
By adopting best practices such as writing clear commit messages, utilizing pull request templates, conducting thorough code reviews, incorporating reviewer feedback, and leveraging automation tools, teams can create a highly efficient and effective code review process. Embracing pull requests as a core part of your Git workflow is an investment that pays off in the long run, leading to higher quality software, a more collaborative development environment, and a more robust and maintainable codebase.
Continuously refining and adapting your pull request workflow to your team's specific needs and project requirements will further optimize your development process and contribute to the success of your software projects.
Frequently Asked Questions
What is a Git pull request and why is it important?
A Git pull request is a method for collaborative code review. It's important because it allows team members to review and discuss changes before they are merged into the main codebase, improving code quality.
How does a typical Git pull request workflow begin?
The workflow typically starts with a developer creating a new branch from the main branch, making their changes, and then pushing the branch to a remote repository like GitHub or GitLab.
What are some key steps involved in reviewing a Git pull request?
Key steps include examining the code changes, running tests to ensure functionality, and providing constructive feedback to the author, focusing on clarity and potential issues.
How do you address conflicts that arise during a Git pull request?
Conflicts are usually resolved by the author rebasing their branch onto the latest version of the target branch, resolving any merge conflicts, and then pushing the updated branch to the remote repository.
What happens after a Git pull request is approved?
Once approved, the pull request is merged into the target branch, typically the main branch, integrating the new code into the codebase. This often triggers CI/CD pipelines for automated testing and deployment.
Final Reflection: Embracing Collaborative Growth Through Code
The essence of collaborative code review, as highlighted throughout this guide, lies in its power to foster shared ownership and continuous improvement within development teams. In today's fast-paced software landscape, where innovation hinges on collective intelligence, embracing a robust Git pull request workflow is no longer a luxury, but a necessity for building high-quality, reliable, and maintainable software.
The impact of this workflow extends far beyond simply catching bugs; it cultivates a culture of learning and mentorship. Witnessing the evolution of code through constructive feedback has profoundly shaped my own understanding of best practices and architectural patterns. Coming together is a beginning, staying together is progress, and working together is success.
This quote perfectly encapsulates the spirit of collaborative code review, emphasizing that true success lies not just in individual brilliance, but in the synergy created through shared effort and mutual support.
As you integrate these principles into your own development practices, remember that the Git pull request workflow is more than just a technical process; it's a catalyst for growth, a platform for knowledge sharing, and a testament to the power of collaborative problem-solving. Let us all strive to create code that is not only functional but also a reflection of our collective wisdom and commitment to excellence. Embrace the feedback, learn from each other, and build a future where code is a testament to the power of collaboration.
Supercharge Your Code: Level Up Your Review Process!
Thanks for exploring collaborative code review! We hope this guide clarified how Git pull requests can transform your team's workflow and improve code quality. Now, let's put that knowledge into practice.
Here's how to proceed:
- Embrace the Power of Pull Requests: Integrate Git pull requests into your next project. Begin with a small feature branch to familiarize yourself with the process.
- Explore Branching Strategies: Experiment with various branching models like Gitflow or GitHub Flow to determine the best fit for your team. Iterative improvement is key!
- Spread the Word: Share this guide with your colleagues and initiate a discussion about enhancing your code review practices. Shared knowledge is crucial for success.
What small improvement will you implement in your code review process today?