
Branching in Git for Beginners: Isolating Features and Experiments Safely

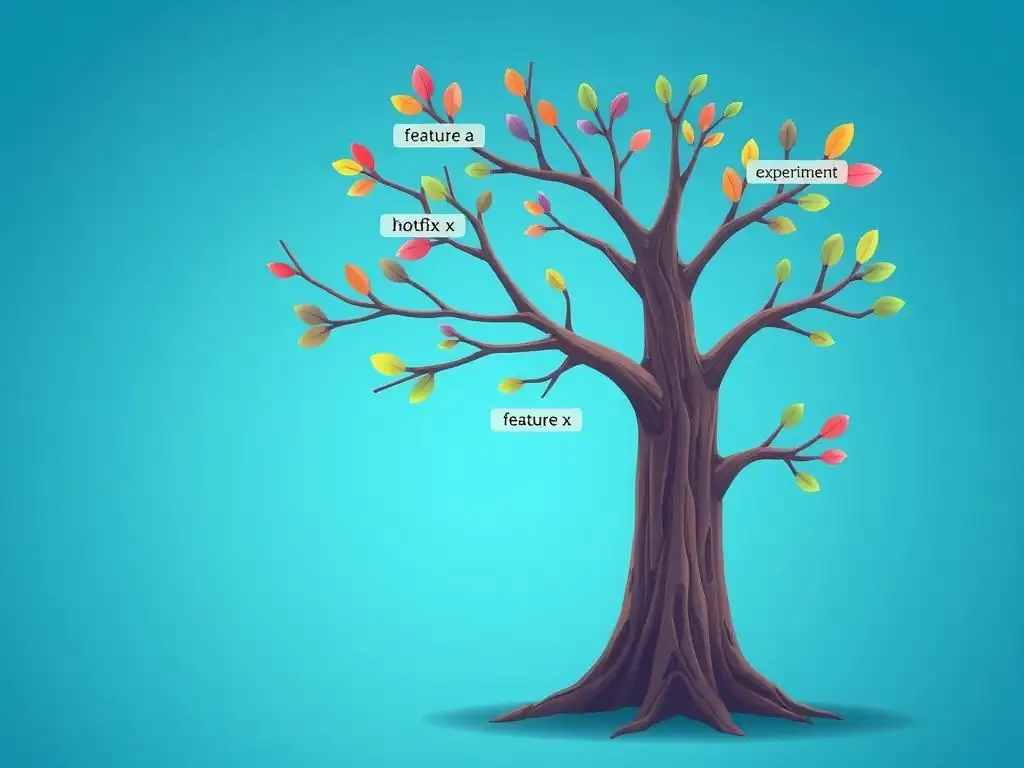
Welcome to Git and Version Control Hub, your central resource for mastering Git and version control!
Are you ready to unlock the power of collaborative coding and streamline your development workflow? Dive into our latest guide, " Git branching strategies for beginners," and discover how to isolate features and experiments safely using Git's powerful branching capabilities. Curious about how branching can revolutionize your coding process? Let's explore the fundamentals and get you started on the path to becoming a Git pro!
Effective Git Branching for Collaborative Software Development
- Introduction to Git Branching for Team Projects
- Creating Feature Branches: A Collaborative Approach
- Collaborative Development on Feature Branches: Isolating and Sharing Changes
- Integrating Feature Branches into the Main Branch: Code Review and Testing
- Exploring Git Branching Strategies for Collaborative Teams
- Managing Branches After Integration: Maintaining a Clean Repository
- Common Challenges with Git Branching in Teams (and Solutions)
- Advanced Git Branching Techniques for Teams (Brief Introduction)
- Git Branching for Bug Fixes: Rapid Response and Stability
- Conclusion: Leveraging Git Branching for Efficient Team Collaboration
- Frequently Asked Questions
- Final Reflection: Empowering Collaboration Through Safe Exploration
- Uncover the Power of Git Branching!
Introduction to Git Branching for Team Projects
Why Branching is Crucial for Collaborative Development
In collaborative software development, teams often work on different features, bug fixes, or experiments simultaneously. Without a system to manage these parallel efforts, chaos would ensue. Git branching provides this essential organizational structure. Imagine a team of developers working on a single codebase without branches.
Every change, regardless of its stability or purpose, would be directly integrated into the main project. This would inevitably lead to conflicts, instability, and a slowed-down development process. Branching allows teams to isolate their work, ensuring that new features or bug fixes are developed and tested independently before being integrated into the main project. This isolation is fundamental for maintaining a stable and functional main codebase while enabling parallel development streams.
Consider a scenario where one developer is implementing a new user authentication system while another is fixing a critical bug in the payment gateway. If both developers were working directly on the same codebase, their changes could easily interfere with each other, potentially introducing new bugs or breaking existing functionality. Git branching prevents this by allowing each developer to work in their isolated branch.
The developer working on the authentication system can experiment and iterate without affecting the bug fix, and vice versa. This parallel development not only speeds up the overall process but also significantly reduces the risk of introducing regressions into the stable parts of the project.
Understanding the Underlying Principles of Git Branches
At its core, a Git branch is simply a lightweight, movable pointer to a commit. Think of it as a bookmark in your project's history. When you create a new branch, you are essentially creating a new pointer that starts at the same commit as the branch you branched from, usually main or master. This new branch then evolves independently as you add new commits to it. It's crucial to understand that branches in Git are incredibly efficient and fast to create and switch between. Unlike branching in older version control systems, Git branching is designed to be lightweight and encouraged for even small, isolated tasks.
The beauty of Git's branching model lies in its non-linear history. Instead of a single, linear progression of changes, Git allows for diverging and merging histories, which perfectly mirrors the realities of collaborative development. Each branch represents a separate line of development, allowing teams to explore different ideas, fix bugs, and develop features in isolation.
When a feature or bug fix is complete and tested, the branch can be merged back into the main branch, integrating the changes into the project's primary development line. This merge operation doesn't alter the history of the feature branch but creates a new commit on the main branch that represents the integration of the feature branch's changes.
Practical Git Branching Techniques for Teams
For teams to effectively leverage Git branching, adopting practical techniques is essential. One fundamental practice is to create feature branches for every new feature or significant change. This ensures that each development effort is isolated and doesn't directly impact the main codebase until it's ready. Feature branches should be named descriptively, reflecting the feature they are developing, such as feature/user-authentication or feature/payment-gateway-integration. This naming convention enhances clarity and makes it easier for team members to understand the purpose of each branch.
Another crucial technique is to keep feature branches short-lived and focused. Long-lived feature branches can become difficult to merge back into the main branch due to code divergence and potential conflicts. Aim to integrate feature branches regularly, ideally every few days or at least weekly. This practice of frequent integration, often referred to as continuous integration in a broader context, helps to minimize merge conflicts and ensures that the main branch remains relatively up-to-date. Furthermore, regular code reviews on feature branches before merging are vital for maintaining code quality and ensuring that changes align with project standards and requirements.
Creating Feature Branches: A Collaborative Approach
Using git branch to Create a New Feature Branch for a Specific Task
Creating a feature branch in Git is a straightforward process using the git branch command. To start a new branch, you first need to ensure you are on the branch you want to branch from, typically main. You can check your current branch using git status. Once you are on the correct branch, you can create a new feature branch with the command git branch <feature-branch-name>. For example, to create a branch for implementing user profiles, you would use git branch feature/user-profiles. This command creates the new branch but does not switch you to it.
It's best practice to name your feature branches descriptively, reflecting the specific task or feature being developed. Using prefixes like feature/, bugfix/, or hotfix/ can help categorize branches and improve organization within the repository. For instance, if you are working on a bug fix related to user login, a suitable branch name might be bugfix/login-error. Clear and consistent branch naming conventions are crucial for team collaboration, making it easier for everyone to understand the purpose of each branch and navigate the project's branching structure effectively.
Switching Between Branches with git checkout for Focused Work
After creating a feature branch, you need to switch to it to start working on your changes. This is done using the git checkout command. To switch to the feature branch you just created, use the command git checkout <feature-branch-name>. For example, to switch to the feature/user-profiles branch, you would use git checkout feature/user-profiles. After executing this command, Git will update your working directory to reflect the files and history of the feature/user-profiles branch.
Alternatively, you can create and switch to a new branch in a single command using git checkout -b <new-branch-name>. For instance, git checkout -b feature/email-notifications will both create a branch named feature/email-notifications and immediately switch you to it. Switching branches is a frequent operation in Git workflows, and git checkout allows developers to seamlessly move between different lines of development. This ability to quickly isolate work in separate branches is a cornerstone of effective Git branching strategies for beginners and experienced developers alike.
Verifying Your Current Branch: git status and git branch for Clarity
When working with multiple branches, it's essential to know which branch you are currently on. Git provides two primary commands to verify your current branch: git status and git branch. The git status command provides a comprehensive overview of your working directory, including the current branch. The output of git status typically includes the line "On branch <branch-name , clearly indicating your active branch. Additionally,
git status shows information about staged and unstaged changes, as well as the status of your working tree relative to the repository.
The git branch command, when used without any arguments, lists all branches in your local repository. The current branch is highlighted with an asterisk * and often displayed in green in most Git command-line interfaces. For example, running git branch might output:
  main
* feature/user-profiles
  feature/payment-gateway
This output clearly shows that feature/user-profiles is the currently active branch. Regularly using git status or git branch is a good practice to ensure you are making changes in the intended branch and to avoid accidentally committing changes to the wrong branch, especially when working in a collaborative environment with multiple active branches.
Collaborative Development on Feature Branches: Isolating and Sharing Changes
Making Changes and Committing to Your Feature Branch with Clear Messages
Once you are working on your feature branch, the process of making changes and committing them is similar to working on the main branch. You make modifications to your code, stage the changes using git add <file> or git add ., and then commit them using git commit -m </q>Your commit message". However, when working on feature branches, it's even more crucial to write clear and descriptive commit messages. These messages serve as documentation for the changes you've made and are invaluable for your team members and your future self when reviewing the project history.
Effective commit messages should be concise yet informative, explaining the what and why of the changes. A good commit message typically starts with a short summary of the change (ideally under 50 characters), followed by a blank line, and then a more detailed explanation if necessary. For example, a commit message for implementing user profile updates might be:
feat: Implement user profile update functionality

This commit introduces the ability for users to update their profile information,
including name, email, and profile picture.  Input validation has been added
to ensure data integrity, and appropriate error messages are displayed to the user.
Clear commit messages not only improve code review but also facilitate understanding the evolution of the feature and make it easier to track down specific changes or revert commits if needed. In a collaborative setting, well-crafted commit messages significantly enhance team communication and project maintainability.
Integrating Changes from the Main Branch: Merging or Rebasing
As you work on your feature branch, the main branch of the project continues to evolve with changes from other team members. To keep your feature branch up-to-date and prevent significant divergence, it's essential to regularly integrate changes from the main branch into your feature branch. This integration can be achieved through either merging or rebasing. Merging incorporates changes from the main branch into your feature branch by creating a new "merge commit" that joins the histories of the two branches. To merge the main branch into your current feature branch, you would use the command git merge main.
Rebasing, on the other hand, integrates changes from the main branch by rewriting the history of your feature branch. It essentially replays your feature branch commits on top of the latest commit from the main branch, resulting in a linear history without merge commits. To rebase your feature branch onto the main branch, you would use the command git rebase main. Choosing between merging and rebasing often depends on team preferences and workflow. Merging preserves the history of when integrations occurred, while rebasing creates a cleaner, linear history, which some teams prefer.
Resolving Merge Conflicts: A Team-Oriented Approach
When integrating changes from the main branch into your feature branch, either through merging or rebasing, you might encounter merge conflicts. Merge conflicts occur when Git cannot automatically determine how to combine changes from different branches, typically when the same lines of code have been modified in both branches. Git will mark the conflicting files and indicate the conflicting sections within the files. Resolving merge conflicts is a collaborative task and a crucial aspect of effective Git branching strategies for beginners and advanced teams.
To resolve a merge conflict, you need to manually edit the conflicting files, choosing which changes to keep or combining changes from both branches. Git provides visual markers in the conflicting files to help you identify the conflicting sections, typically enclosed in <<<<<<<, =======, and >>>>>>> markers. After resolving the conflicts in each file, you need to stage the resolved files using git add <resolved-file> and then continue the merge or rebase process with git merge --continue or git rebase --continue. Communication within the team is key during conflict resolution. If you are unsure how to resolve a conflict, don't hesitate to ask for help from team members who might have a better understanding of the conflicting code sections or the intended changes.
Integrating Feature Branches into the Main Branch: Code Review and Testing
The git merge or git rebase Command: Choosing the Right Strategy
Once development on a feature branch is complete and the feature is ready to be integrated into the main project, the next step is to merge the feature branch into the main branch. As mentioned earlier, both git merge and git rebase can be used for integration, but they result in different histories. For integrating feature branches into the main branch, git merge is often the more commonly used and recommended strategy, especially in collaborative environments focused on preserving a detailed history of integrations. Merging creates a merge commit on the main branch, clearly marking the point of integration and preserving the entire history of the feature branch.
To merge a feature branch into the main branch, you first need to switch to the main branch using git checkout main. Then, use the command git merge <feature-branch-name>. For example, to merge the feature/user-profiles branch into main, you would execute git merge feature/user-profiles. git rebase, while useful for keeping feature branches up-to-date, is less frequently used for final integration into the main branch in collaborative workflows because it rewrites history, which can complicate tracking and auditing changes in the main branch over time, especially in larger teams.
Code Review Integration: Ensuring Quality and Collaboration
Before merging a feature branch into the main branch, code review is a critical step to ensure code quality, catch potential bugs, and promote knowledge sharing within the team. Code review is the process where other developers examine the code changes in a feature branch before they are integrated. This can be done through various tools and platforms, such as pull requests on GitHub, GitLab, or Bitbucket. A pull request (or merge request in GitLab) is essentially a request to merge your feature branch into the main branch, initiating the code review process.
During code review, reviewers examine the code for correctness, style, potential issues, and adherence to project standards. They provide feedback, suggest improvements, and may request changes before approving the merge. Addressing feedback and iterating on the code based on review comments is an integral part of the collaborative development process. Code review not only improves code quality but also serves as a valuable learning opportunity for team members, helping to disseminate knowledge and best practices across the team. Only after the code review is successfully completed and approved should the feature branch be merged into the main branch.
Testing Feature Branches Before Merging: Maintaining Stability
Thorough testing of feature branches is paramount before merging them into the main branch. Testing ensures that new features function as expected and do not introduce regressions or break existing functionality in the main codebase. Testing should be conducted at various levels, including unit tests, integration tests, and potentially end-to-end tests, depending on the complexity and scope of the feature. Ideally, automated testing should be integrated into the development workflow, with tests run automatically whenever changes are pushed to a feature branch.
Continuous integration (CI) systems can be configured to automatically build and test feature branches. If tests fail, the CI system should provide feedback to the developers, highlighting the issues that need to be addressed before the feature can be merged.
Only after all tests pass and the code has been reviewed and approved should a feature branch be considered ready for merging into the main branch. Rigorous testing at the feature branch level is crucial for maintaining the stability and reliability of the main branch and ensuring that only well-tested and functional code is integrated into the project's primary development line.
Exploring Git Branching Strategies for Collaborative Teams
Feature Branch Workflow: Collaborative Development on Individual Features
The Feature Branch Workflow is a fundamental and widely adopted Git branching strategy for collaborative development. In this workflow, each new feature or significant change is developed in its own dedicated feature branch, branched off from the main branch. Developers work in isolation on their feature branches, making commits and regularly integrating changes from the main branch as needed to stay up-to-date. This workflow promotes parallel development, allowing multiple team members to work on different features concurrently without interfering with each other's work or destabilizing the main branch.
The core principle of the Feature Branch Workflow is isolation. Feature branches provide a safe space for experimentation and development. Once a feature is complete, tested, and reviewed, it is merged back into the main branch. The main branch, in this workflow, represents the stable, production-ready codebase. This strategy is simple to understand and implement, making it suitable for both small and large teams. It's a cornerstone of many other more complex Git branching strategies and provides a solid foundation for effective collaborative development.
Gitflow Workflow: Release Management and Hotfixes [Explain Briefly]
Gitflow is a more elaborate branching strategy designed for projects with scheduled releases. It extends the Feature Branch Workflow by introducing additional branches to manage releases and hotfixes. In Gitflow, the main branch reflects the production-ready state, and a separate develop branch serves as the integration branch for features. Feature branches are branched off from develop and merged back into develop. For releases, release branches are created from develop, allowing for final stabilization and preparation before merging into both main (tagged for release version) and develop.
Gitflow also incorporates hotfix branches, which are branched directly from main to quickly address critical bugs in production. Hotfixes are merged back into both main and develop to ensure the bug fix is included in both the production branch and the ongoing development line. Gitflow is well-suited for projects with defined release cycles and a need for robust release management and hotfix procedures. However, its complexity can be overkill for simpler projects or teams practicing continuous delivery.
GitHub Flow: Continuous Integration and Deployment [Explain Briefly]
GitHub Flow is a simpler, branch-per-feature workflow optimized for teams practicing continuous integration and continuous deployment. It revolves around a single main branch that is always deployable. Feature branches are branched off from main, and once a feature is ready, it's merged back into main. Deployments are typically triggered from every merge to main. GitHub Flow emphasizes simplicity and rapid iteration, making it ideal for web applications and services where frequent deployments are common.
Unlike Gitflow, GitHub Flow avoids separate develop and release branches, streamlining the workflow. Environments other than production (like staging or testing) are often represented by feature branches or short-lived branches derived from main. GitHub Flow is easier to learn and implement than Gitflow, particularly for teams adopting continuous delivery practices. It promotes a fast-paced development cycle with frequent integrations and deployments.
Managing Branches After Integration: Maintaining a Clean Repository
Using git branch -d to Delete Local Branches After Successful Merges
After a feature branch has been successfully merged into the main branch and is no longer needed for active development, it's good practice to delete the local feature branch. This helps keep your local repository clean and uncluttered, making it easier to navigate and manage branches. To delete a local branch, you can use the command git branch -d <branch-name>. For example, to delete the local feature/user-profiles branch, you would use git branch -d feature/user-profiles.
Git will prevent you from deleting a branch if it hasn't been fully merged into its upstream branch. If you are sure you want to delete the branch even if it hasn't been merged (e.g., you are discarding the changes), you can use the command git branch -D <branch-name> (note the uppercase -D). However, be cautious when using -D as it will permanently delete the branch and any commits that are not reachable from other branches. Regularly deleting merged local branches contributes to a cleaner and more manageable Git repository, reducing visual clutter and potential confusion.
Deleting Remote Branches: git push origin --delete <branch_name> After Confirmation
In addition to deleting local branches, it's also important to delete remote feature branches after they have been merged and are no longer needed. Remote branches, especially on shared repositories like GitHub or GitLab, can accumulate over time and create clutter if not managed properly. To delete a remote branch, you use the git push command with the --delete option followed by the remote name (usually origin) and the branch name. For example, to delete the remote feature/user-profiles branch on the origin remote, you would use git push origin --delete feature/user-profiles.
It's crucial to confirm with your team that a remote branch is indeed no longer needed before deleting it, especially in collaborative environments. Deleting a remote branch is a permanent action, and while the commits are not necessarily lost (they might still be reachable through other branches or reflogs), it can be inconvenient or disruptive if a branch is deleted prematurely or by mistake. Maintaining clean remote repositories by deleting merged branches regularly improves repository hygiene and makes it easier for team members to navigate and understand the current state of the project.
Common Challenges with Git Branching in Teams (and Solutions)
Conflicting Changes: Strategies for Prevention and Resolution
Merge conflicts are a common challenge in collaborative Git branching workflows. They arise when changes made in different branches affect the same lines of code. While conflicts are inevitable in collaborative development, strategies can minimize their occurrence and facilitate efficient resolution. One key prevention strategy is frequent integration of changes from the main branch into feature branches. Regularly merging or rebasing feature branches helps to identify and resolve conflicts early, before they become more complex and intertwined.
Clear communication within the team is also crucial. When team members are aware of each other's work and potential areas of overlap, they can proactively coordinate changes and reduce the likelihood of conflicts. Using descriptive branch names and commit messages also helps in understanding the context of changes and resolving conflicts more effectively. When conflicts do occur, a team-oriented approach is essential. Developers should collaborate to understand the conflicting changes, discuss the best way to combine them, and ensure that the resolved code maintains the intended functionality.
Stale Branches: Regularly Updating or Removing Unused Branches
Stale branches, branches that are outdated and no longer actively worked on, can become a source of confusion and clutter in a Git repository. Over time, feature branches that are not regularly updated can diverge significantly from the main branch, making them harder to merge and potentially leading to more complex merge conflicts. To prevent stale branches, teams should establish a practice of regularly reviewing and managing branches. This includes updating feature branches with changes from the main branch and removing branches that are no longer needed or have become obsolete.
Regularly pruning local and remote branches is essential for maintaining a clean and manageable repository. Teams can implement policies for branch lifecycles, such as automatically closing feature branches after a certain period of inactivity or after they have been merged. Tools and scripts can also be used to identify stale branches and remind developers to update or remove them. Proactive branch management helps to keep the repository organized and reduces the risk of working with outdated or irrelevant branches.
Communication and Coordination: Keeping the Team Informed
Effective communication and coordination are paramount for successful Git branching in teams. Git branching workflows are inherently collaborative, and their effectiveness relies heavily on team members being aware of each other's work, branch structure, and integration plans. Clear communication channels, such as team meetings, chat platforms, or project management tools, should be used to keep everyone informed about branch creation, purpose, and status.
When starting new features or making significant changes, developers should communicate their plans to the team, especially if their work might overlap with others. During code reviews and merge processes, clear communication is essential for providing feedback, discussing changes, and resolving any issues collaboratively. Maintaining a shared understanding of the branching strategy and conventions, as well as promoting open communication about branch-related activities, is crucial for avoiding misunderstandings, reducing conflicts, and ensuring a smooth and efficient collaborative development workflow.
Advanced Git Branching Techniques for Teams (Brief Introduction)
Rebasing: When and How to Use It Effectively [Briefly Explain]
Rebasing is an advanced Git technique used to integrate changes from one branch into another by rewriting the commit history. Unlike merging, which creates a merge commit, rebasing replays the commits from one branch on top of another, resulting in a linear history. Rebasing is often used to keep feature branches up-to-date with the main branch, creating a cleaner history without merge commits in feature branches. However, rebasing rewrites history, which can be problematic in collaborative environments, especially when branches have already been shared with others.
Generally, rebasing is considered safe and beneficial for local feature branches that have not been pushed to a shared remote repository. It can simplify the history of feature branches and make them easier to merge into the main branch with a fast-forward merge. However, rebasing shared branches is strongly discouraged as it can cause significant confusion and conflicts for other team members who have based their work on the original branch history. When used appropriately and with caution, rebasing can be a powerful tool for maintaining a clean and streamlined Git history.
Cherry-Picking: Applying Specific Commits to Different Branches [Briefly Explain]
Cherry-picking is a Git command that allows you to select specific commits from one branch and apply them to another branch. It's useful when you want to incorporate only certain changes from a branch, rather than merging the entire branch. For example, you might cherry-pick a bug fix commit from a feature branch and apply it directly to the main branch without merging the entire feature branch. Cherry-picking creates a new commit on the target branch that has the same changes as the cherry-picked commit but a different commit hash.
While cherry-picking can be convenient in certain situations, it should be used sparingly. Overuse of cherry-picking can lead to a confusing and fragmented history, making it harder to track changes and understand the relationships between branches. It's generally preferable to use merging or rebasing for integrating changes between branches whenever possible, as these methods preserve the branch history and relationships more clearly. Cherry-picking is best suited for exceptional cases where only specific, isolated changes need to be transferred between branches.
Submodules and Subtrees: Managing Dependencies [Briefly Explain]
Git submodules and subtrees are advanced techniques for managing dependencies or including other Git repositories within your main repository. Submodules allow you to include an external repository as a subdirectory within your main repository, tracking it at a specific commit. Subtrees, on the other hand, merge another repository's history into your repository, effectively incorporating it as a subdirectory while maintaining its history within your main repository. Both submodules and subtrees provide ways to manage external code or libraries as part of your project, but they differ in their implementation and usage.
Submodules maintain a clear separation between the main repository and the external dependency, making it explicit that it's an external project. However, submodules can be more complex to manage, especially for beginners, as they require extra steps for initialization and updates. Subtrees integrate the external code more tightly into the main repository, making it feel more like a regular subdirectory. Subtrees are generally easier to use for simple dependency management but can be less explicit about the external nature of the included code. Choosing between submodules and subtrees depends on the specific needs of your project and team preferences.
Git Branching for Bug Fixes: Rapid Response and Stability
Creating Hotfix Branches for Critical Issues
For critical bugs that need immediate attention in a production environment, Git branching facilitates a rapid response through the use of hotfix branches. A hotfix branch is created directly from the main branch (or a release branch if using Gitflow) to isolate the bug fix from ongoing development. This ensures that bug fixes can be deployed quickly without including any potentially unstable or untested new features that are currently under development in feature branches. Hotfix branches are typically named with a prefix like hotfix/ followed by a descriptive identifier of the bug being addressed, such as hotfix/login-authentication-error.
Creating a hotfix branch involves branching directly from the stable branch ( main or release branch), implementing the necessary bug fixes, and thoroughly testing the changes. The focus of a hotfix branch is solely on resolving the critical bug with minimal changes to avoid introducing new issues. This targeted approach allows for a quick and focused response to production issues, ensuring stability and minimizing disruption for users.
Isolating Bug Fixes from Ongoing Development
The primary purpose of hotfix branches is to isolate bug fixes from the regular development workflow. By branching directly from the stable branch, hotfixes are developed independently of feature branches and other ongoing changes. This isolation is crucial for ensuring that only the necessary bug fixes are introduced into the production environment, minimizing the risk of regressions or unintended side effects from new, untested features. Isolating bug fixes also allows developers to focus solely on resolving the critical issue without being distracted by or interfering with other development activities.
This isolation strategy ensures that the hotfix process is streamlined and efficient, allowing for rapid deployment of bug fixes to production. Once a hotfix is developed and tested, it can be quickly merged back into the stable branch and deployed, addressing the critical issue promptly. This separation of concerns is a key advantage of using hotfix branches for managing urgent bug fixes in a controlled and stable manner.
Merging Hotfixes into Main and Release Branches
After a hotfix is developed and tested in a hotfix branch, it needs to be integrated back into the appropriate branches. Typically, a hotfix branch is merged back into both the main branch (or release branch it was branched from) and the develop branch (if using Gitflow or a similar workflow with a separate integration branch). Merging into the main branch ensures that the production environment is updated with the bug fix. Merging into the develop branch (or equivalent integration branch) ensures that the bug fix is also included in the ongoing development line, preventing the bug from reappearing in future releases.
The merge process for hotfixes should be straightforward and fast, as the changes are typically small and targeted. After merging, it's important to tag the main branch with a new version number reflecting the hotfix release. This tagging helps to track releases and provides a clear point in history representing the version with the bug fix applied. Properly merging hotfixes into both stable and development branches ensures that the bug is addressed across all relevant environments and development lines, maintaining consistency and stability throughout the project.
Conclusion: Leveraging Git Branching for Efficient Team Collaboration
The Benefits of Git Branching: Enhanced Productivity and Code Quality
Git branching is an indispensable tool for collaborative software development, offering numerous benefits that significantly enhance team productivity and code quality. By enabling parallel development, branching allows multiple developers to work on different features or bug fixes simultaneously without interfering with each other's work. This isolation reduces conflicts, speeds up development cycles, and allows teams to deliver features and fixes more quickly. Branching also provides a safe environment for experimentation and innovation. Developers can explore new ideas and implement complex features in isolated branches, without risking the stability of the main codebase.
Code quality is also improved through branching workflows, particularly when combined with code review processes. Feature branches provide a clear scope for code reviews, allowing reviewers to focus on specific changes and ensure they meet quality standards before integration. The ability to test feature branches independently before merging ensures that only well-tested and functional code is integrated into the main project, reducing the risk of regressions and improving overall software stability. Git branching, therefore, not only streamlines the development process but also contributes significantly to building higher quality software.
Next Steps: Continuous Improvement of Git Workflow and Team Practices
Mastering Git branching is an ongoing journey. While understanding the basics is essential, continuously improving your Git workflow and team practices is crucial for maximizing its benefits. Teams should regularly review their branching strategies, identify areas for improvement, and adapt their workflows to better suit their project needs and team dynamics. Experimenting with different branching strategies, such as Feature Branch Workflow, Gitflow, or GitHub Flow, and choosing the one that best aligns with the team's development style and release cycle is a valuable step.
Encouraging team members to deepen their Git knowledge through training and knowledge sharing is also important. Staying updated with new Git features and best practices ensures that the team is leveraging the full potential of Git. Regularly reviewing and refining commit message conventions, branch naming strategies, and code review processes further enhances team collaboration and workflow efficiency. Continuous improvement of Git workflow and team practices is a key factor in achieving long-term success in collaborative software development with Git.
Frequently Asked Questions
What is Git branching, and why is it important?
Git branching allows you to isolate features or experiments in your codebase without affecting the main development line. It's important because it enables parallel development and prevents introducing bugs into the stable code.
What's the most common branching strategy for beginners?
The most common strategy is a simple feature branch workflow, where each new feature gets its own branch. This allows for isolated development and easier code review before merging into the main branch.
How do I create a new branch in Git?
You can create a new branch using the command git branch <branch_name>. To switch to the new branch, use git checkout <branch_name> or, in a single command, git checkout -b <branch_name>. This ensures you're working in the isolated environment you intended.
What's the difference between merging and rebasing branches?
Merging creates a new merge commit, preserving the history of both branches. Rebasing rewrites the branch's history to appear as if it branched directly from the target branch, resulting in a cleaner, linear history.
How do I resolve conflicts when merging or rebasing?
Conflicts occur when Git can't automatically determine how to combine changes. You'll need to manually edit the conflicting files, mark the conflicts as resolved using git add, and then continue the merge or rebase process.
Final Reflection: Empowering Collaboration Through Safe Exploration
The journey through Git branching strategies for beginners reveals a powerful truth: safe experimentation fuels innovation. What began as a technical exploration of commands and workflows culminates in a deeper understanding of how to foster collaboration and mitigate risk in software development. The ability to isolate features and experiments within branches transforms the development process from a potentially chaotic free-for-all into a structured and manageable endeavor.
This concept of controlled exploration extends far beyond the realm of coding. It speaks to the human need for a safe space to test ideas, to iterate without fear of breaking the whole system. The lessons learned from Git branching – the value of isolation, the importance of merging thoughtfully, and the power of reverting mistakes – resonate with broader themes of learning and growth. As the saying goes: The only way to do great work is to love what you do.
This love often requires the freedom to experiment and the security of knowing that mistakes are recoverable.
Now, consider how you can apply these principles of branching in your own life. Where can you create a safe space to explore new ideas, to test different approaches, without jeopardizing your overall progress? Embrace the power of isolation, the discipline of merging thoughtfully, and the comfort of knowing that you can always revert. Embrace the branching mindset, and unlock your potential for innovation and growth.
Uncover the Power of Git Branching!
Thanks for taking the time to learn about branching in Git! You've now unlocked the secret to isolating your features and experiments, ensuring a safer and more organized workflow. Ready to put this knowledge into practice?
Here are a few actionable steps you can take right now:
- Immediately create a new branch for your next coding task! Don't touch your main branch until your changes are ready for prime time.
- Explore the Git documentation for advanced branching strategies like Gitflow or GitHub Flow for more complex projects.
- Share this article with a fellow developer who might be struggling with understanding Git branching and offer to help them practice!
What's one crazy experiment you're now confident enough to try in a new Git branch? Share your idea in the comments below!