
Simple Steps to Version Control Your Documentation with Git

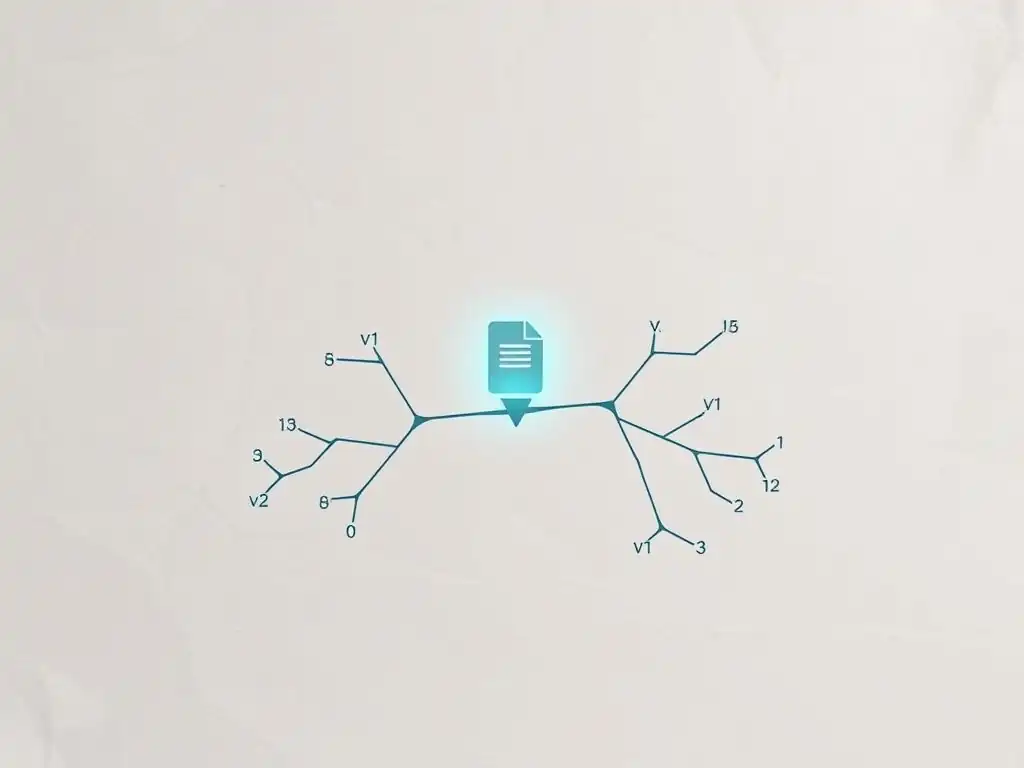
Welcome to Git and Version Control Hub!
Ever wrestled with keeping track of changes to your documentation? You're not alone! Dive into our guide, " Simple Steps to Version Control Your Documentation with Git," and discover how to leverage the power of Git, typically used for code, to streamline your workflow. Unlock the secrets to efficient collaboration and maintain a clear history of your documentation with our practical, step-by-step instructions. Read on to learn how to implement effective version control documentation with Git, and never lose track of a crucial revision again!
Streamlining Documentation with Git Version Control
- Introduction: Why Use Git for Documentation?
- Prerequisites: Preparing Your Git Environment
- Step 1: Structuring Your Documentation Project
- Step 2: Committing Documentation Changes Effectively
- Step 3: Branching for Feature Development and Bug Fixes
- Step 4: Collaborating on Documentation with Pull Requests
- Step 5: Versioning Documentation Releases
- Step 6: Automating Documentation Builds with CI/CD
- Best Practices for Git-Based Documentation
- Conclusion: Mastering Documentation Version Control
-
Frequently Asked Questions
- How can Git help with version control for documentation?
- What are the basic Git commands needed to version control documentation?
- How does branching in Git aid in managing different versions of documentation?
- Is Git suitable for managing documentation in collaborative environments?
- What are some strategies for organizing documentation files within a Git repository?
- Final Reflection: Empowering Documentation Through Version Control
- Master Your Docs: Start Versioning Today!
Introduction: Why Use Git for Documentation?
The Importance of Version Control for Documentation
In the realm of software development, version control is paramount for managing code changes, tracking revisions, and facilitating collaboration. However, the benefits of version control extend far beyond just code. Documentation, the often-underestimated cornerstone of any successful project, stands to gain immensely from a robust version control system. Imagine a scenario where multiple team members are simultaneously updating different sections of a crucial user manual.
Without version control, tracking changes, reverting errors, and ensuring consistency would quickly descend into chaos. Version control for documentation provides a structured approach to manage these changes, ensuring that every modification is recorded, traceable, and reversible. This meticulous tracking is not merely about record-keeping; it's about safeguarding the integrity and reliability of your documentation as it evolves alongside your project.
The significance of version control for documentation becomes even more pronounced when considering the iterative nature of software development. As features are added, bugs are fixed, and the product evolves, the documentation must keep pace. Outdated or inaccurate documentation can lead to user confusion, increased support requests, and ultimately, a diminished user experience.
Version control acts as a safety net, enabling documentation teams to confidently make updates, knowing they can always revert to previous versions if needed. This ability to roll back to a prior state is crucial for correcting errors introduced during updates and for comparing different versions to understand how the documentation has evolved over time. Furthermore, version control fosters a collaborative environment, allowing multiple contributors to work on documentation concurrently without overwriting each other's changes or creating conflicting versions.
Benefits of Git for Documentation Management
Git, a widely adopted distributed version control system, offers a plethora of advantages when applied to documentation management. Its core strength lies in its branching and merging capabilities, allowing for parallel development streams and seamless integration of changes. For documentation, this translates to the ability to create separate branches for new features, major revisions, or even translations, without disrupting the main documentation baseline.
This isolation of work in branches ensures that ongoing updates can be developed and reviewed independently before being merged back into the main documentation, maintaining stability and clarity. Git's efficient handling of branches and merges is particularly beneficial for larger documentation projects involving multiple contributors or complex updates.
Beyond branching, Git's distributed nature provides inherent redundancy and data security. Each team member working with a Git repository has a complete copy of the entire documentation history on their local machine. This distributed architecture means that even if a central server fails, no data is lost, as every collaborator possesses a backup. This resilience is crucial for protecting valuable documentation assets.
Moreover, Git's commit history acts as a detailed audit trail of every change made to the documentation, including who made the change, when it was made, and why. This comprehensive history is invaluable for tracking down the origin of errors, understanding the evolution of documentation content, and ensuring accountability within the documentation team. The combination of robust version control features, distributed architecture, and detailed history makes Git an ideal choice for managing documentation effectively.
Git for Docs: Enhancing Collaboration and Accuracy
Utilizing Git for documentation, often referred to as "Docs as Code," significantly enhances collaboration among writers, editors, and subject matter experts. Git's collaborative workflows, primarily through pull requests and code reviews, can be directly applied to documentation. Writers can work on documentation updates in their branches, and then submit pull requests to propose their changes.
This process allows for peer review by other team members, ensuring accuracy, consistency, and clarity before changes are incorporated into the main documentation. The structured review process inherent in Git workflows helps to catch errors early, improve the overall quality of the documentation, and foster a collaborative culture within the documentation team.
Furthermore, Git promotes accuracy by providing a single source of truth for documentation. Instead of fragmented documents residing in shared drives or individual computers, Git centralizes the documentation repository, ensuring that everyone is working with the latest and most accurate version. This centralized approach eliminates the confusion and errors that can arise from working with outdated or disparate document versions.
By using Git, documentation becomes a living, evolving entity that is continuously improved and refined through collaborative efforts and rigorous version control practices. This commitment to accuracy and collaboration, facilitated by Git, ultimately leads to better documentation that serves users effectively and contributes to the overall success of the project.
Prerequisites: Preparing Your Git Environment
Installing Git: A Concise Guide
Before you can harness the power of Git for your documentation, you need to have Git installed on your local machine. The installation process is straightforward and varies slightly depending on your operating system. For Windows users, the official Git website provides an executable installer that guides you through the installation process with default settings suitable for most users. macOS users may already have Git installed, but it's often an older version. The recommended approach for macOS is to use package managers like Homebrew or MacPorts to install the latest version of Git. For example, using Homebrew, you would simply run the command brew install git in your terminal. Linux distributions usually offer Git through their package managers as well. For Debian-based systems like Ubuntu, you can install Git using sudo apt-get install git. Similarly, for Fedora or CentOS, the command would be sudo yum install git or sudo dnf install git.
Once the installation is complete, it's prudent to verify that Git is correctly installed and accessible from your command line or terminal. Open your terminal or command prompt and type git --version. If Git is installed correctly, this command will display the installed Git version. This simple check confirms that Git is properly configured on your system and ready to be used for version controlling your documentation. Taking this initial step ensures a smooth transition into using Git for documentation management and avoids potential setup issues down the line.
Creating a Repository: Initializing Git for Your Project (Link to GitHub Docs on Repository Creation)
With Git installed, the next crucial step is to create a Git repository for your documentation project. A Git repository is essentially a directory that contains all the files for your documentation, along with the complete history of changes tracked by Git. To initialize a Git repository, navigate to the root directory of your documentation project in your terminal or command prompt. Once you are in the correct directory, execute the command git init. This command initializes an empty Git repository in the current directory, creating a hidden .git subdirectory which stores all the repository metadata and history.
After initializing the repository, you need to add your documentation files to Git's tracking. To do this, use the command git add .. This command stages all the files in your current directory and its subdirectories for the first commit. Staging files means preparing them to be included in the next snapshot of your project history. Finally, to create the initial commit, use the command git commit -m "Initial commit of documentation". The -m flag allows you to provide a commit message directly in the command. This message should be concise and descriptive, summarizing the changes included in the commit. In this case, "Initial commit of documentation" clearly indicates that this is the first version of your documentation being added to Git. This initial commit marks the starting point of your documentation's version history within Git.
Essential Git Commands for Documentation
While Git offers a vast array of commands, a handful of essential commands are particularly relevant for managing documentation. git status is your go-to command for checking the current state of your repository. It shows you which files have been modified, staged, or are untracked, providing a quick overview of your working directory. git add <file> or git add . (as previously mentioned) stages changes for the next commit. git commit -m "<commit message<q> records staged changes with a descriptive message, creating a new point in your project history. git log displays the commit history, showing commit messages, authors, and dates, allowing you to review past changes.
For collaboration and branching, git branch lists existing branches and allows you to create new ones using git branch <branch-name>. git checkout <branch-name> switches to a different branch, allowing you to work on isolated features or bug fixes. git merge <branch-name> integrates changes from one branch into the current branch. git pull origin <branch-name> fetches changes from a remote repository and merges them into your local branch. git push origin <branch-name> uploads your local branch and commits to a remote repository. Understanding and utilizing these core Git commands will empower you to effectively version control your documentation, collaborate with others, and manage the evolution of your documentation project with confidence.
Step 1: Structuring Your Documentation Project
Organizing Documentation Files for Clarity
The organization of your documentation files is crucial for maintainability, navigation, and overall usability. A well-structured documentation project makes it easier for both contributors and users to find and understand the information they need. A common and effective approach is to organize documentation by topic or module. For instance, you might have separate directories for user guides, API references, tutorials, and developer documentation. Within each directory, further subdirectories can categorize content by specific features, functionalities, or user roles. For example, in a User Guides" directory, you could have subdirectories for "Installation," "Configuration," and "Troubleshooting."
Another organizational strategy is to mirror the structure of your software project itself. If your software is modular, your documentation can reflect this modularity, with each module having its corresponding documentation section. This approach is particularly beneficial for API documentation or developer guides where the documentation directly relates to specific code components.
Regardless of the chosen structure, consistency is key. Adopt a clear and logical file naming convention and stick to it throughout your project. Using descriptive filenames and directory names enhances discoverability and makes it easier to navigate the documentation project, especially as it grows in size and complexity.
Choosing a File Format: Markdown for Simplicity and Portability
Selecting the right file format for your documentation is a critical decision that impacts readability, maintainability, and the ease of generating output formats like HTML or PDF. While various formats exist, Markdown has emerged as a popular and highly effective choice for documentation projects, particularly when used with Git. Markdown is a lightweight markup language with plain text formatting syntax.
Its simplicity makes it easy to write and read, even in its raw form. This readability is a significant advantage for collaborative documentation projects, as it lowers the barrier to entry for contributors who may not be familiar with complex markup languages.
Markdown's portability is another key benefit. Markdown files are plain text, meaning they can be opened and edited with any text editor. This platform independence ensures that your documentation can be accessed and modified across different operating systems and environments. Furthermore, Markdown is widely supported by documentation generators like Sphinx, MkDocs, and Docusaurus. These tools can effortlessly convert Markdown files into beautifully formatted HTML websites, PDFs, and other output formats. The combination of simplicity, portability, and broad tool support makes Markdown an excellent choice for version-controlled documentation projects, streamlining the writing, editing, and publishing workflow.
Creating a .gitignore File: Excluding Build Artifacts and Temporary Files
When version controlling documentation, it's essential to only track the source files – typically Markdown or other text-based formats – and exclude generated files, temporary files, and build artifacts. This is where the .gitignore file comes into play. A .gitignore file is a plain text file in your repository that specifies intentionally untracked files that Git should ignore. By listing patterns in this file, you prevent Git from accidentally tracking files that are not part of your source documentation or are automatically generated. This keeps your repository clean, focused on the essential documentation content, and reduces unnecessary noise in your commit history.
Common items to include in your .gitignore file for a documentation project are build directories (e.g., _build, build, public), output formats (e.g., .html, .pdf, .epub), temporary files (e.g., .tmp, *.swp), and editor-specific files (e.g., .idea, .vscode). Each line in the .gitignore file specifies a pattern to match against file paths. You can use wildcards like * (matches zero or more characters) and ? (matches a single character) to create flexible patterns. For example, *.html would ignore all HTML files, and _build/ would ignore the entire _build directory and its contents. Properly configuring your .gitignore file ensures that your Git repository remains focused on the source documentation, making it cleaner, more efficient, and easier to manage.
Step 2: Committing Documentation Changes Effectively
Staging Changes: Preparing for a Commit
Before you can record changes to your documentation in Git's history, you need to "stage" those changes. Staging is the process of selecting which modified files or new files you want to include in your next commit. Think of staging as preparing a snapshot of your current work that you are ready to save as a version.
Git uses a staging area (also known as the index) to hold these prepared changes. This intermediate step allows you to review and fine-tune the set of changes you are about to commit, ensuring that only relevant and intended modifications are included in each version.
To stage changes, you use the git add command. As previously mentioned, git add <file> stages a specific file, while git add . stages all changes in the current directory and its subdirectories. After staging, you can use git status to see which files are staged and ready to be committed. Staged files are typically listed in green in the git status output. If you accidentally stage a file you didn't intend to commit, you can unstage it using git reset HEAD <file>. This command removes the file from the staging area without discarding your changes to the file itself. The staging area provides a crucial buffer, allowing you to carefully curate each commit and ensure that your commit history is clean and meaningful.
Writing Clear and Concise Commit Messages
Commit messages are a vital part of Git version control, especially for documentation. They serve as a concise record of why a particular change was made, providing valuable context for you and your collaborators in the future. A well-written commit message should be informative, brief, and explain the "what" and "why" of the changes, not just the "how."
A widely adopted convention for commit messages is to use a concise summary line followed by a more detailed explanation if necessary. The summary line should be no more than 50 characters and should complete the sentence "If applied, this commit will...".
For example, a good commit message summary might be "Fix typo in installation instructions." If more detail is needed, you can add a blank line after the summary line, followed by a more elaborate explanation in the body of the commit message. The body can provide context, reasoning, and any relevant details about the changes.
For instance, you might elaborate with "The word 'intallation' was misspelled as 'intallation' in the prerequisites section. This commit corrects the typo to improve clarity and professionalism." Consistent and informative commit messages create a readable and understandable commit history, making it easier to track changes, understand the evolution of the documentation, and collaborate effectively with others.
Committing Changes: Recording Iterations
Once you have staged your changes and written a clear commit message, you are ready to commit those changes. The git commit command is used to record the staged snapshot of your documentation in the repository's history. As you've already seen, the command git commit -m "<commit message<q> commits the staged changes and includes the commit message directly in the command line. After executing this command, Git creates a new commit object containing the staged changes and the commit message, effectively creating a new version of your documentation.
Each commit represents a distinct iteration of your documentation. Committing frequently and in small, logical units is a best practice. Small commits are easier to review, understand, and revert if necessary.
Instead of making large, monolithic commits that encompass numerous unrelated changes, strive to break down your work into smaller, focused commits, each addressing a specific aspect of the documentation. For example, instead of one commit for Update user guide," consider separate commits for "Add section on new feature X," "Clarify instructions for feature Y," and "Fix typos in chapter Z." This granular approach to committing creates a more detailed and manageable commit history, making it easier to track changes, collaborate effectively, and maintain a high-quality documentation base.
Step 3: Branching for Feature Development and Bug Fixes
Creating a Branch for New Features or Bug Fixes
Git branching is a powerful feature that allows you to diverge from the main line of development and work on isolated changes without affecting the stable version of your documentation. Creating branches is particularly useful when adding new features to your documentation or fixing bugs. Instead of directly modifying the main documentation (typically on the main or master branch), you create a new branch specifically for your feature or bug fix. This branch acts as a safe sandbox where you can experiment, make changes, and test your updates without risking the stability of the primary documentation.
To create a new branch, you use the git branch <branch-name> command. For example, to create a branch named feature-new-api-docs, you would run git branch feature-new-api-docs. This command creates the branch, but it doesn't switch you to it yet. To switch to the newly created branch, use the git checkout <branch-name> command, such as git checkout feature-new-api-docs. Alternatively, you can create and switch to a new branch in a single step using git checkout -b <branch-name>, for example, git checkout -b feature-new-api-docs. Once you are on your feature branch, any commits you make will be isolated to that branch, allowing you to work independently and safely.
Isolating Development Work with Branches
Branches provide a crucial mechanism for isolating development work, especially in collaborative documentation projects. When multiple contributors are working on different aspects of the documentation simultaneously, branches prevent their changes from interfering with each other. Each contributor can work on their feature or bug fix in their own branch, without the risk of overwriting or conflicting with changes made by others. This isolation is particularly valuable for complex documentation updates or when working on features that are not yet ready for integration into the main documentation.
By isolating development work in branches, you can also experiment with different approaches or ideas without fear of breaking the main documentation. If a particular approach doesn't work out, you can simply discard the branch without affecting the main codebase. Branches also facilitate code review workflows.
Once a feature or bug fix is complete in a branch, it can be reviewed by other team members before being merged into the main branch. This review process ensures the quality and accuracy of the documentation and promotes collaboration within the documentation team. Branches are fundamental to a robust and efficient Git workflow for documentation management.
Merging Branches: Integrating Changes (Link to GitLab Docs on Merging)
Once you have completed your work on a feature branch or bug fix branch and it has been reviewed and approved, the next step is to integrate those changes back into the main documentation branch. This process is called merging. Merging brings the changes from your branch into another branch, typically the main or master branch, making them part of the primary documentation baseline. Before merging, it's essential to ensure that your feature branch is up-to-date with the main branch to minimize potential merge conflicts. You can update your branch by merging the main branch into it using git merge main (assuming you are on your feature branch).
To perform the merge, first switch to the target branch, usually main or master, using git checkout main. Then, execute the command git merge <branch-name>, replacing <branch-name> with the name of the branch you want to merge, for example, git merge feature-new-api-docs. Git will then attempt to automatically merge the changes from the feature branch into the main branch. In most cases, Git can perform merges automatically, especially if the branches have diverged cleanly. However, if there are conflicting changes (e.g., the same lines of a file have been modified in both branches), Git will require you to manually resolve these conflicts before completing the merge. Successfully merging branches integrates your work back into the main documentation, making it available to users and part of the official documentation baseline.
Step 4: Collaborating on Documentation with Pull Requests
Setting Up a Remote Repository: GitHub or GitLab
For collaborative documentation projects using Git, a remote repository is essential. A remote repository is a version of your Git repository hosted on a server, accessible to multiple collaborators. Platforms like GitHub and GitLab are popular choices for hosting remote Git repositories. They provide not only repository hosting but also a range of collaboration features like issue tracking, pull requests, and project management tools. Setting up a remote repository on GitHub or GitLab allows your team to share code, collaborate on documentation, and manage the project centrally.
To set up a remote repository, you first need to create an account on GitHub or GitLab. Once you have an account, you can create a new repository on the platform's website. During repository creation, you'll typically be asked to provide a repository name, a description, and choose visibility settings (public or private). After creating the remote repository, you need to connect your local Git repository to it. This is done using the git remote add origin <remote-repository-url> command. Replace <remote-repository-url> with the URL of your remote repository, which you can find on the repository page on GitHub or GitLab. The name origin is a common convention for the default remote repository. Once you have added the remote, you can push your local commits to the remote repository using git push origin <branch-name>. Setting up a remote repository lays the foundation for collaborative workflows using Git.
Collaboration: Branching and Pull Requests
Collaboration on documentation using Git and platforms like GitHub or GitLab is significantly enhanced by branching and pull requests. The typical collaborative workflow involves each contributor working on their changes in their own branch, as discussed earlier. Once a contributor has completed their work on a branch and is ready to submit it for review and integration, they create a pull request (or merge request in GitLab) against the main branch.
A pull request is essentially a request to merge the changes from your branch into another branch, usually the main branch. It initiates a code review process and provides a platform for discussion and feedback on the proposed changes.
To create a pull request, you typically navigate to your repository on GitHub or GitLab and click the "New pull request" button. You'll then select your feature branch as the source branch and the main branch as the target branch. GitHub and GitLab will automatically show the differences between the branches, allowing reviewers to easily see the proposed changes. Reviewers can then add comments, suggest changes, and approve or reject the pull request. Pull requests provide a structured and transparent way to collaborate on documentation, ensuring that changes are reviewed and discussed before being incorporated into the main documentation.
Resolving Conflicts: Handling Merge Conflicts
Merge conflicts can arise when merging branches, particularly when multiple contributors are working on the same files or lines of text concurrently. A merge conflict occurs when Git cannot automatically determine how to integrate changes from different branches. When a merge conflict occurs, Git will pause the merge process and mark the conflicting files. You will need to manually resolve these conflicts before you can complete the merge. Conflicting sections in files are typically marked with special conflict markers: <<<<<<<, =======, and >>>>>>>. The content between <<<<<<< HEAD and ======= represents the changes in your current branch, and the content between ======= and >>>>>>> <branch-name> represents the changes in the branch being merged.
To resolve a merge conflict, you need to manually edit the conflicting file, decide which changes to keep, and remove the conflict markers. You might need to combine changes from both branches or choose one version over the other. After resolving the conflicts in all marked files, you need to stage the resolved files using git add <resolved-file> and then continue the merge process by running git commit. Git will then create a merge commit that integrates the resolved changes. Resolving merge conflicts is a necessary part of collaborative Git workflows, and understanding how to handle them effectively is crucial for smooth collaboration.
Step 5: Versioning Documentation Releases
Tagging Releases: Marking Specific Versions
As your documentation evolves, it's often necessary to mark specific points in history as releases. Tagging releases allows you to create human-readable names (tags) for specific commits, making it easy to refer to and retrieve particular versions of your documentation. Tags are particularly useful for associating documentation versions with software releases. For example, if you release version 1.0 of your software, you can tag the corresponding documentation commit with a tag like v1.0. This tag then acts as a permanent marker for that specific version of the documentation.
To create a tag in Git, you use the git tag <tag-name> <commit-hash> command. If you omit the <commit-hash>, Git will tag the current commit. For example, to tag the current commit as v1.0, you would run git tag v1.0. It's best practice to create annotated tags, which include a message and the tagger's information. To create an annotated tag, use the -a flag and the -m flag for the message: git tag -a v1.0 -m "Release version 1.0 documentation". After creating a tag locally, you need to push it to the remote repository using git push origin --tags to make it available to others. Tags provide a stable and easily identifiable way to reference specific documentation releases.
Tags are invaluable for historical tracking of documentation versions. They provide a clear and persistent way to identify and access documentation associated with past software releases or significant documentation milestones. Instead of relying on commit hashes, which are long and difficult to remember, you can use tags to quickly jump back to a specific version of the documentation. For instance, if a user is using version 1.0 of your software and encounters an issue, you can easily check out the documentation tagged as v1.0 to provide them with the correct documentation for their software version.
Tags also simplify the process of comparing documentation versions. You can use Git commands like git diff <tag1> <tag2> to compare the differences between two tagged versions of the documentation. This is helpful for understanding how the documentation has changed between releases and for identifying specific changes that were introduced in each version. Furthermore, tags can be used to generate release notes or documentation archives for specific software versions. By using tags effectively, you create a well-organized and easily navigable history of your documentation, making it easier to manage and maintain over time.
Creating Release Notes: Summarizing Changes
Release notes are essential for communicating the changes and improvements included in each documentation release. They provide a summary of what's new, what's changed, and what's fixed in a particular documentation version. Release notes help users understand the evolution of the documentation and quickly grasp the key updates in each release. When using Git tags to mark releases, generating release notes becomes a streamlined process. You can use Git commands to extract the commit messages between two tags and automatically generate a draft of your release notes.
For example, you can use git log --pretty=format:"- %s" <tag1>..<tag2> to get a list of commit messages between tag tag1 and tag2. This output can then be formatted and refined to create comprehensive release notes. Release notes typically include sections like "New Features," "Improvements," "Bug Fixes," and "Known Issues." They should be written in clear and concise language, targeting the intended audience of your documentation. Including release notes with each tagged documentation release enhances the user experience by providing valuable context and transparency about documentation updates, fostering trust and user satisfaction.
Step 6: Automating Documentation Builds with CI/CD
Integrating Git with CI/CD Pipelines
Continuous Integration and Continuous Delivery (CI/CD) pipelines can significantly streamline the documentation workflow, automating the process of building, testing, and deploying documentation updates whenever changes are pushed to your Git repository. Integrating Git with CI/CD pipelines automates tasks that would otherwise be manual and time-consuming, such as generating HTML from Markdown, running documentation checks, and deploying the updated documentation to a web server. This automation not only saves time and effort but also ensures consistency and reduces the risk of human error in the documentation release process.
Popular CI/CD platforms like Jenkins, GitLab CI, GitHub Actions, and CircleCI can be configured to trigger documentation builds automatically when new commits are pushed to specific branches in your Git repository. The CI/CD pipeline typically consists of several stages, such as checkout (fetching the latest code from Git), build (generating documentation output), test (running documentation checks and validation), and deploy (publishing the updated documentation). By integrating Git with CI/CD, you create a fully automated documentation pipeline, ensuring that your documentation is always up-to-date and readily available whenever changes are made to the source files in Git.
Automatically Deploying Documentation Updates
One of the key benefits of CI/CD for documentation is the ability to automatically deploy documentation updates. Once the documentation build and test stages in the CI/CD pipeline are successful, the pipeline can automatically deploy the generated documentation to a web server or hosting platform. This automated deployment process eliminates the need for manual uploads or deployments, ensuring that documentation updates are published quickly and efficiently. Automated deployment also reduces the risk of inconsistencies between the documentation source and the published documentation, as the deployment process is consistently executed by the CI/CD pipeline.
The deployment stage in a CI/CD pipeline can be configured to deploy documentation to various destinations, such as static website hosting services (e.g., Netlify, Vercel, GitHub Pages), cloud storage (e.g., AWS S3, Google Cloud Storage), or dedicated documentation hosting platforms. The specific deployment method will depend on your documentation hosting infrastructure and requirements. By automating documentation deployment, you ensure that users always have access to the latest and most accurate documentation, improving their experience and reducing support requests related to outdated documentation.
Tools for Documentation Generation: Sphinx, MkDocs, Docusaurus
Several excellent tools are available for generating documentation from source files, particularly Markdown, and these tools integrate seamlessly with Git and CI/CD pipelines. Sphinx is a powerful Python-based documentation generator widely used for creating technical documentation, especially for Python projects. MkDocs is another popular choice, known for its simplicity and ease of use, particularly for creating static documentation websites from Markdown files. Docusaurus, developed by Facebook, is a modern static site generator optimized for building documentation websites with a focus on user experience and SEO.
These documentation generation tools typically take Markdown files as input and produce HTML, PDF, and other output formats. They often support features like theming, search functionality, versioning, and internationalization. Integrating these tools into your CI/CD pipeline allows you to automate the documentation generation process. The CI/CD pipeline can execute the documentation generator after checking out the latest code from Git, and then deploy the generated output automatically. Using these tools in conjunction with Git and CI/CD creates a robust and efficient documentation workflow, enabling you to produce high-quality documentation with minimal manual effort.
Best Practices for Git-Based Documentation
Consistent Commit Messages: Maintaining a Readable History
Maintaining a consistent style and format for commit messages is crucial for creating a readable and understandable commit history. As previously discussed, commit messages should be concise, informative, and follow a common convention, such as using a summary line followed by an optional detailed body. Consistency in commit messages makes it easier to scan the commit history, understand the purpose of each change, and track down specific modifications. Encourage all contributors to adhere to the same commit message guidelines to ensure a uniform and well-maintained commit history.
Establish clear commit message conventions within your documentation team and communicate these guidelines to all contributors. Tools like commitlint can be used to automatically enforce commit message formatting rules, ensuring consistency across all commits. A well-structured and consistent commit history is not just for archival purposes; it's a valuable resource for understanding the evolution of your documentation, debugging issues, and collaborating effectively over time. Investing in maintaining a readable commit history pays dividends in the long run by improving documentation maintainability and team collaboration.
Regular Branching and Merging: Keeping Documentation Current
Adopting a regular branching and merging workflow is essential for keeping your documentation current and managing changes effectively. Regularly creating branches for new features, bug fixes, or significant revisions ensures that changes are isolated, reviewed, and integrated in a controlled manner. Avoid making large, infrequent commits directly to the main branch. Instead, encourage contributors to work in short-lived feature branches and merge them back into the main branch frequently. Frequent merging helps to minimize merge conflicts and keeps the main branch relatively stable and up-to-date.
Establish a clear branching strategy that suits your documentation project and team workflow. Common branching strategies include Gitflow and GitHub Flow. Regularly merging changes from the main branch into feature branches (rebasing or merging) helps to keep feature branches synchronized and reduces the risk of merge conflicts when the feature branch is eventually merged back into the main branch. A well-defined and consistently followed branching and merging strategy is crucial for managing documentation changes effectively and ensuring that your documentation remains current and accurate.
Peer Review: Ensuring Quality and Accuracy
Peer review is a vital practice for ensuring the quality and accuracy of your documentation. Before merging any significant documentation changes into the main branch, have them reviewed by other team members. Peer review helps to catch errors, inconsistencies, and areas for improvement that might be missed by the original author. Pull requests in GitHub or GitLab provide an excellent platform for conducting peer reviews. Reviewers can examine the proposed changes, provide feedback, suggest edits, and approve or reject the pull request.
Establish a clear peer review process for documentation changes. Define who should review documentation updates, what aspects to focus on during reviews (e.g., accuracy, clarity, completeness, style), and how to handle review feedback. Encourage constructive feedback and create a culture of collaboration and continuous improvement within your documentation team. Peer review not only improves the quality of your documentation but also fosters knowledge sharing and collaboration among team members, contributing to a more robust and reliable documentation resource.
Conclusion: Mastering Documentation Version Control
Git: A Powerful Tool for Documentation
Git, initially designed for code version control, proves to be an equally powerful and versatile tool for managing documentation. Its robust features, including branching, merging, commit history, and collaboration workflows, are directly applicable to documentation projects. By adopting Git for version control documentation, teams can streamline their workflow, improve collaboration, enhance accuracy, and ensure that their documentation evolves in sync with their software or products. The "Docs as Code" approach, powered by Git, transforms documentation from a static artifact into a living, versioned entity that is actively managed and continuously improved.
The benefits of using Git for documentation extend beyond just version tracking. Git fosters a collaborative environment, enabling multiple contributors to work on documentation concurrently and efficiently. It provides a clear audit trail of changes, making it easy to track down errors, understand the evolution of documentation content, and revert to previous versions if needed. Furthermore, Git integrates seamlessly with CI/CD pipelines, automating documentation builds, tests, and deployments, further streamlining the documentation workflow and ensuring that documentation is always up-to-date and readily available.
Further Resources: Expanding Your Knowledge (Link to Git Documentation)
To deepen your understanding of Git and its application to documentation, numerous resources are available online. The official Git documentation is an excellent starting point, providing comprehensive information on Git commands, concepts, and workflows. Websites like GitHub and GitLab offer extensive documentation on their platforms and how to use Git for collaboration. Online tutorials, blog posts, and video courses on Git version control are readily accessible and can help you master Git skills at your own pace. Exploring these resources will further enhance your proficiency in using Git for documentation and unlock its full potential for your projects.
Consider exploring specific documentation generation tools like Sphinx, MkDocs, and Docusaurus to learn how they integrate with Git and can automate your documentation build and deployment processes. Experiment with different Git workflows and branching strategies to find the best approach for your team and documentation project. Continuously learning and refining your Git skills will empower you to effectively manage documentation, collaborate seamlessly, and create high-quality documentation that serves your users and projects effectively.
Embrace Version Control: Improve Your Workflow
Embracing version control for your documentation is not just a best practice; it's a transformative approach that can significantly improve your documentation workflow and the quality of your documentation. By adopting Git for version control documentation, you move away from outdated, manual document management practices and embrace a modern, collaborative, and efficient workflow. Version control provides a structured framework for managing changes, tracking revisions, and ensuring the accuracy and consistency of your documentation.
The initial investment in learning Git and setting up a version control system for your documentation will pay off handsomely in the long run. You will experience improved collaboration, reduced errors, streamlined updates, and a more maintainable and reliable documentation base. Embrace version control for your documentation, and you will unlock a new level of efficiency, quality, and collaboration in your documentation process, ultimately leading to better documentation and a more positive user experience.
Frequently Asked Questions
How can Git help with version control for documentation?
Git allows you to track changes to your documentation files over time, enabling you to revert to previous versions if needed and collaborate effectively with others.
What are the basic Git commands needed to version control documentation?
You'll need commands like git init to start a repository, git add to stage changes, git commit to save changes with a message, and git push to upload your documentation to a remote repository like GitHub.
How does branching in Git aid in managing different versions of documentation?
Branching allows you to create separate lines of development for different versions or features of your documentation, allowing you to experiment without affecting the main documentation branch.
Is Git suitable for managing documentation in collaborative environments?
Yes, Git is excellent for collaboration. Features like pull requests and branch merging make it easy for multiple people to contribute to and review documentation changes.
What are some strategies for organizing documentation files within a Git repository?
Consider using a clear folder structure to organize your documentation files and creating a comprehensive README file to explain the project and how to contribute.
Final Reflection: Empowering Documentation Through Version Control
The ability to effectively manage and track changes to documentation is no longer a luxury, but a necessity in today's rapidly evolving technological landscape. This article has outlined simple steps to achieve this using Git, a powerful tool that empowers teams to collaborate, iterate, and maintain accurate records of their documentation. The principles discussed are directly applicable to any project, regardless of size or complexity, ensuring that documentation remains a living, breathing asset rather than a stagnant afterthought.
The impact of version control on documentation extends far beyond mere organization; it fosters a culture of collaboration, transparency, and continuous improvement. Personally, I've witnessed firsthand how Git transforms documentation from a source of frustration into a shared resource, empowering individuals to contribute and ensuring that knowledge is preserved and accessible. Documentation is a love letter that you write to your future self.
This quote perfectly encapsulates the long-term value of well-maintained, version-controlled documentation, a gift that keeps on giving as projects evolve and teams grow.
Now, I invite you to reflect on your own documentation practices. Consider the challenges you currently face and the potential benefits of implementing version control with Git. Embrace the power of collaboration, track your progress meticulously, and build a documentation repository that serves as a reliable foundation for your projects. The journey towards better documentation starts with a single commit – are you ready to take the first step?
Master Your Docs: Start Versioning Today!
Thank you for reading "Simple Steps to Version Control Your Documentation with Git"! We hope you found this guide helpful and are ready to improve your workflow. Now, it's time to put your new knowledge into practice.
Ready to get started?
- Begin by setting up a Git repository for your most important documentation project and experience the advantages immediately!
- Explore more advanced techniques like branching and merging to collaborate more effectively on your documents.
- Share this knowledge with a colleague or friend—show them how version control can transform their documentation processes!
What documentation challenges are you hoping to solve with Git? Share your thoughts in the comments below!