
Becoming a Git Merge Conflict Ninja: Command Line Edition

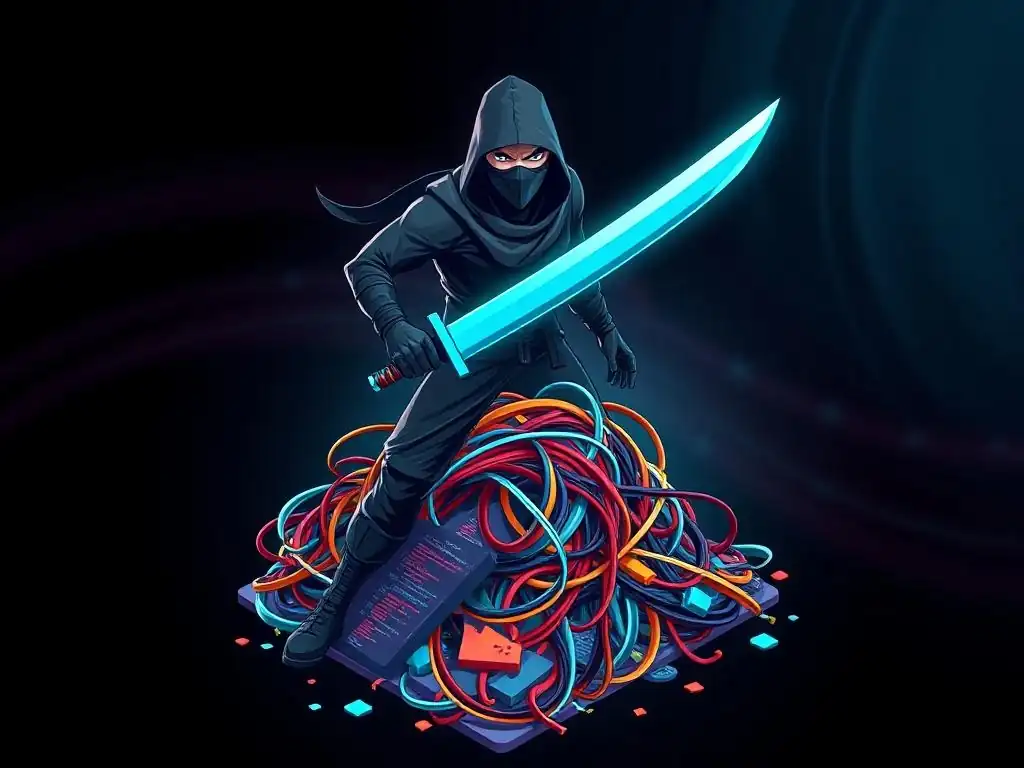
Welcome to the Git and Version Control Hub, your central resource for mastering the art of collaborative development!
Are you ready to tackle those dreaded merge conflicts head-on? Dive into our latest article, "Becoming a Git Merge Conflict Ninja: Command Line Edition," where we unveil powerful Git merge conflict resolution tips to streamline your workflow and conquer branching complexities. Discover practical strategies to navigate conflicting code, understand the underlying causes, and emerge victorious, ensuring seamless integration and a smoother development experience. Curious to learn more? Let's get started!
Resolving Git Merge Conflicts: A Command Line Guide
- Introduction to Git Merge Conflicts
- Simulating Git Merge Conflicts
- Decoding Conflict Markers
- Command Line Resolution Strategies
- Advanced Conflict Scenarios
- Preventing Merge Conflicts
- Finalizing the Merge
- Conclusion
-
Frequently Asked Questions
- What is a Git merge conflict, and why does it happen?
- What are some common indicators that a merge conflict has occurred?
- What are the basic steps to resolve a Git merge conflict using the command line?
- Is there a Git command to help visualize the differences causing the conflict?
- What are some strategies to avoid merge conflicts in the first place?
- Final Reflection: Mastering the Art of Git Harmony
- Conquer Your Git Merge Conflicts!
Introduction to Git Merge Conflicts
Understanding Git Merging
Git merging is a fundamental operation in version control, allowing developers to integrate changes from different branches into a unified codebase. When you merge branches in Git, the system attempts to automatically combine the changes made along divergent paths. This process works seamlessly when modifications occur in different parts of the files or in different files altogether. Git's three-way merge algorithm, which compares the two branch heads and their common ancestor, is typically very effective at resolving these integrations automatically. However, scenarios arise where Git encounters conflicting changes, leading to a merge conflict that requires manual resolution.
Merge conflicts occur when Git cannot automatically determine how to integrate changes from different branches. This typically happens when the same lines in a file have been modified differently in the branches being merged. For example, imagine two developers working on separate branches, both editing the same paragraph in a document.
When attempting to merge these branches, Git detects that there are competing changes to the same lines and halts the automatic merge process. Instead, Git marks the conflicting file with special conflict markers, signaling to the developer that manual intervention is required to resolve the discrepancies. Understanding the underlying merging process is the first step in effectively tackling these conflicts.
Causes of Merge Conflicts
Merge conflicts are primarily caused by concurrent modifications to the same lines of code or text within a file across different branches. While this is the most common cause, there are other scenarios that can trigger conflicts. For instance, if one branch renames or deletes a file that is modified in another branch, a conflict arises because Git is unsure how to reconcile these diverging actions. Similarly, changes in file permissions or modes in different branches, although less frequent, can also lead to conflicts.
Another significant contributor to merge conflicts, especially in collaborative environments, is long-lived branches and infrequent merging. When branches diverge significantly over time, the likelihood of encountering conflicting changes increases substantially. Imagine a feature branch that remains active for several weeks while the main branch continues to evolve with bug fixes and other features.
The longer the feature branch lives without merging back into the main branch, the greater the probability of encountering merge conflicts when the integration eventually happens. Regularly merging changes from the main branch into feature branches, a practice known as "merging frequently," can significantly reduce the occurrence and complexity of merge conflicts.
Benefits of Command Line Resolution
While graphical merge tools offer visual aids for conflict resolution, mastering command line techniques provides developers with a deeper understanding and greater control over the process. The command line offers a direct and explicit way to interact with Git's merge resolution mechanisms. By resolving conflicts directly in the command line, developers gain a more granular view of the changes and the conflict markers, fostering a stronger comprehension of the underlying issues. This hands-on approach can be particularly beneficial for developers seeking to improve their Git proficiency and troubleshoot complex merge scenarios.
Furthermore, command line resolution is often faster and more efficient for experienced developers, particularly when dealing with simple conflicts or when working remotely over SSH where graphical interfaces might be less responsive. Command line tools are readily available in any Git environment, eliminating the need for specific software installations or configurations. This universality makes command line skills invaluable across different development environments and workflows.
Moreover, command line resolution is scriptable, allowing for automation in certain scenarios or the creation of custom conflict resolution workflows. For developers aiming to become true "Git merge conflict resolution ninjas," proficiency in command line techniques is indispensable.
Simulating Git Merge Conflicts
Creating a Test Repository
To effectively learn and practice Git merge conflict resolution tips using the command line, creating a test repository is an essential first step. Begin by opening your terminal or command prompt and navigating to a suitable directory where you want to create your practice repository. Use the command mkdir git-conflict-test to create a new directory named git-conflict-test, and then cd git-conflict-test to move into this directory. Once inside, initialize a Git repository with the command git init. This command sets up the necessary Git infrastructure within the directory, turning it into a version-controlled space.
Next, create a sample file that we can modify to trigger a merge conflict. Use a text editor or the command line to create a file named example.txt. You can use the command echo "This is the initial content of the file." > example.txt to quickly create the file with some initial content. Add this file to the staging area using git add example.txt and then commit it to your repository with the command git commit -m "Initial commit: added example.txt". This initial commit establishes a baseline for our experiment and sets up the repository for branching and conflict generation. We now have a basic Git repository ready for simulating merge conflicts.
Branching and Modifying Files
With our test repository set up, the next step is to create branches and introduce conflicting changes. Start by creating a new branch named feature-branch using the command git checkout -b feature-branch. This command both creates the branch and switches your working directory to it. Now, make a modification to the example.txt file. For instance, open example.txt in a text editor and change the content to "This is the content on feature branch.". Save the changes. Stage and commit this modification on the feature-branch with the commands git add example.txt and git commit -m "Modified example.txt on feature branch".
After committing the change on feature-branch, switch back to the main branch using git checkout main. Now, make a different modification to the same lines in example.txt on the main branch. For example, change the content to "This is the content on main branch.". Save the changes and commit them to the main branch using git add example.txt and git commit -m "Modified example.txt on main branch". At this point, we have two branches, main and feature-branch, both stemming from the same initial commit, but with different modifications to the same file, specifically to the same lines within that file. This setup is ripe for triggering a merge conflict.
Triggering a Merge Conflict
Now we have set the stage to intentionally trigger a merge conflict. While on the main branch, attempt to merge the feature-branch into it using the command git merge feature-branch. Git will attempt to automatically integrate the changes from feature-branch into main. However, because we have modified the same lines in example.txt differently on both branches, Git will detect a conflict. Instead of a successful merge, Git will output a message indicating a merge conflict and will likely list the files that are in conflict, in our case, example.txt.
Upon encountering a merge conflict, Git will modify the working directory to reflect the conflicted state. If you check the status using git status, you'll see that example.txt is marked as "Unmerged paths." Furthermore, if you open example.txt in a text editor, you will observe the introduction of conflict markers within the file. These markers, <<<<<<<, =======, and >>>>>>>, are Git's way of delineating the conflicting changes from the different branches. This situation represents a merge conflict that requires manual resolution, and it provides the perfect scenario to practice your command line Git merge conflict resolution tips.
Decoding Conflict Markers
Examining <<<<<<<, =======, >>>>>>>
When a Git merge conflict arises, Git inserts specific conflict markers into the affected files to highlight the conflicting sections. These markers are crucial for understanding and resolving the conflict manually. The markers are <<<<<<<, =======, and >>>>>>>, each serving a distinct purpose in delineating the conflicting changes. The <<<<<<< HEAD marker indicates the beginning of the section of code from your current branch, typically main or the branch you are currently checked out on when you initiate the merge. This section represents the changes that are currently in your working branch.
Following the <<<<<<< HEAD section, you will find the ======= marker. This marker acts as a separator, dividing the changes from your current branch from the changes coming from the branch you are trying to merge in. Everything between the <<<<<<< HEAD and ======= markers represents the code as it exists in your current branch. After the ======= marker, you will encounter the >>>>>>> branch-name marker. This marker signals the end of the conflicting section and indicates the code from the branch you are merging, denoted by branch-name. Everything between the ======= and >>>>>>> branch-name markers represents the incoming changes from the branch being merged.
Identifying HEAD and Incoming Changes
Understanding which part of the conflict markers represents your changes ( HEAD) and which part represents the incoming changes is fundamental for effective conflict resolution. As mentioned, the section between <<<<<<< HEAD and ======= always refers to the changes in your current branch, often referred to as HEAD in Git terminology, representing the tip of your current branch. Conversely, the section between ======= and >>>>>>> branch-name represents the incoming changes, originating from the branch specified after the >>>>>>> marker (e.g., >>>>>>> feature-branch). This branch name clearly indicates the source of the incoming changes that are in conflict with your current branch.
When you open a file containing conflict markers, carefully examine these sections. The HEAD section shows how the code looks in your current branch, while the incoming section shows how it looks in the branch you are merging. By clearly identifying these sections, you can analyze the differences and decide how to reconcile them. For example, if you are on the main branch and merging feature-branch, the <<<<<<< HEAD section shows the version of the code in main, and the >>>>>>> feature-branch section shows the version from feature-branch. Recognizing this distinction is the first step towards making informed decisions about how to resolve the merge conflict.
Importance of Understanding Markers
Comprehending the meaning and structure of Git conflict markers is paramount for effective command line merge conflict resolution. These markers are not just visual clutter; they are Git's explicit communication to you about the nature and location of the conflicting changes. Without understanding these markers, you would be working blindly, potentially introducing errors or losing important changes during conflict resolution. The markers provide a clear and structured way to view the conflicting versions of the code side-by-side within the file itself.
By correctly interpreting the <<<<<<<, =======, and >>>>>>> markers, you can systematically analyze the conflicting changes, compare the versions from both branches, and make informed decisions about how to proceed. This understanding empowers you to choose which changes to keep, which to discard, or how to combine them to create a merged version that accurately reflects your desired outcome. Ignoring or misinterpreting these markers can lead to incorrect resolutions, introducing bugs or losing valuable code. Therefore, mastering the interpretation of conflict markers is a foundational skill for any developer aiming to efficiently and correctly resolve Git merge conflicts using the command line.
Command Line Resolution Strategies
Strategy 1: Manual Editing
Editing the File
Manual editing is the most fundamental and frequently used strategy for resolving Git merge conflicts using the command line. When you encounter a merge conflict, the first step is to open the conflicted file in a text editor. Navigate to the file path indicated by Git's conflict message and open the file using your preferred text editor. You will see the conflict markers ( <<<<<<<, =======, >>>>>>>) delineating the conflicting sections as described earlier. The core of manual editing involves directly manipulating the file content within these markers to create the desired merged outcome.
Once the file is open, carefully examine the conflicting sections marked by <<<<<<< HEAD, =======, and >>>>>>> branch-name. Read the code within each section to understand the changes made in your current branch ( HEAD) and the incoming branch ( branch-name). Your task is to decide how to combine or reconcile these changes. This might involve choosing to keep the changes from one branch, discarding the changes from the other, or, more commonly, merging and combining parts of both sets of changes into a unified version.
Choosing Changes
After examining the conflicting sections, the next step in manual editing is to decide which changes to incorporate into the final merged file. In some cases, the resolution might be straightforward. For instance, you might decide that the changes from your current branch are the correct ones and should be kept, while the incoming changes should be discarded.
Conversely, you might determine that the incoming changes are more relevant and should be prioritized. Or, in other situations, neither set of changes is entirely correct, and you might need to rewrite or modify the code to create a correct and functional merged version.
The decision of which changes to choose depends heavily on the context of the conflict and the overall goals of the merge. Consider the purpose of the changes in each branch, the intended functionality, and the desired outcome of the merged code. If the conflict is in configuration files, you might need to carefully analyze the different settings and combine them appropriately.
If it's in code logic, you might need to understand the algorithms and ensure that the merged code functions correctly. There is no one-size-fits-all approach; careful consideration and understanding of the code are key to making informed choices.
Combining Changes
Often, the optimal solution for resolving a merge conflict involves combining changes from both branches rather than simply choosing one over the other. This is where manual editing truly shines, allowing you to selectively pick and mix elements from both conflicting sections to create a coherent and functional merged outcome. This process requires careful consideration of the code and a clear understanding of the intended functionality.
For example, you might want to keep certain lines from the HEAD section, incorporate specific modifications from the incoming branch section, and perhaps even introduce entirely new lines of code to bridge the gap or refine the merged result. This fine-grained control is the power of manual editing. It allows you to tailor the resolution precisely to the needs of the project. When combining changes, pay close attention to syntax, logic, and potential side effects to ensure that the resulting code is not only syntactically correct but also functionally sound and achieves the desired behavior.
Removing Markers
Once you have edited the file to your satisfaction, having chosen, discarded, and combined changes as needed, the final step in manual editing is to remove all the conflict markers. These markers ( <<<<<<<, =======, >>>>>>>) are only meant to guide you during conflict resolution; they are not part of the valid code syntax and must be removed before you can finalize the merge. Carefully go through the file and delete every instance of these markers, ensuring you don't accidentally remove any of your resolved code in the process.
After removing all the markers, double-check your merged file. Read through the changes you made, ensure that the code is syntactically correct, logically sound, and achieves the intended outcome. It's a good practice to test the code locally after resolving conflicts to verify that everything works as expected. Once you are confident that the file is correctly resolved and the markers are gone, save the file. The file is now ready to be staged and committed, completing the merge conflict resolution process using manual editing.
Strategy 2: Using git checkout --ours and git checkout --theirs
Understanding git checkout --ours
Git provides convenient commands, git checkout --ours and git checkout --theirs, which can expedite conflict resolution in specific scenarios. git checkout --ours is used to keep your changes and discard the incoming changes from the branch being merged. When you execute this command on a conflicted file, Git will replace the content of that file in your working directory with the version from your current branch (the ours side of the merge). This effectively discards all changes from the branch you are merging in for that specific file, resolving the conflict in favor of your branch's version.
The --ours option is particularly useful when you are confident that the changes in your current branch are the correct and desired ones, and you want to completely disregard the conflicting changes from the incoming branch. For example, if you know that the incoming changes are outdated or incorrect, or if your branch contains the definitive version of the code, using git checkout --ours can quickly resolve the conflict and move forward. It's a powerful tool for quickly choosing your side in a conflict, but it should be used judiciously and only when you are certain that discarding the incoming changes is the correct course of action.
Understanding git checkout --theirs
Conversely, git checkout --theirs allows you to keep their changes, meaning the changes from the incoming branch, and discard your changes in the current branch for the conflicted file. When you run git checkout --theirs <conflicted_file>, Git will replace the content of <conflicted_file> in your working directory with the version from the branch you are merging (the theirs side of the merge). This action effectively resolves the conflict by adopting the incoming branch's version of the file and discarding your branch's modifications within that file.
The --theirs option is beneficial when you determine that the changes from the incoming branch are the preferred or correct ones, and you wish to discard your local changes for that specific file. For instance, if the incoming branch contains important updates or bug fixes that you need to incorporate, and your local changes are either less significant or potentially outdated, using git checkout --theirs can be a quick and efficient way to resolve the conflict by prioritizing the incoming changes. Like --ours, --theirs should be used thoughtfully, ensuring that adopting the incoming changes is indeed the desired resolution for the conflict.
Combining with Manual Editing
While git checkout --ours and git checkout --theirs offer quick ways to choose one version over another, they can also be used as starting points for more nuanced conflict resolution through manual editing. You can use either command to initially populate the conflicted file with either your version ( --ours) or their version ( --theirs). After running one of these commands, the conflict markers will be removed, and the file will contain the chosen version. However, the resolution process is not necessarily complete at this stage.
You can then open the file in a text editor and manually refine the content. For example, you might start with git checkout --theirs to adopt the incoming changes, but then realize that you need to incorporate a specific piece of code from your original version. In this case, you can manually edit the file, adding back the desired code from your original version, effectively combining elements from both sides of the conflict. This approach allows you to leverage the speed of git checkout --ours or --theirs for a quick initial choice, while still retaining the flexibility of manual editing to achieve a more precise and tailored resolution.
Strategy 3: Leveraging git mergetool
Configuring a Merge Tool
For more visually oriented and feature-rich conflict resolution, Git provides the git mergetool command, which integrates with external merge tools. Before using git mergetool, you might need to configure a merge tool if you haven't already. Git supports various merge tools, including visual diff and merge applications like meld, diffmerge, kdiff3, p4merge, and many others. You can check your current merge tool configuration using git config --get merge.tool. If no tool is configured, or if you want to change it, you can set a specific tool using git config --global merge.tool <tool_name>, replacing <tool_name> with the name of your preferred merge tool (e.g., meld, diffmerge).
For example, to configure meld as your merge tool, you would use the command git config --global merge.tool meld. You might also need to install the merge tool itself if it's not already installed on your system. Instructions for installing specific merge tools vary depending on your operating system. Once you have configured a merge tool, Git will use it when you invoke git mergetool to resolve merge conflicts, providing a graphical interface to visualize and resolve the differences.
Launching git mergetool
After configuring a merge tool, resolving conflicts using it is straightforward. When you encounter a merge conflict and Git indicates "Unmerged paths" in git status, you can launch the configured merge tool by simply running the command git mergetool. Git will then analyze the conflicted files and launch your configured merge tool, presenting a visual interface for resolving the conflicts. The specific appearance and functionality of the merge tool will depend on the tool you have configured, but generally, they provide a three-way view of the conflicting files: one panel showing the ours version (your current branch), one panel showing the theirs version (the incoming branch), and a central panel where you construct the merged result.
Git may launch the merge tool for each conflicted file sequentially, allowing you to resolve conflicts one file at a time. Once you launch git mergetool, the graphical merge tool will guide you through the conflict resolution process, typically allowing you to visually compare the conflicting versions, select changes to keep or discard, and edit the merged output directly within the tool's interface.
Resolving Conflicts within the Tool
Within the graphical merge tool, you will typically see a visual representation of the conflicting changes, often with color-coding to highlight differences between the ours version, the theirs version, and the common ancestor. The interface usually allows you to easily navigate through the conflicts within the file. You can often choose to accept changes from either the ours side or the theirs side with a click of a button, or you can manually edit the merged output in the central panel to combine changes or create a custom resolution.
Many merge tools offer features like auto-merge capabilities for non-conflicting changes, visual diff highlighting, and easy navigation between conflict blocks. As you resolve each conflict within the tool's interface, the tool typically marks the conflict as resolved. Once you have resolved all conflicts in a file within the merge tool, you usually need to save the resolved file within the tool. After resolving all conflicts for all files using the merge tool, you can exit the merge tool. Git will then recognize that the conflicts have been resolved, and you can proceed to stage and commit the changes to finalize the merge. Using git mergetool can be a more intuitive and visually guided approach to resolving merge conflicts compared to purely command line methods, especially for developers who prefer visual interfaces or when dealing with complex conflicts.
Advanced Conflict Scenarios
Resolving Conflicts with Binary Files
Merge conflicts are not limited to text files; they can also occur with binary files, such as images, compiled code, or proprietary data formats. However, resolving conflicts in binary files is fundamentally different from resolving text file conflicts. Unlike text files where you can manually edit and merge lines of code, binary files are not human-readable and cannot be meaningfully merged line by line.
Git's approach to binary file conflicts is simpler: it cannot automatically merge them. When a merge conflict occurs in a binary file, Git will mark the file as conflicted, similar to text files, but it does not insert conflict markers within the binary file itself.
For binary file conflicts, you typically have two primary options: choose either the version from your current branch ( ours) or the version from the incoming branch ( theirs). You cannot perform a manual, line-by-line merge of binary content. To resolve a binary file conflict, you would generally use git checkout --ours <binary_file> to keep your version or git checkout --theirs <binary_file> to keep their version. After choosing one version, you would then stage the resolved file using git add <binary_file> and proceed with the commit. In some cases, if neither version is entirely satisfactory, you might need to manually replace the conflicted binary file with a completely new, merged version, perhaps generated by re-exporting an asset or recompiling code.
Handling Conflicts After Rebasing
Rebasing, while a powerful Git operation for rewriting branch history, can sometimes introduce or complicate merge conflicts. When you rebase a branch onto another branch, you are essentially replaying your commits on top of the target branch. If your rebased branch and the target branch have diverged significantly, or if there are overlapping changes, you may encounter conflicts during the rebase process. These conflicts are similar in nature to merge conflicts but occur during the rebase operation instead of a merge operation.
Resolving conflicts during a rebase is also similar to resolving merge conflicts. Git will pause the rebase process when a conflict occurs and will indicate the conflicted files. You can then use the same command line resolution strategies discussed earlier, such as manual editing, git checkout --ours/ --theirs, or git mergetool, to resolve the conflicts in each conflicted file. After resolving the conflicts in a file, you need to stage the resolved file using git add <resolved_file> and then continue the rebase process using git rebase --continue. If you encounter further conflicts during the rebase, you will repeat this resolution process. If you decide to abort the rebase process due to complexity or errors, you can use git rebase --abort to return to the state before the rebase began.
Resolving Complex, Multi-File Conflicts
Some merge conflicts can be particularly complex, involving changes across multiple files and requiring careful coordination to resolve correctly. These multi-file conflicts can arise when features span multiple modules or components of a project, and concurrent modifications affect these interconnected parts. Resolving such conflicts often requires a broader understanding of the codebase and the intended interactions between the modified files. A systematic approach is crucial for managing complex, multi-file conflicts.
Start by getting a high-level overview of all the conflicted files using git status. Examine the list of unmerged paths to understand the scope of the conflict. Then, address the conflicts file by file, perhaps starting with the files you are most familiar with or those that seem to have the most critical conflicts. For each conflicted file, use your preferred resolution strategy (manual editing, git checkout, or git mergetool). When dealing with interconnected files, consider how the changes in one file might affect others. You may need to resolve conflicts in a specific order to ensure consistency and avoid introducing new issues. After resolving conflicts in all files, stage all the resolved files using git add . or git add <file1> <file2> ... and proceed with the commit to finalize the merge. For very complex situations, communication with team members who worked on the conflicting branches can be invaluable to understand the changes and ensure a correct resolution.
Preventing Merge Conflicts
Frequent Committing and Pushing
One of the most effective Git merge conflict resolution tips is to proactively prevent them in the first place. Frequent committing and pushing of your changes are crucial practices for minimizing the occurrence and complexity of merge conflicts, especially in collaborative development environments. Committing your changes frequently, even for small increments of work, helps to keep your local branch synchronized with the remote repository and reduces the divergence between branches. Smaller, more frequent commits make it easier to understand the changes you've made and to integrate them with others' work.
Pushing your commits to the remote repository regularly further reduces the risk of conflicts. When team members push their changes frequently, everyone's local repositories stay more up-to-date, minimizing the chances of significant divergence and conflicting modifications. Frequent pushing also facilitates early detection of potential conflicts. If conflicts do arise, they are likely to be smaller and easier to resolve because the branches haven't diverged as much. Aim for a workflow where you commit and push your changes at least daily, or even multiple times a day for active development, to promote smoother collaboration and fewer merge conflicts.
Small, Focused Branches
Creating small, focused branches for specific features or bug fixes is another key strategy for preventing merge conflicts. Large, long-lived branches are more prone to conflicts because they tend to diverge significantly from the main branch over time, accumulating more changes that can potentially conflict with ongoing developments in other branches. By breaking down large tasks into smaller, manageable features or bug fixes and working on dedicated branches for each, you limit the scope of changes within each branch.
Small, focused branches are easier to merge back into the main branch quickly and frequently. This approach reduces the time branches spend diverging and minimizes the window for conflicting changes to accumulate. When branches are small and focused, the changes are typically more isolated and less likely to overlap with changes in other branches. This practice not only reduces the likelihood of merge conflicts but also makes the codebase easier to manage, review, and integrate new features or fixes. Aim to keep your branches short-lived and focused on a single, well-defined task to minimize the risk of merge conflicts.
Communication and Collaboration
Effective communication and collaboration within a development team are essential for preventing and mitigating merge conflicts. When multiple developers are working on related features or modules, proactively communicating about planned changes and potential overlaps can significantly reduce the risk of conflicts. Before starting work on a new feature, especially one that might touch areas of the codebase being modified by others, it's beneficial to discuss your plans with your team members. This communication can help identify potential conflicts early on and coordinate development efforts to avoid or minimize them.
Regular team meetings, code reviews, and informal discussions about ongoing development activities can foster a collaborative environment where potential conflicts are identified and addressed proactively. Using communication tools like instant messaging or project management platforms to keep team members informed about branch activities, feature development progress, and potential areas of overlap can also contribute to conflict prevention. Open and frequent communication helps ensure that everyone is aware of changes being made, reducing the chances of surprising and difficult-to-resolve merge conflicts.
Utilizing Git Attributes
Git attributes provide a powerful mechanism for customizing how Git handles specific files or file types, which can be leveraged to prevent or automatically resolve certain types of merge conflicts. Git attributes are defined in .gitattributes files and allow you to set properties on files based on their path or filename patterns. One particularly relevant attribute for conflict prevention is the merge attribute. For certain file types, you can configure custom merge strategies using Git attributes to automatically handle merges in a way that avoids conflicts or resolves them automatically in a predictable manner.
For example, for configuration files where you want to favor one version over another in case of conflicts, you could define a custom merge driver using the merge attribute. Similarly, for files where you know that conflicts are unlikely or can be resolved by simply concatenating the changes, you could configure a merge strategy that attempts this automatic resolution. While custom merge strategies require some setup and understanding of Git attributes, they can be highly effective in automating conflict resolution for specific file types and reducing the manual effort required to handle merge conflicts in certain project contexts. Exploring and utilizing Git attributes can be a valuable advanced technique for fine-tuning your Git workflow and minimizing merge conflict occurrences.
Finalizing the Merge
Staging Resolved Files
After resolving all merge conflicts in your working directory, whether through manual editing, git checkout, or git mergetool, the next step is to stage the resolved files. Git tracks the state of files in your working directory and staging area. Once you have resolved a conflict in a file, you need to explicitly tell Git that the conflict is resolved and that you want to include the resolved version in your commit. This is done by staging the file using the git add <resolved_file> command. You need to stage each file that was in a conflicted state after you have resolved the conflict within it.
You can stage multiple resolved files at once by using git add . or git add -u in the root of your repository or in a directory containing the resolved files. git add . stages all changes in the current directory and its subdirectories, including modified and newly created files. git add -u stages only modified and deleted files, which is often preferable after resolving conflicts as it avoids accidentally staging untracked files. After staging all the resolved files, you can proceed to the next step of finalizing the merge – writing a commit message.
Writing a Commit Message
With the resolved files staged, the final step in completing the merge is to write a commit message. Git usually pre-populates a merge commit message when you initiate a merge operation that results in conflicts. This pre-populated message typically indicates that a merge occurred and lists the branches that were merged. However, it's good practice to review and, if necessary, edit this commit message to provide more context and detail about the merge, especially if it involved conflict resolution.
A well-written commit message for a merge that involved conflict resolution should briefly summarize the purpose of the merge and highlight any significant conflict resolutions that were performed. For example, you might mention the branches that were merged, the types of conflicts encountered, and any specific strategies or decisions made during the resolution process. Providing clear and informative commit messages helps to maintain a clean and understandable commit history, making it easier for yourself and your team members to track changes, understand the evolution of the codebase, and troubleshoot issues in the future.
Completing the Commit
Once you have staged all the resolved files and written an appropriate commit message, you are ready to complete the merge commit. If you are satisfied with the pre-populated commit message or have edited it to your liking, you can finalize the commit by using the command git commit. If you are using a graphical Git client, there is usually a button or option to complete the merge commit after staging the resolved files. After executing the commit command, Git will create a merge commit that incorporates the resolved changes, and the merge process will be finalized.
At this point, the merge conflict is fully resolved, and your current branch now contains the integrated changes from the merged branch, with all conflicts properly handled. You can then push your changes to the remote repository to share your merged code with your team. Remember to test your code thoroughly after resolving merge conflicts to ensure that the merged version functions correctly and that no regressions or new issues have been introduced during the resolution process.
Conclusion
Recap of Command Line Techniques
This guide has provided a comprehensive overview of Git merge conflict resolution tips using the command line. We explored various strategies, from the fundamental approach of manual editing, where you directly modify the conflicted file to combine or choose changes, to using convenience commands like git checkout --ours and git checkout --theirs for quickly selecting one version over another. We also delved into leveraging git mergetool for a more visual and feature-rich conflict resolution experience using external merge tools. These command line techniques empower developers with precise control and a deeper understanding of the conflict resolution process.
Mastering these strategies is essential for effectively navigating merge conflicts in Git. Manual editing provides the greatest flexibility but requires careful analysis and understanding of the conflicting changes. git checkout --ours and --theirs offer quick resolutions in straightforward scenarios. git mergetool provides a visually guided approach, which can be particularly helpful for complex conflicts or for developers who prefer graphical interfaces. Choosing the appropriate strategy depends on the complexity of the conflict, your familiarity with the codebase, and your personal preferences.
Importance of Practice
Like any skill, proficiency in Git merge conflict resolution, especially using the command line, is honed through practice. The more you encounter and resolve merge conflicts, the more comfortable and efficient you will become at identifying conflict markers, understanding the nature of conflicts, and applying the appropriate resolution strategies. Creating test repositories and intentionally simulating merge conflicts, as demonstrated earlier, is an excellent way to practice in a safe and controlled environment.
Experiment with different conflict scenarios, try out each resolution strategy, and observe the outcomes. Practice manual editing to gain a deep understanding of the conflict markers and the process of combining changes. Explore git checkout --ours and --theirs to understand their quick resolution capabilities and limitations. Configure and use git mergetool to experience the visual approach to conflict resolution. Consistent practice will build your confidence and expertise in resolving Git merge conflicts effectively and efficiently using the command line, transforming you into a true "Git merge conflict resolution ninja."
Further Resources
To further enhance your skills and knowledge of Git merge conflict resolution and related topics, several valuable resources are available. The official Git documentation is an invaluable source of detailed information on all Git commands and concepts, including merging and conflict resolution. Online tutorials and interactive Git learning platforms offer structured lessons and exercises to guide you through various Git scenarios, including conflict resolution. Websites dedicated to Git best practices and workflows often contain articles and guides on preventing and resolving merge conflicts effectively in team environments.
Consider exploring resources like the Pro Git book, which is freely available online and provides a comprehensive guide to Git. Websites like GitHub, GitLab, and Atlassian Bitbucket offer extensive documentation and tutorials on Git and collaborative workflows. Online communities and forums dedicated to Git and version control can also be valuable places to ask questions, share experiences, and learn from other developers. Continuously seeking out and utilizing these resources will help you deepen your understanding of Git, improve your conflict resolution skills, and stay up-to-date with best practices in version control.
Frequently Asked Questions
What is a Git merge conflict, and why does it happen?
A Git merge conflict occurs when Git cannot automatically resolve differences between two branches being merged. This usually happens when changes are made to the same lines in different branches.
What are some common indicators that a merge conflict has occurred?
You'll typically see conflict markers in the affected files. These markers, like <<<<<<<, =======, and >>>>>>>, indicate the conflicting sections and the originating branches. Additionally, Git will report that the merge failed with a message about unmerged paths.
What are the basic steps to resolve a Git merge conflict using the command line?
First, open the conflicted file in a text editor. Then, manually edit the file to resolve the conflicts by choosing which changes to keep, or combining them. Finally, git add the resolved file and git commit to complete the merge.
Is there a Git command to help visualize the differences causing the conflict?
Yes, git diff is your friend! Using git diff on the conflicted file lets you compare the changes from both branches side-by-side, making it easier to understand the conflict and decide how to resolve it.
What are some strategies to avoid merge conflicts in the first place?
Frequent small commits and regularly merging your branches with the main branch can help prevent large, complex conflicts. Also, clear communication within the team about who's working on what is crucial.
Final Reflection: Mastering the Art of Git Harmony
The ability to navigate and resolve Git merge conflicts efficiently is no longer just a technical skill; it's a critical competency for collaborative software development in today's fast-paced environment. The tips and techniques presented in this article are designed to empower developers, transforming them from conflict-averse individuals to confident "Git Merge Conflict Ninjas" capable of maintaining code integrity and team productivity.
The impact of mastering Git merge conflict resolution extends far beyond individual efficiency. It fosters a culture of seamless collaboration, reduces development bottlenecks, and ultimately contributes to the creation of higher-quality software. As Linus Torvalds famously said, Given enough eyeballs, all bugs are shallow.
This holds true for merge conflicts as well; with the right tools and understanding, even the most daunting conflicts can be resolved quickly and effectively, allowing teams to leverage the collective intelligence of their members.
Now, armed with these Git merge conflict resolution tips, I invite you to reflect on your own development workflow. How can you incorporate these techniques to streamline your collaboration process and minimize the frustration associated with merge conflicts? Embrace the challenge, practice diligently, and become the Git Merge Conflict Ninja your team needs. The path to smoother, more efficient development starts with you.
Conquer Your Git Merge Conflicts!
Thanks for exploring the command-line approach to mastering Git merge conflicts! You've gained the knowledge to handle even the most challenging situations. But knowledge is only power when applied. So, what's next?
Here are a few steps you can take now to improve your Git skills:
- Practice regularly! Create a sample repository to simulate merge conflicts and hone your skills. The more you practice, the easier it becomes.
- Share your new knowledge! Tell your colleagues about this article and help them become proficient with Git merge conflict resolution. Collaborative understanding streamlines teamwork.
- Explore advanced techniques: Learn about
git rerere(reuse recorded resolution). This powerful, yet often overlooked, tool can automatically resolve recurring merge conflicts!
What's one helpful Git command you've used to resolve a difficult conflict? Share your tips in the comments below!