
Mastering Git CherryPick: A Comprehensive Guide for Developers

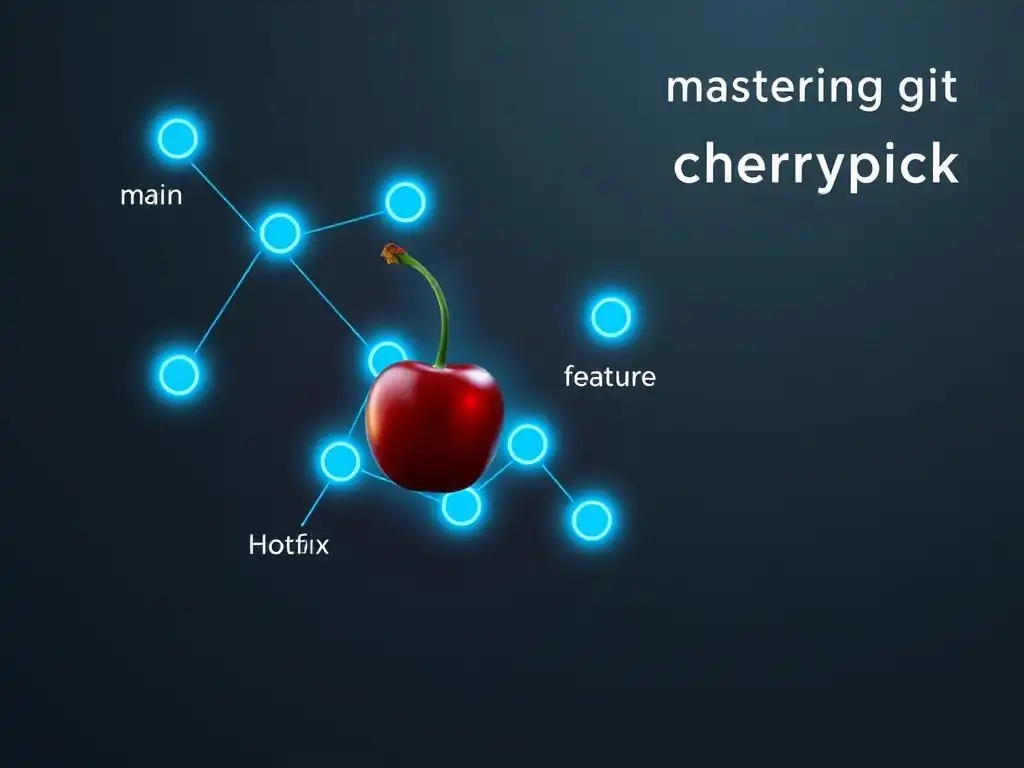
Welcome to the Git and Version Control Hub, your go-to resource for mastering the intricacies of Git. Are you ready to elevate your Git skills beyond the basics? Dive into our advanced techniques and discover how to streamline your workflow. This week, we're unlocking the power of a crucial command: git cherry-pick. Struggling to understand how to selectively incorporate changes from one branch to another? Our Git cherry-pick tutorial for developers will guide you step-by-step, transforming you from a novice into a Git virtuoso. Keep reading to discover how to leverage this powerful tool for efficient and precise code integration!
Mastering Git Cherry-Pick: A Comprehensive Guide for Developers
- Introduction to Git Cherry-Picking for Software Development
- Git Cherry-Pick Tutorial: Step-by-Step Instructions
- Advanced Git Cherry-Pick Techniques for Efficient Workflow
- Git Cherry-Pick Best Practices for Collaborative Teams
- Practical Examples of Git Cherry-Pick in Real-World Scenarios
- Troubleshooting Common Git Cherry-Pick Issues
- Git Cherry-Pick Alternatives and When to Use Them
- Conclusion: Leveraging Git Cherry-Pick for Effective Version Control
- Frequently Asked Questions
- Final Reflection: Embracing Selective History
- Unleash the Power of Cherry-Picking!
Introduction to Git Cherry-Picking for Software Development
What is Git Cherry-Pick and Why Use It?
Git cherry-pick is a powerful command in Git that allows developers to select individual commits from one branch and apply them to another. Unlike merging or rebasing, which typically integrate entire branches, git cherry-pick offers a more granular approach. This command essentially "picks" specific changesets, represented by commits, and grafts them onto your current branch. It's akin to hand-picking cherries from a tree – you choose exactly what you want and leave the rest behind. This selective application of changes makes cherry-picking a valuable tool in various development scenarios, providing flexibility and precision in version control.
The primary advantage of using git cherry-pick lies in its ability to isolate and incorporate specific changes without bringing in the entire history or context of another branch. This is particularly useful when you need to apply a bug fix from a development branch to a stable release branch, or when you want to incorporate a particular feature from an experimental branch without merging the entire branch. By using git cherry-pick, developers can maintain cleaner branch histories and avoid unnecessary code integration, streamlining the development process and reducing the risk of introducing unintended changes. For developers aiming for precise control over their codebase, understanding and utilizing git cherry-pick is an essential skill.
Understanding Cherry-Pick Use Cases: Bug Fixes, Feature Backporting, and Hotfixes
One of the most common use cases for git cherry-pick is applying bug fixes. Imagine you're working on a development branch and discover a critical bug that also exists in your stable release branch. Instead of merging the entire development branch into the release branch, which could introduce new, untested features, you can cherry-pick the specific commit that fixes the bug. This allows you to quickly patch the release branch with only the necessary fix, minimizing disruption and ensuring stability. This targeted approach to bug fixing is crucial for maintaining healthy release cycles and quickly addressing critical issues in production environments.
Feature backporting is another significant application of git cherry-pick. Suppose a new feature is developed in a feature branch and is ready to be integrated into the main development line but you also need this feature in an older release branch for maintenance purposes. Cherry-picking the commits related to that specific feature from the development branch to the older release branch efficiently backports the feature. This is particularly helpful for maintaining feature parity across different release versions or when clients on older versions require specific new functionalities without upgrading to the latest major release. Furthermore, hotfixes often necessitate the use of git cherry-pick. When a critical issue arises in a production environment, a hotfix branch is typically created from the stable release branch to address it quickly. Once the fix is committed to the hotfix branch, cherry-picking that commit back into the release branch ensures that the production environment is patched rapidly without introducing any other changes from ongoing development efforts.
Git Cherry-Pick vs. Other Git Commands: Merge, Rebase, and Patch
While git cherry-pick, git merge, git rebase, and git patch all serve to integrate changes between branches, they operate fundamentally differently and are suited for distinct scenarios. Git merge integrates entire branches together, preserving the full history of both branches. When you merge branch 'feature' into 'main', Git creates a new merge commit on 'main' that incorporates all changes from 'feature' and their history. This approach is ideal for integrating completed features or larger sets of changes where maintaining the branch history is important. Merge operations are generally straightforward but can sometimes lead to complex merge histories, particularly in long-lived branches.
Git rebase, on the other hand, rewrites the commit history. Rebasing branch 'feature' onto 'main' moves the base of 'feature' to the tip of 'main', effectively replaying the commits of 'feature' on top of 'main'. This results in a linear, cleaner history without merge commits. Rebasing is often preferred for feature branches before merging into the main branch to simplify the project history. However, it's crucial to avoid rebasing public branches that are shared with other developers, as it can cause significant confusion and conflicts due to history rewriting. Git patch allows you to apply changes from a patch file, which is essentially a text file representing the differences between versions of files. Patches are useful for sharing changes outside of Git repositories, applying changes to repositories where you don't have direct push access, or for very specific scenarios where you need to apply changes without directly interacting with branches.
In contrast to these commands, git cherry-pick targets specific commits rather than entire branches or sets of changes. It selectively picks individual commits and applies them to the current branch, creating new commits that contain the same changes but with a new commit hash and potentially different commit metadata. This selective nature distinguishes git cherry-pick as the tool of choice when you need fine-grained control over change integration and want to avoid the broader scope of merging or rebasing, or the less direct approach of patches.
Git Cherry-Pick Tutorial: Step-by-Step Instructions
Prerequisites: Setting Up a Git Repository and Branches
Before you start using git cherry-pick, ensure you have a Git repository set up and understand the basics of Git branching. If you don't already have a repository, you can create one locally by navigating to your project directory in the terminal and running git init. This command initializes a new Git repository in your current directory. Alternatively, you can clone an existing repository from a remote source like GitHub or GitLab using git clone <repository_url>. Cloning creates a local copy of the remote repository, including all its branches and history.
Once you have a repository, you need to have at least two branches to effectively demonstrate git cherry-pick. Typically, you'll be cherry-picking commits from one branch (the source branch) to another (the target branch). You can list existing branches using git branch. To create a new branch, use git branch <branch_name>. Switch to a branch using git checkout <branch_name>. For example, you might have a main branch representing your stable release and a develop branch for ongoing development. To practice cherry-picking, create these branches and make a few commits on each to simulate a real development scenario. Understanding how to create, switch, and manage branches is fundamental to effectively using git cherry-pick and managing your Git workflow.
Basic Git Cherry-Pick Command: Applying a Single Commit
The most fundamental use of git cherry-pick is applying a single commit from another branch to your current branch. To do this, first, identify the commit hash of the commit you want to cherry-pick. You can find commit hashes using git log on the branch containing the desired commit. Once you have the commit hash, switch to the target branch where you want to apply the commit using git checkout <target_branch>.
After switching to the target branch, execute the git cherry-pick <commit_hash> command, replacing <commit_hash> with the actual commit hash you identified. Git will then attempt to apply the changes from the specified commit to your current branch. If the cherry-pick is successful without conflicts, Git will automatically create a new commit on your target branch with the changes from the cherry-picked commit. This new commit will have a different commit hash than the original commit, as it's a new commit applied in a different context, but it will contain the same changes. This basic command is the foundation for using git cherry-pick and is essential for selectively incorporating changes into your branches.
Cherry-Picking Multiple Commits: Strategies Using Ranges and Commit Lists
Cherry-picking isn't limited to single commits; you can also cherry-pick multiple commits at once. Git provides several strategies to accomplish this efficiently, including using commit ranges and commit lists. To cherry-pick a range of consecutive commits, you can use the syntax git cherry-pick <start_commit>..<end_commit>. This command will cherry-pick all commits between <start_commit> (exclusive) and <end_commit> (inclusive). For example, if you want to cherry-pick commits from commit 'A' to commit 'C' (inclusive), you would use git cherry-pick A..C. It's important to note the order: the start commit comes first, followed by two periods, and then the end commit.
Alternatively, you can cherry-pick a list of specific commits that are not necessarily consecutive by providing a space-separated list of commit hashes to the git cherry-pick command: git cherry-pick <commit_hash1> <commit_hash2> <commit_hash3>. Git will attempt to apply these commits in the order they are listed. When cherry-picking multiple commits, Git might stop if it encounters a conflict during the process. If a conflict arises, you will need to resolve it before continuing the cherry-pick operation. Understanding these strategies for cherry-picking multiple commits significantly enhances your ability to manage and integrate changes efficiently, especially when dealing with feature backporting or incorporating a series of related fixes.
Resolving Conflicts During Git Cherry-Pick Operations
Identifying and Understanding Cherry-Pick Conflicts
During a git cherry-pick operation, conflicts can arise when the changes introduced by the commit you're cherry-picking clash with the current state of your target branch. These conflicts typically occur when the same lines of code have been modified in both the commit being cherry-picked and the target branch since the divergence point. When a conflict occurs, Git will pause the cherry-pick process and indicate the files with conflicts in your working directory. You'll notice conflict markers within the affected files, such as <<<<<<< HEAD, =======, and >>>>>>> commit_hash. HEAD refers to the current branch's version, and commit_hash represents the version from the cherry-picked commit.
Understanding these conflict markers is crucial for resolving cherry-pick conflicts. Git doesn't automatically resolve these conflicts because it requires human intervention to decide how to integrate the conflicting changes. The message output by Git will guide you to the files with conflicts, and your task is to manually edit these files to resolve the discrepancies.
It's important to carefully examine the conflicting sections and decide which changes to keep, modify, or merge to achieve the desired outcome. Resolving conflicts correctly ensures that the cherry-picked changes are properly integrated into your target branch without introducing unintended issues or losing important modifications.
Resolving Merge Conflicts Manually Using a Text Editor
The most common method for resolving cherry-pick conflicts is by manually editing the conflicted files using a text editor. Open each file that Git has marked as conflicted. Inside these files, you'll find the conflict markers delineating the conflicting sections. Carefully analyze the code blocks between <<<<<<< HEAD and ======= (changes in your current branch) and between ======= and >>>>>>> commit_hash (changes from the cherry-picked commit). Decide how you want to reconcile these differences. This might involve choosing one version over the other, merging parts of both versions, or rewriting the code entirely to accommodate both sets of changes.
Once you've made the necessary edits to resolve the conflicts, remove the conflict markers ( <<<<<<< HEAD, =======, >>>>>>> commit_hash). The resulting file should contain the merged code without any conflict markers. After resolving all conflicts in a file, save it. Repeat this process for all files marked with conflicts. After you've resolved all conflicts in all files, you need to stage the resolved files using git add <resolved_file>. This tells Git that you've resolved the conflicts in these files and are ready to proceed with the cherry-pick operation.
Using Git Tools: git mergetool for Conflict Resolution
While manual editing is effective, Git also provides a command-line tool, git mergetool, to assist in resolving conflicts, including those arising from cherry-pick operations. git mergetool launches a visual merge tool, which can be configured to your preferred diff and merge application (like vimdiff, meld, kdiff3, etc.). To use git mergetool, simply run the command in your terminal after encountering cherry-pick conflicts. Git will automatically detect the conflicted files and open your configured merge tool.
The merge tool typically presents a three-way view: the common ancestor version, your current branch's version ( LOCAL or HEAD), and the cherry-picked commit's version ( REMOTE or the commit hash). This visual representation makes it easier to compare the changes and decide how to resolve the conflicts. Most merge tools allow you to interactively select which changes to keep from each version, edit the merged output, and save the resolved file. After resolving conflicts in the merge tool and saving the file, the tool usually marks the file as resolved in Git. Once you have resolved all conflicts using git mergetool, you still need to stage the resolved files using git add <resolved_file> before continuing or completing the cherry-pick process. Using git mergetool can streamline conflict resolution, especially for complex conflicts or when you prefer a visual interface over manual text editing.
Advanced Git Cherry-Pick Techniques for Efficient Workflow
Cherry-Picking Across Branches: Best Practices for Stable Releases
Cherry-picking is particularly valuable when managing stable release branches and development branches. A common scenario involves fixing bugs found in a stable release that were originally fixed in the development branch. In such cases, cherry-picking the bug fix commit from the development branch to the stable release branch ensures that the release branch gets the fix without merging in potentially unstable new features from the development branch. This targeted approach is a best practice for maintaining stable releases, as it minimizes the risk of introducing regressions or unintended changes into production environments.
When cherry-picking across branches, especially for stable releases, it's crucial to test the cherry-picked changes thoroughly in the target branch environment. Even though the commit might have been tested in the source branch, differences in branch context or other changes in the target branch could lead to unexpected issues. Therefore, after cherry-picking to a stable release branch, always perform regression testing and ensure the fix works as expected in the release context.
Furthermore, clearly document cherry-pick operations, especially for release branches. Documenting which commits were cherry-picked, why, and when helps maintain transparency and provides a clear audit trail of changes applied to stable releases, aiding in long-term maintenance and issue tracking.
Using the -x Option: Tracking Cherry-Picked Commits with Commit Messages
The -x option in git cherry-pick is a useful feature for enhancing traceability and understanding the origin of cherry-picked commits. When you use git cherry-pick -x <commit_hash>, Git not only applies the changes from the specified commit but also adds a line to the commit message of the newly created commit indicating that it was cherry-picked from the original commit. This added line typically looks like (cherry picked from commit <original_commit_hash>).
This extra information in the commit message is invaluable for tracking the history and relationships between commits, especially when dealing with cherry-picks across different branches or repositories. By including the -x option, you can easily identify commits that originated from cherry-picking and trace them back to their original source commit. This is particularly helpful when reviewing commit histories, debugging issues, or understanding the evolution of changes across branches. Using the -x option consistently is a best practice for improving the clarity and maintainability of your Git repository, especially in collaborative projects where changes are frequently cherry-picked between branches.
The --continue, --abort, and --quit Options: Managing Cherry-Pick Processes
When conflicts occur during a git cherry-pick operation, or when cherry-picking multiple commits, Git provides options to manage the process effectively. The --continue option is used after you have resolved conflicts and staged the resolved files using git add. Running git cherry-pick --continue tells Git to proceed with the cherry-pick process, applying the next commit in the sequence if you were cherry-picking multiple commits, or completing the cherry-pick operation if it was a single commit.
If you encounter conflicts that are too complex to resolve or decide you want to undo the cherry-pick operation entirely, you can use git cherry-pick --abort. This command will stop the cherry-pick process and revert your branch back to the state it was in before you started the cherry-pick. It effectively cancels the cherry-pick operation and cleans up any changes made during the attempt. Alternatively, if you start a cherry-pick operation (perhaps with multiple commits) and then decide to pause it temporarily, you can use git cherry-pick --quit. This option also stops the cherry-pick process, but unlike --abort, it leaves your working directory and staging area in their current state, including any resolved or unresolved conflicts. You can then resume the cherry-pick operation later using git cherry-pick --continue after further resolving conflicts or making adjustments. These options provide control over the cherry-pick process, allowing you to manage conflicts, undo operations, and pause/resume as needed.
Cherry-Picking Merge Commits: A Detailed Explanation and Potential Issues
Cherry-picking merge commits requires special consideration because merge commits combine changes from multiple parent commits, and simply cherry-picking a merge commit can lead to unexpected results or incomplete change integration. By default, git cherry-pick only follows the first parent of a merge commit. This means if you try to cherry-pick a merge commit without specifying any options, Git will only apply the changes introduced by merging the first parent into the merge commit, effectively ignoring the changes from the other parent branches involved in the merge.
To properly cherry-pick a merge commit and include changes from all involved branches, you need to use the -m <parent_number> option. You need to specify which parent of the merge commit you want to consider as the "mainline" for the cherry-pick. The first parent (parent number 1) is usually the branch you were on when you performed the merge, and subsequent parents are the branches that were merged in. You can view the parents of a merge commit using git log --parents <merge_commit_hash>. For example, if you want to cherry-pick a merge commit and include the changes introduced by merging the second parent branch, you would use git cherry-pick -m 2 <merge_commit_hash>. It's crucial to understand the parent structure of merge commits and use the -m option correctly when cherry-picking them, otherwise you might miss important changes or introduce unintended partial merges. Cherry-picking merge commits can be complex and should be approached with caution, ensuring you understand which changes you intend to include and test thoroughly after the operation.
Git Cherry-Pick Best Practices for Collaborative Teams
Communicating Cherry-Pick Decisions Within the Team: Pull Requests and Documentation
In a collaborative development environment, communication is key when using git cherry-pick. Before cherry-picking commits, especially in shared branches or stable release branches, it's crucial to communicate your intentions to the team. This helps prevent conflicts, ensures that everyone is aware of the changes being introduced, and facilitates code reviews if necessary. For significant cherry-picks, consider creating a pull request (or merge request) even for cherry-picked commits. This allows for code review and discussion before the changes are integrated, similar to regular feature merges. A pull request provides a platform to explain why a cherry-pick is needed, what changes are being included, and allows team members to review and approve the changes.
Beyond pull requests, documentation plays a vital role in communicating cherry-pick decisions. Maintain clear documentation of cherry-pick operations, especially for stable release branches and hotfixes. Documenting which commits were cherry-picked, the reasons behind it, and the date of cherry-picking provides a valuable audit trail and helps team members understand the history of changes in different branches. This documentation can be in the form of commit messages (using the -x option), release notes, or internal project documentation. Effective communication and documentation around cherry-pick decisions ensure transparency, reduce misunderstandings, and contribute to a smoother collaborative workflow.
Avoiding Common Cherry-Pick Mistakes and Pitfalls: Duplication and Conflicting Changes
One common pitfall when using git cherry-pick is accidentally duplicating commits or introducing conflicting changes. If you are not careful, you might cherry-pick the same commit multiple times onto the same branch, leading to duplicate commits in the history. To avoid this, always check the commit history of the target branch before cherry-picking to ensure that the commit hasn't already been applied, perhaps through a previous cherry-pick or merge. Using tools like git log and visually inspecting the branch history can help prevent accidental duplication.
Conflicting changes are another potential issue. While Git attempts to automatically merge cherry-picked changes, conflicts can arise, as discussed earlier. To minimize conflicts, try to cherry-pick commits that are relatively isolated and have minimal overlap with changes already present in the target branch.
If you anticipate conflicts, communicate with team members who might be working on related areas to coordinate changes and minimize the likelihood of conflicts. Resolving conflicts effectively, as described in previous sections, is essential, but preventing them in the first place through careful planning and communication is even better. Being mindful of these potential mistakes and pitfalls, and adopting preventative measures, will lead to more efficient and less error-prone cherry-picking operations.
Integrating Cherry-Pick into Your Git Workflow Strategy: Release Management and Hotfix Procedures
Git cherry-pick is a powerful tool that can be strategically integrated into various Git workflow strategies, particularly in release management and hotfix procedures. In release management, cherry-picking plays a crucial role in maintaining stable release branches. When preparing for a release, bug fixes and critical features developed in the development branch can be selectively cherry-picked into the release branch to ensure stability and include necessary updates without introducing untested features. This allows for a controlled and focused approach to building release candidates.
For hotfix procedures, git cherry-pick is indispensable. When a critical issue is identified in a production release, a hotfix branch is typically created from the release branch. Once the hotfix is developed and tested in the hotfix branch, the fix commit is cherry-picked back into both the release branch (to update the current release) and the development branch (to ensure the fix is included in future development). This ensures rapid patching of production issues while also maintaining consistency across branches. Integrating git cherry-pick into your Git workflow strategy, especially for release management and hotfixes, allows for efficient and precise management of changes, contributing to a more robust and reliable software development process.
Practical Examples of Git Cherry-Pick in Real-World Scenarios
Scenario 1: Bug Fix from Development to Release Branch
Imagine a scenario where your team is working on a web application. The main branch represents the stable release deployed to production, and the develop branch is where active development takes place. During testing of the develop branch, a critical security vulnerability is discovered and fixed in a commit with the hash a1b2c3d. This bug also exists in the main branch, posing a risk to the production environment. To address this, the team decides to cherry-pick the bug fix commit a1b2c3d from develop to main.
First, the developer checks out the main branch: git checkout main. Then, they execute the cherry-pick command: git cherry-pick a1b2c3d. Git applies the changes from commit a1b2c3d to the main branch, creating a new commit with the same fix but a different commit hash. After successful cherry-picking, the developer tests the main branch locally to confirm the fix is applied and doesn't introduce any regressions. Finally, they push the updated main branch to the remote repository, deploying the security patch to production. This example demonstrates how git cherry-pick allows for quick and targeted application of critical bug fixes to stable release branches, ensuring production stability.
Scenario 2: Feature Backport from Experimental Branch to Main Branch
Consider a situation where a team is experimenting with a new user authentication system in an experimental branch named feature-auth. After several weeks of development and testing, the new authentication system is deemed successful. However, the team decides that while they are ready to integrate this feature into the main development line in the near future, they also need to backport this new authentication system to the current main branch for an upcoming minor release. The commits implementing the new authentication system are spread across several commits in the feature-auth branch, say from commit e4f5g6h to i7j8k9l.
To backport this feature, the developer checks out the main branch: git checkout main. Then, they use the range cherry-pick command to apply the commits: git cherry-pick e4f5g6h..i7j8k9l. Git attempts to cherry-pick all commits in the specified range onto the main branch. If conflicts arise, the developer resolves them as described earlier. After resolving any conflicts and ensuring the backported feature works correctly in the main branch, the developer commits the changes and pushes the updated main branch. This scenario illustrates how git cherry-pick facilitates feature backporting, allowing teams to selectively bring features from experimental branches to stable branches for specific releases.
Scenario 3: Security Patch Application to a Production Branch
Imagine a critical security vulnerability is publicly disclosed affecting your software product. Your security team quickly develops a patch in a dedicated security branch named security-patch. This patch is contained within a single commit with the hash m9n0o1p. The production environment is running from the production branch, which needs to be patched immediately. To minimize downtime and risk, the team opts to cherry-pick the security patch directly to the production branch.
The operations team checks out the production branch: git checkout production. They then execute the cherry-pick command: git cherry-pick m9n0o1p. Git applies the security patch from commit m9n0o1p to the production branch. Since security patches are often designed to be isolated and targeted, conflicts are less likely, but the team still verifies the application of the patch in a staging environment that mirrors production. After verification, the updated production branch is deployed to the live production environment. This example highlights the use of git cherry-pick for rapidly applying critical security patches to production branches, ensuring the security and stability of live systems with minimal disruption.
Troubleshooting Common Git Cherry-Pick Issues
"No Changes Added to Commit" Error: Causes and Solutions
One common error encountered during git cherry-pick is "No changes added to commit (use 'git add' and/or 'git commit -a')". This error typically arises when the commit you are cherry-picking either introduces no changes relative to the target branch, or when conflicts occur during the cherry-pick but are not resolved and staged. If the cherry-picked commit truly introduces no changes, it might be because the changes it contains are already present in the target branch, or the commit is empty. In such cases, you can often safely ignore the error, as no new changes need to be committed.
However, if you expect changes to be applied and encounter this error, it's more likely due to unresolved conflicts. Git stops the cherry-pick process when conflicts occur and requires manual resolution. To solve this, first, check the output of git status after the cherry-pick command. It will list the files with conflicts. Resolve these conflicts manually using a text editor or git mergetool as described earlier. After resolving the conflicts in each file, stage them using git add <resolved_file>. Once all conflicts are resolved and staged, use git cherry-pick --continue to complete the cherry-pick operation. Ensure you have staged the resolved files before using --continue; otherwise, Git won't detect the resolution, and you might encounter the "No changes added to commit" error again.
Dealing with Cherry-Pick Loops and Duplication: Identifying and Preventing
Cherry-pick loops and duplication occur when commits are repeatedly cherry-picked back and forth between branches, leading to a confusing and redundant commit history. This can happen if cherry-picking is not carefully managed, especially in workflows involving multiple branches and frequent cherry-picking. To identify potential cherry-pick loops or duplications, regularly review the commit history using git log --graph --oneline --decorate. This command provides a visual representation of the branch and commit structure, making it easier to spot duplicated commits or unusual patterns. Look for commits with similar commit messages or changesets appearing multiple times in different branches.
To prevent cherry-pick loops and duplication, establish clear guidelines for cherry-picking within your team. Document which branches are intended for cherry-picking and under what circumstances. Use the -x option consistently when cherry-picking to track the origin of commits, making it easier to identify if a commit has already been cherry-picked. Before cherry-picking a commit, always check the commit history of the target branch to ensure it hasn't already been applied. If you suspect duplication, use git diff to compare the content of potentially duplicated commits to confirm if they are indeed identical or very similar. Careful planning, communication, and consistent use of Git best practices are crucial for preventing cherry-pick loops and maintaining a clean and manageable commit history.
Recovering from a Failed Cherry-Pick Operation: Using git reset and git reflog
If a git cherry-pick operation goes wrong, perhaps due to unresolved conflicts that lead to a corrupted state, or if you simply want to undo a cherry-pick, Git provides tools for recovery. The git cherry-pick --abort command, as discussed earlier, is the simplest way to abort an ongoing cherry-pick operation and return your branch to its state before the cherry-pick started. This is useful if you realize during the process that the cherry-pick is not going as planned or you decide to undo it.
For more complex recovery scenarios or if you need to undo a cherry-pick operation that has already been completed (committed), git reset and git reflog are powerful tools. If you just committed a cherry-pick and want to undo it, you can use git reset --hard HEAD^ to move your branch back to the commit before the cherry-pick. However, be cautious with --hard as it discards changes in your working directory and staging area. A safer alternative, especially if you're unsure, is to use git reset --soft HEAD^. This also moves the branch back but keeps the changes from the cherry-pick in your staging area, allowing you to inspect them or try a different approach.
git reflog is a more comprehensive recovery tool. It shows a log of all changes to your branch's HEAD, including cherry-pick attempts, resets, and branch switches. You can use git reflog to find the commit your branch was at before the failed cherry-pick operation. Once you identify the desired commit hash from git reflog, you can use git reset --hard <commit_hash_from_reflog> to forcefully reset your branch to that state, effectively undoing the failed cherry-pick and any other operations performed since that point. git reflog is an invaluable tool for recovering from various Git mishaps, including botched cherry-pick operations, providing a safety net to undo mistakes and restore your repository to a previous known state.
Git Cherry-Pick Alternatives and When to Use Them
Git Rebase: A Potential Alternative for Integrating Smaller Changes
While git cherry-pick excels at selectively applying individual commits, git rebase offers an alternative approach for integrating changes, particularly when dealing with smaller, focused sets of changes or feature branches. Git rebase rewrites the commit history by moving or combining commits. Instead of picking individual commits, rebase takes all the commits from a branch and replays them onto another branch, creating a linear history. If you have a small feature branch with a few clean, well-organized commits that you want to integrate into the main branch, rebasing can be a cleaner alternative to merging, as it avoids creating a merge commit and results in a simpler, linear history.
For example, if you have a feature branch feature-branch based off main, and you want to integrate its changes into main, you can checkout feature-branch and run git rebase main, then checkout main and run git merge feature-branch. This will effectively move the base of feature-branch to the tip of main and then fast-forward merge feature-branch into main, resulting in a linear sequence of commits on main. However, rebasing rewrites history, which can be problematic if the branch has already been shared with others. Therefore, rebase is generally recommended for local feature branches or when collaborating on branches where history rewriting is acceptable and well-understood within the team. When deciding between git cherry-pick and git rebase, consider the scope of changes, the desired history outcome, and the collaboration context.
Git Merge: When Merging is the Better Option for Larger Integrations
Git merge remains the primary and often preferred method for integrating larger features or when preserving the complete branch history is important. Unlike git cherry-pick, which selectively applies commits, and git rebase, which rewrites history, git merge integrates entire branches together, creating a merge commit that explicitly records the branch integration point. When you are ready to integrate a fully developed feature branch into the main branch, merging is typically the most appropriate approach. Merging preserves the branch's history and provides a clear record of when and how branches were integrated.
For example, to merge a feature branch feature-x into main, you would checkout main and run git merge feature-x. Git will create a new merge commit on main that combines the changes from feature-x and main. Merge commits clearly delineate branch integrations in the history graph, which can be valuable for understanding the project's evolution and branch management. While merging can sometimes lead to more complex history graphs compared to rebasing, it is generally safer for collaboration, especially on shared branches, as it avoids rewriting history. For large feature integrations, long-lived branches, and collaborative workflows where preserving history is paramount, git merge is often the better option compared to git cherry-pick or git rebase.
Assessing the Best Approach: Considering Branching Strategy and Team Workflow
Choosing between git cherry-pick, git rebase, and git merge depends heavily on your team's branching strategy and overall workflow. There's no single "best" approach; the optimal choice depends on the specific scenario and project needs. If your workflow emphasizes a linear history and you are working on isolated feature branches, rebasing might be preferred for integrating smaller features before merging. If you prioritize preserving the full history and are integrating larger features or long-lived branches, merging is generally the more suitable option. Git cherry-pick shines when you need to selectively apply specific commits, such as bug fixes to stable releases or feature backports, without bringing in entire branches.
Consider your team's collaboration style and comfort level with history rewriting. If your team is comfortable with rebasing and understands its implications, it can be a valuable tool for maintaining a cleaner history. However, if history rewriting is discouraged or poses risks in your collaborative environment, merging might be the safer and more conventional choice. For hotfix procedures and maintaining stable release branches, git cherry-pick is often indispensable, providing the precision needed to apply targeted fixes without broader branch integrations. Ultimately, the best approach involves understanding the strengths and weaknesses of each command, aligning them with your branching strategy, and establishing clear guidelines for your team to ensure consistent and effective version control practices.
Conclusion: Leveraging Git Cherry-Pick for Effective Version Control
Key Takeaways: Mastering the Art of Cherry-Picking
Mastering git cherry-pick is a significant step towards becoming proficient in Git and version control. This powerful command provides developers with granular control over change integration, allowing for selective application of commits across branches. Key takeaways from this guide include understanding that git cherry-pick is ideal for specific use cases like bug fixes, feature backporting, and hotfixes, where targeted change application is crucial. It differs significantly from git merge and git rebase, offering a more precise approach than merging entire branches or rewriting history with rebase. Successfully using git cherry-pick involves understanding its basic command structure, strategies for cherry-picking single and multiple commits, and techniques for resolving conflicts that may arise during the process.
Advanced techniques such as using the -x option for tracking cherry-picked commits, managing cherry-pick processes with --continue, --abort, and --quit, and carefully handling cherry-picking of merge commits further enhance workflow efficiency. Best practices for collaborative teams emphasize clear communication, documentation of cherry-pick decisions, and avoiding common pitfalls like duplication and conflicting changes. Real-world scenarios demonstrate the practical application of git cherry-pick in bug fixing, feature backporting, and security patching, highlighting its value in diverse development contexts. Troubleshooting common issues and understanding alternatives like git rebase and git merge complete the skillset for effectively leveraging git cherry-pick in your version control strategy. By mastering git cherry-pick, developers can significantly improve their ability to manage changes precisely, maintain stable releases, and streamline hotfix procedures, ultimately leading to more efficient and robust software development workflows.
Further Resources for Advanced Git Techniques
To deepen your understanding of git cherry-pick and explore more advanced Git techniques, several resources are available. The official Git documentation is an invaluable source of information, providing comprehensive details on all Git commands, including git cherry-pick. Online tutorials and interactive Git learning platforms offer practical exercises and visual explanations to solidify your understanding of cherry-picking and other Git concepts. Websites dedicated to Git workflows and best practices often feature articles and guides on advanced branching strategies and effective use of commands like git cherry-pick, git rebase, and git merge.
Consider exploring resources that delve into topics like Git hooks for automating workflow processes, advanced branching strategies like Gitflow or GitHub Flow, and techniques for managing large repositories and complex merge scenarios. Practicing regularly with Git in real-world projects and experimenting with different commands and workflows is crucial for building practical skills.
Engaging with the Git community through forums, online discussions, and open-source projects can also provide valuable insights and help you stay updated with best practices and new developments in Git and version control. Continuous learning and hands-on experience are key to truly mastering Git and leveraging its full potential for effective software development.
Frequently Asked Questions
What is git cherry-pick and what does it do?
git cherry-pick is a powerful command that allows you to select specific commits from one branch and apply them to another. It essentially "picks" a commit and copies its changes.
When would I use git cherry-pick instead of git merge?
You would typically use git cherry-pick when you only need a few commits from another branch, rather than merging the entire branch. This is useful for selective bug fixes or feature additions.
What happens if there are conflicts during a git cherry-pick?
If conflicts arise, Git will pause the cherry-pick and allow you to resolve the conflicts manually. You'll need to edit the conflicted files, stage the changes, and then use git cherry-pick --continue.
Can I cherry-pick multiple commits at once?
Yes, you can. You can specify a range of commits using git cherry-pick <commit1>..<commit2>. This picks all commits between and including commit1 and commit2.
Is it safe to cherry-pick commits that have already been merged?
It's generally safe, but it can create duplicate commits in your history. Be mindful of this and consider whether a merge might be a cleaner solution in that scenario.
Final Reflection: Embracing Selective History
The power of selective history manipulation through git cherry-pick is more relevant than ever in today's fast-paced development environments. As projects grow in complexity and teams become increasingly distributed, the ability to isolate and integrate specific changes becomes crucial for maintaining stability, streamlining workflows, and ensuring efficient collaboration. This tutorial has aimed to demystify the process, empowering developers to wield this powerful tool with confidence.
The ongoing influence of git cherry-pick extends far beyond simple code integration; it shapes how we approach problem-solving, manage risk, and foster innovation within our teams. Understanding its nuances allows us to navigate complex branching strategies, address critical bug fixes with precision, and ultimately, build more robust and reliable software. The best way to predict the future is to create it.
– Peter Drucker. This quote resonates deeply with the spirit of git cherry-pick, as it allows us to actively shape our project's history and trajectory.
Now, armed with this knowledge, I invite you to reflect on how you can integrate git cherry-pick into your own development practices. Consider the potential it holds for simplifying your workflows, resolving conflicts, and contributing more effectively to your team's success. Embrace the power of selective history, and let it guide you towards a future of cleaner, more efficient, and ultimately, more impactful code.
Unleash the Power of Cherry-Picking!
Thank you for diving deep into the world of Git cherry-picking! We hope you've gained valuable insights into this powerful technique for selecting specific commits. Now, let's put your newfound knowledge into action and refine your Git workflow.
Here are a few ways to get started:
- Experiment with cherry-picking in a safe, isolated branch. This is the best way to truly master the technique without impacting your main codebase. Create a new branch just for testing and see how cherry-pick can streamline your work.
- Share this article with your fellow developers! Let them discover the benefits of cherry-picking and improve their Git skills.
- Try cherry-picking a commit from a public repository on GitHub and contribute it to your own project or create a pull request for the original repository.
What fascinating use case for cherry-picking are you planning to explore first? Let us know in the comments!