
Your First Git Steps: Initialization, Staging, and Committing Made Easy

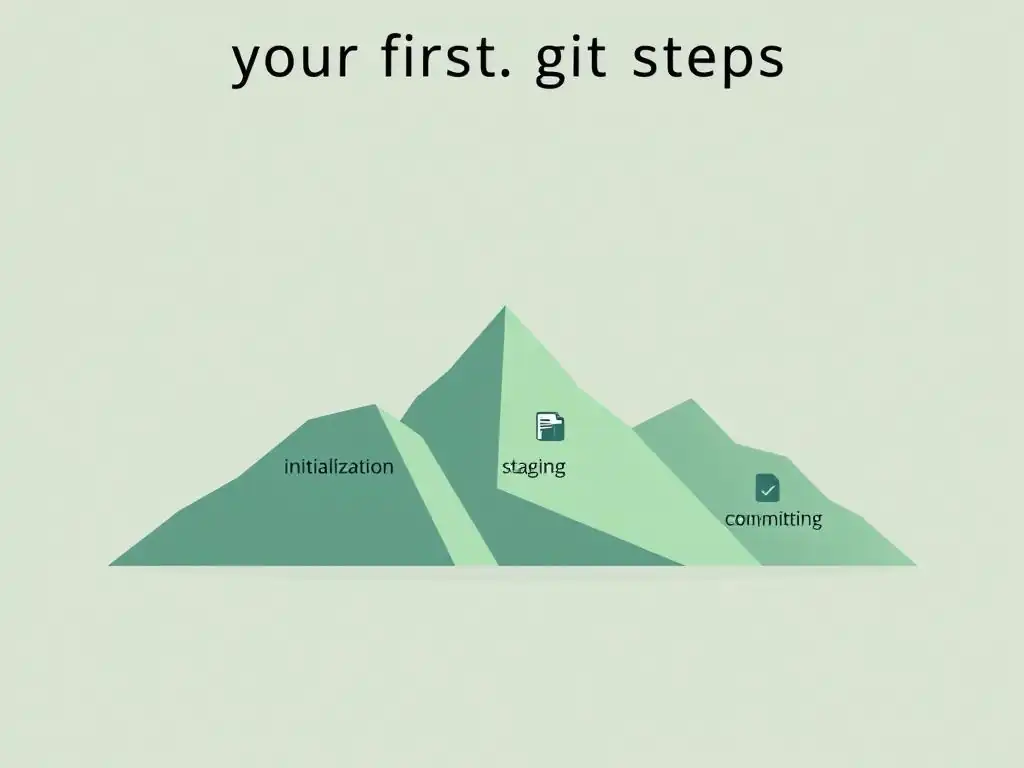
Welcome to the Git and Version Control Hub, your central resource for mastering the art of collaborative coding! Ready to take your projects to the next level? This article dives into the essential first step: how to initialize a Git repository. Discover the secrets to tracking your changes and laying the groundwork for efficient version control. What exactly happens when you initialize a repository and how does it set the stage for your entire workflow? Let's unravel the mysteries and get your Git journey started!
- Introduction to Git: A Beginner's Guide to Version Control
- How to Initialize a Git Repository: Setting Up Your Project for Version Control
- Staging Changes in Git: Preparing Files for Your Commit
- Committing Changes in Git: Saving Your Work with Meaningful Messages
- Practical Example: Initializing, Staging, and Committing a Simple Text File
- Undoing Changes: Removing Files from Staging and Uncommitting
- Best Practices for Git Initialization, Staging, and Committing
- Conclusion: Mastering the Fundamentals of Git Version Control
- Frequently Asked Questions
- Final Reflection: Embracing Version Control's Power
- Unleash Your Inner Git Master!
Introduction to Git: A Beginner's Guide to Version Control
Why Use Git for Version Control?
Imagine you are working on a crucial software project, or even a simple document. Without version control, every change you make is potentially irreversible. If you accidentally delete a crucial section of code or decide to revert to a previous version, you might find yourself in a difficult situation, especially if you haven't been meticulously saving copies.
This is where Git comes to the rescue. Git is a powerful version control system that tracks changes to files over time, allowing you to revert to previous versions, compare changes, and collaborate more effectively with others. Think of it as a detailed history book for your project, where every modification is carefully recorded.
For instance, if you are developing a website and introduce a bug in the latest update, Git allows you to effortlessly roll back to the last working version, minimizing downtime and frustration. In collaborative environments, Git is invaluable for managing contributions from multiple developers, preventing conflicts and streamlining the development process.
Furthermore, Git is not just about undoing mistakes; it’s about enhancing productivity and collaboration. By using Git, you gain the ability to work on new features in isolation (using branches), merge changes smoothly, and understand the evolution of your project through detailed commit histories. Consider a scenario where a team of four developers is working on different features of a mobile application simultaneously. Git enables each developer to work on their feature branch without disrupting the main codebase.
Once a feature is complete and tested, it can be merged back into the main branch with confidence, ensuring a cohesive and stable product. This parallel development significantly accelerates project timelines and improves overall code quality. The benefits of using Git extend beyond just software development; it's equally useful for managing documentation, configuration files, or any collection of files that evolve over time.
Understanding the Basics: Repositories, Staging Area, and Commits
To effectively use Git, it's essential to understand three core concepts: repositories, the staging area, and commits. A Git repository, often simply called a "repo," is the heart of version control. It’s essentially a folder, usually located in the root directory of your project, that contains all the history of your project's files, along with Git's internal data structures. When you initialize Git in a project, you are creating a .git directory, which is the repository itself. This repository tracks all changes within your project directory. You can have both local repositories on your computer and remote repositories hosted on platforms like GitHub or GitLab, allowing for collaboration and backup.
The staging area, also known as the "index," is an intermediate area where you prepare changes before committing them to the repository. Think of it as a preparation zone. When you modify files in your project, Git is aware of these changes, but they are not yet part of your project's history until you stage and then commit them.
The staging area allows you to selectively choose which changes you want to include in your next commit. For example, if you've modified five files but only want to commit changes from three of them in a specific commit, you would stage only those three files.
Finally, a commit is a snapshot of your project at a specific point in time. Each commit represents a saved state of your project, and it includes a message describing the changes you made since the last commit. Commits are the building blocks of your project's history, and they allow you to navigate back and forth in time to review previous states of your project.
Every commit is uniquely identified and contains information about the changes made, the author, and a timestamp. By making frequent, well-described commits, you build a detailed and understandable history of your project, making it easier to manage and maintain over time.
How to Initialize a Git Repository: Setting Up Your Project for Version Control
Creating a New Project Directory
Before you can harness the power of Git, you first need a project directory. This directory will house all your project files, whether it's code, documents, or any other type of digital asset you want to track with version control. Creating a new project directory is straightforward. Open your terminal or command prompt, navigate to the location where you want to create your project, and use the mkdir command followed by your desired project name. For instance, if you want to create a project called "my-website," you would type mkdir my-website and press Enter. This command creates a new folder named "my-website" in your current directory.
Once you have created your project directory, you need to navigate into it. In the terminal, use the cd command followed by the project directory name. Continuing with our example, you would type cd my-website and press Enter. Now, your terminal's current working directory is "my-website." This is where you will initialize your Git repository. Ensuring you are in the correct project directory before initializing Git is crucial because Git will track changes within this directory and its subdirectories. A well-organized project directory from the start will contribute to a cleaner and more manageable Git repository in the long run.
Using the git init Command: Starting Your Git Repository
With your project directory created and you navigated into it using the terminal, you are now ready to initialize a Git repository. This is the crucial step in setting up version control for your project. To initialize a Git repository, simply type the command git init in your terminal while inside your project directory and press Enter. This command is the cornerstone of "how to initialize Git repository" and marks the beginning of version control for your project. When you execute git init, Git sets up all the necessary internal structures to start tracking changes.
Upon successful execution of git init, Git will display a message in your terminal, typically indicating "Initialized empty Git repository in [your project directory path]/.git/". This message confirms that a new Git repository has been successfully created in your project directory. Behind the scenes, the git init command creates a hidden directory named .git inside your project directory. This .git directory is the Git repository itself, containing all the objects and references that Git uses to manage versions of your project. It's important not to modify or delete the .git directory directly, as it is managed by Git and essential for its operation. Initializing a Git repository is a one-time operation per project; once initialized, Git is active and ready to track changes in your project.
Verifying Successful Git Repository Initialization: Checking for the .git Folder
After running the git init command, it's good practice to verify that the Git repository has been initialized correctly. The most straightforward way to do this is to check for the presence of the .git directory within your project directory. As mentioned earlier, the .git directory is created by the git init command and is hidden by default in most operating systems because it contains Git's internal files and is not meant to be directly manipulated by users.
To check for the .git directory, you can use your operating system's file explorer or your terminal. In most file explorers, you'll need to enable the option to show hidden files and folders. Once enabled, you should see the .git folder in your project's root directory. Alternatively, using the terminal, you can use the command ls -a (on macOS and Linux) or dir /a (on Windows) within your project directory. These commands list all files and directories, including hidden ones. In the output, you should see .git listed. The presence of the .git directory confirms that you have successfully initialized a Git repository and that Git is now tracking your project. If you don't see the .git directory, it means the git init command might not have executed correctly, and you should rerun it, ensuring you are in the correct project directory.
Staging Changes in Git: Preparing Files for Your Commit
Understanding the Staging Area (Index) in Git
The staging area, often referred to as the "index," is a crucial intermediate step in Git's workflow. It acts as a buffer zone between your working directory and your Git repository. When you make changes to files in your project, Git becomes aware of these modifications. However, these changes are not automatically included in your next commit. Instead, you must explicitly add these changes to the staging area. Think of the staging area as a checklist of changes you intend to include in your next snapshot of your project's history – your commit.
The purpose of the staging area is to provide flexibility and control over what gets committed. It allows you to group related changes into logical commits, even if those changes are spread across multiple files. For instance, if you are working on a new feature and modify several files, you can stage only the changes related to that specific feature, ensuring that each commit is focused and meaningful.
Without the staging area, every change in your working directory would be committed at once, leading to potentially large and less organized commits. The staging area empowers you to curate your commits, making your project history cleaner and easier to understand.
Using git add: Adding Files to the Staging Area
The git add command is how you move changes from your working directory to the staging area in Git. This command is essential for preparing your modifications to be included in your next commit. After you have made changes to files in your project, you need to use git add to stage those changes. To add all changed files in your current directory and its subdirectories to the staging area, you can use the command git add . The dot . signifies the current directory, and git add . is a convenient way to stage all changes at once.
Alternatively, if you want to stage specific files, you can specify their names after the git add command. For example, to stage a file named index.html, you would use the command git add index.html. You can also stage multiple files at once by listing their names separated by spaces, such as git add index.html styles.css script.js. Git intelligently tracks which files have been modified and will add the current version of the specified files to the staging area. It's important to note that git add only stages the current state of the file. If you make further changes to a file after staging it, you will need to run git add again to stage the new changes before committing.
Staging Specific Files or Directories with git add
Git provides flexibility in how you stage changes, allowing you to target specific files or entire directories. As mentioned, to stage a specific file, you simply use git add followed by the filename, like git add my_document.txt. This is useful when you've made changes across several files but only want to commit modifications to my_document.txt in the current commit.
You can also stage an entire directory and all its contents, including subdirectories and files within them, using git add followed by the directory name. For example, if you have a directory named src containing your source code, using git add src will stage all changes within the src directory. This is particularly helpful when you've made extensive changes across a project's module or feature encapsulated within a directory. Furthermore, you can use wildcards to stage files based on patterns. For instance, git add *.txt will stage all files ending with .txt in the current directory and its subdirectories. Similarly, git add path/to/directory/*.js will stage all JavaScript files within the specified directory. These methods allow for precise control over what changes are included in the staging area, enabling you to create focused and well-organized commits.
Checking the Status of Your Staged Files: Using git status
After staging files using git add, it’s crucial to verify which changes are staged and which are not. The git status command is your go-to tool for checking the status of your working directory and staging area. Simply type git status in your terminal and press Enter. Git will then provide a summary of the current state of your repository, including information about staged changes, unstaged changes, and untracked files.
The output of git status is generally very informative. It will typically list changes that are staged to be committed under the heading "Changes to be committed." These are the files you have successfully added to the staging area using git add. It will also list changes that are not staged for commit under the heading "Changes not staged for commit." These are files you have modified in your working directory but have not yet added to the staging area. Additionally, git status will show "Untracked files," which are files in your working directory that Git is not currently tracking. These files are usually new files that have not yet been added to Git's version control. Regularly using git status helps you keep track of your changes and ensures you are staging the correct files before committing, preventing accidental commits of unwanted changes.
Committing Changes in Git: Saving Your Work with Meaningful Messages
Understanding Commits: Snapshots of Your Project
Commits are the fundamental building blocks of your project's history in Git. A commit is essentially a snapshot of your entire project at a specific point in time. When you make a commit, you are saving the current state of all the staged files into the Git repository. Each commit is permanent and immutable once created, forming a chronological record of your project's evolution. Think of commits as checkpoints in a video game; you can always revert back to any previous checkpoint (commit) if needed.
Every commit in Git is uniquely identified by a long, alphanumeric hash (SHA-1 hash) that is calculated based on the commit's content, author, timestamp, and parent commits. This hash ensures the integrity of the commit history. Commits are not just about saving file versions; they also include metadata such as the author of the changes, the date and time of the commit, and a commit message describing the changes made.
This metadata is crucial for understanding the history of your project and for collaboration. By creating a series of commits over time, you build a detailed and traceable history of your project, allowing you to easily review past changes, understand the project's development, and revert to earlier states if necessary.
Using git commit: Creating a Commit with a Message
The git commit command is used to save the staged changes as a new commit in your Git repository. This command finalizes the process of capturing a snapshot of your project's state. To create a commit, you simply type git commit in your terminal and press Enter. However, just running git commit will typically open a text editor where you are prompted to write a commit message. Commit messages are essential for explaining the changes included in the commit.
A more common and recommended way to commit is to use the -m flag followed by your commit message directly in the command line. For example, git commit -m "Add initial README file" will create a new commit with the message "Add initial README file." Using the -m flag is often quicker and more efficient for simple commits. After executing the git commit command, Git will output information about the commit, including which branch you are on, the commit hash, and the number of files changed, insertions, and deletions. This confirms that your commit has been successfully created and added to your project's history. Remember, only the changes that have been staged using git add will be included in the commit.
Writing Effective Commit Messages: Best Practices
Writing clear and informative commit messages is a crucial aspect of using Git effectively, especially in collaborative projects. A well-written commit message explains the why behind the changes, not just the what. Following best practices for commit messages makes your project history more understandable and maintainable for yourself and your team.
A widely adopted best practice is to start your commit message with a concise summary of the changes in the imperative mood, limited to about 50 characters. This summary should complete the sentence "If applied, this commit will…". For example, instead of "Added a new feature," use "Add new user authentication feature."
After the summary line, leave a blank line, and then provide a more detailed explanation of the changes, if necessary. This detailed body can explain the context of the changes, the problem they solve, and any relevant details. Keep the lines in the body to around 72 characters for better readability in terminals and Git tools. Use consistent language and tone in your commit messages.
Avoid generic messages like "Fixed bug" or "Updated files." Instead, be specific and descriptive, such as "Fix: Resolved issue with user login failure due to incorrect password hashing algorithm." Using prefixes like "feat:" for new features, "fix:" for bug fixes, "docs:" for documentation changes, and "refactor:" for code refactoring can also improve the organization and readability of your commit history. Well-crafted commit messages are invaluable for understanding the evolution of your project and for debugging or reverting changes in the future.
Viewing Your Commit History: Using git log
Once you start making commits, you'll want to review your project's history. The git log command is the primary tool in Git for viewing the commit history. Simply type git log in your terminal and press Enter to see a list of commits in reverse chronological order (newest commits first). By default, git log displays each commit with its commit hash, author, date, and commit message. This provides a basic overview of your project's commit history.
git log offers various options to customize the output and filter the commit history. For a more concise one-line view of commits, you can use git log --oneline. This displays each commit as a single line with a shortened commit hash and the commit message summary. To see the changes introduced in each commit (the diff), you can use git log -p. This will show the patch (difference) for each commit, indicating the lines added and removed. You can also filter commits by author using git log --author="Your Name" or by date using options like --since and --until. To navigate through a long commit history, use the arrow keys to scroll, and press q to quit and return to the terminal prompt. git log is an essential command for understanding the history of your project, tracking changes, and reviewing contributions from team members.
Practical Example: Initializing, Staging, and Committing a Simple Text File
Creating a README.md File
Let's walk through a practical example to solidify your understanding of initializing, staging, and committing in Git. First, ensure you are in your project directory (e.g., "my-website") that you initialized with git init. Now, let's create a simple text file named README.md. README.md files are commonly used in projects to provide a brief introduction and instructions for the project. You can create this file using your text editor or directly from the terminal. In the terminal, you can use the touch command to create an empty file: touch README.md.
Next, open the README.md file with a text editor and add some content. For example, you could write:
# My Awesome Website Project

This is a simple website project managed with Git.
This README file provides a basic introduction to the project.
Save the README.md file after adding the content. At this point, you have created a new file in your project directory, and Git is aware of this change, but it's not yet staged or committed.
Staging and Committing the README.md File
Now that you have created and populated your README.md file, the next step is to stage it and then commit it to your Git repository. First, check the status of your repository using git status. You should see that README.md is listed under "Untracked files." To stage the README.md file, use the git add command: git add README.md. After running this command, use git status again. You should now see README.md listed under "Changes to be committed" – this means the file is now staged and ready to be committed.
Finally, to commit the staged README.md file, use the git commit command with a meaningful message: git commit -m "Add initial README file". After executing this command, Git will output a confirmation message indicating that one file has been changed and insertions have been made. You have now successfully initialized a Git repository, created a file, staged it, and committed it. This is the basic workflow for getting your project under version control with Git.
Viewing the Commit in the Git History
To verify that your commit has been successfully recorded in the Git history, use the git log command. Type git log in your terminal and press Enter. You should see the commit you just created listed in the output. The output will include the commit hash, author information, date, and the commit message "Add initial README file."
For a more concise view, you can use git log --oneline. This will display a simplified version of the commit history, showing only the shortened commit hash and the commit message summary. In this case, you would likely see something like:
[commit hash] Add initial README file
Where [commit hash] is the unique hash of your commit. Viewing the commit history with git log confirms that your initial commit has been successfully added to your project's version history. As you continue to make changes, stage, and commit, your Git history will grow, providing a detailed record of your project's development.
Undoing Changes: Removing Files from Staging and Uncommitting
Removing Files from the Staging Area: git rm --cached
Sometimes, you might accidentally stage a file that you didn't intend to commit, or you might decide to remove a file from version control but keep it in your working directory. In such cases, you need to know how to remove files from the staging area. The command git rm --cached is used to remove a file from the staging area (index) and stop tracking it, but it leaves the file in your working directory.
For example, if you accidentally staged a file named sensitive_data.txt and you want to remove it from the staging area before committing, you would use the command git rm --cached sensitive_data.txt. After running this command, the file sensitive_data.txt will be unstaged, meaning it will no longer be included in your next commit, and Git will stop tracking changes to it. However, the file will still be present in your project directory. This command is particularly useful for removing files that should not be part of your repository, such as temporary files or configuration files containing sensitive information, without deleting them from your local file system.
Amending the Last Commit: git commit --amend (Use with Caution)
In situations where you have just made a commit but realize you made a mistake in the commit message or forgot to include a small change, Git provides the git commit --amend command. This command allows you to modify the most recent commit. It's important to use git commit --amend with caution, especially if you have already pushed your commits to a remote repository, as it rewrites the commit history, which can cause issues for collaborators.
To amend the last commit, make the necessary changes (e.g., edit files, stage additional changes with git add). Then, run git commit --amend. This will open your text editor with the previous commit message. You can then modify the commit message or leave it as is. If you staged new changes before running git commit --amend, those changes will also be included in the amended commit. Effectively, git commit --amend replaces the last commit with a new commit that includes the amended changes and/or message. It's generally recommended to use git commit --amend only for correcting mistakes in your local commits before sharing them with others. For more significant changes or if you've already pushed your commits, it's better to create a new commit instead of amending.
Best Practices for Git Initialization, Staging, and Committing
Committing Frequently and with Clear Messages
One of the most fundamental best practices in Git is to commit frequently and with clear, concise, and descriptive commit messages. Frequent commits create a detailed history of your project, making it easier to track changes, revert to previous states, and understand the evolution of your codebase. Aim to commit logical units of work. For example, commit after completing a feature, fixing a bug, or refactoring a specific section of code. Small, focused commits are easier to review and understand than large, monolithic commits.
Alongside frequent commits, writing clear and informative commit messages is equally crucial. As discussed earlier, a good commit message summarizes the changes and explains the reasoning behind them. Start with a concise summary in the imperative mood, followed by a blank line and a more detailed explanation if needed. Well-written commit messages serve as valuable documentation for your project's history, helping you and your team understand the purpose and context of each change. Adhering to these practices will significantly enhance the maintainability and collaborative nature of your Git repository.
Using .gitignore to Exclude Unnecessary Files
In almost every project, there are files and directories that you don't want to track with Git. These might include temporary files, build artifacts, log files, dependency directories (like node_modules in Node.js projects), or files containing sensitive information. Including such files in your Git repository can clutter your history, increase repository size, and potentially expose sensitive data. The .gitignore file is used to specify intentionally untracked files that Git should ignore.
Create a file named .gitignore in the root directory of your Git repository. Inside this file, list the patterns for files and directories you want Git to ignore. Each pattern should be on a new line. You can use wildcards like * to match multiple files or directories. For example, to ignore all files ending with .log, you would add *.log to .gitignore. To ignore the entire node_modules directory, you would add node_modules/. Git will automatically read and apply the rules defined in .gitignore. Using .gitignore ensures that your repository remains clean and focused on essential project files, improving efficiency and security.
Regularly Checking the Status of Your Repository
Developing a habit of regularly checking the status of your Git repository using the git status command is a simple yet highly effective best practice. Checking git status frequently provides you with up-to-date information about the state of your working directory, staging area, and repository. Before making any significant changes, committing, or switching branches, run git status to ensure you have a clear understanding of the current state.
git status helps you identify unstaged changes, staged changes, untracked files, and the current branch you are working on. This allows you to catch accidental modifications, ensure you are staging the correct files before committing, and avoid committing unintended changes. By making git status a routine part of your Git workflow, you can maintain better control over your changes, prevent errors, and keep your repository in a consistent and organized state. It's a quick command that can save you from potential headaches and streamline your version control process.
Conclusion: Mastering the Fundamentals of Git Version Control
Next Steps: Exploring Branching, Merging, and Remote Repositories
Congratulations! You've now taken your first steps into the world of Git and version control. You've learned how to initialize a Git repository, stage changes, and create commits – the foundational skills for managing your projects with Git. Mastering these fundamentals is crucial for any developer, regardless of experience level. By understanding initialization, staging, and committing, you've laid a solid groundwork for more advanced Git concepts and workflows.
As you continue your Git journey, the next logical steps are to explore branching and merging, which are powerful features for managing parallel development and feature isolation. Branching allows you to create independent lines of development, enabling you to work on new features or bug fixes without disrupting the main codebase. Merging is the process of integrating changes from one branch into another.
Furthermore, learning about remote repositories and collaboration platforms like GitHub and GitLab will open up the world of team-based development and code sharing. These platforms provide tools for hosting your Git repositories online, collaborating with others, managing pull requests, and setting up CI/CD pipelines. Continue practicing and exploring these advanced topics to unlock the full potential of Git and version control in your software development endeavors.
Frequently Asked Questions
How do I initialize a Git repository?
To initialize a Git repository, use the command git init in your project's root directory. This creates a hidden .git folder that tracks changes to your project. It essentially turns your project folder into a Git repository.
What does staging files in Git mean?
Staging files in Git means preparing them for the next commit. You use the git add command to move files from the working directory to the staging area, indicating which changes you want to include in your next snapshot.
What is a Git commit, and why is it important?
A Git commit is a snapshot of your project at a specific point in time. It's important because it allows you to track changes, revert to previous versions, and collaborate effectively with others.
How do I commit my staged changes in Git?
You commit staged changes using the git commit -m "your commit message" command. The -m flag allows you to add a descriptive message explaining the purpose of the commit.
What's the difference between the working directory, staging area, and Git repository?
The working directory is where you make changes to your files. The staging area is where you prepare changes for the next commit, and the Git repository stores the history of all your commits.
Final Reflection: Embracing Version Control's Power
The journey into version control, as we've explored, begins with a single command: git init. This seemingly simple act unlocks a world of possibilities, transforming folders into living histories of our projects. The ability to track changes, revert to previous states, and collaborate seamlessly is no longer a luxury, but a fundamental requirement in today's dynamic development landscape.
This initial step, and the subsequent dance of staging and committing, has profoundly influenced how we build software, write documentation, and even manage personal projects. Understanding these core principles is not just about mastering Git; it's about embracing a mindset of iterative improvement and collaborative creation. Version control is not just a tool; it's a philosophy of continuous improvement and collaboration.
This philosophy empowers us to experiment fearlessly, knowing that we can always rewind and learn from our mistakes.
As you embark on your Git journey, remember that every git init, every git add, and every git commit is a step towards greater control, clarity, and collaboration. Embrace the power of version control, experiment with its features, and allow it to transform the way you approach your projects. The future of your work, and perhaps even your collaborative spirit, awaits.
Okay, I will use the provided title and website information to create a compelling Call to Action (CTA) at the end of a hypothetical web article.
Unleash Your Inner Git Master!
Thank you for exploring the world of Git with us! We hope this article has empowered you to understand and confidently navigate the initial stages of version control. Now, let's put that knowledge into action and solidify your Git foundation!
Here's what you can do right now:
- Initialize a brand-new Git repository! Create a simple project,
cdinto it in your terminal, and rungit init. Feel the power! - Experiment with staging and committing. Add a README file, stage it, and write your first commit message. Don't be afraid to make mistakes; that's how you learn!
- Share your newfound Git wisdom with a friend or colleague. Helping others is the best way to reinforce your understanding.
Ready to confidently manage your code and collaborate like a pro? What awesome project are you going to version control with Git first?