
Git Reflog for Beginners: Your First Steps in Commit History Exploration

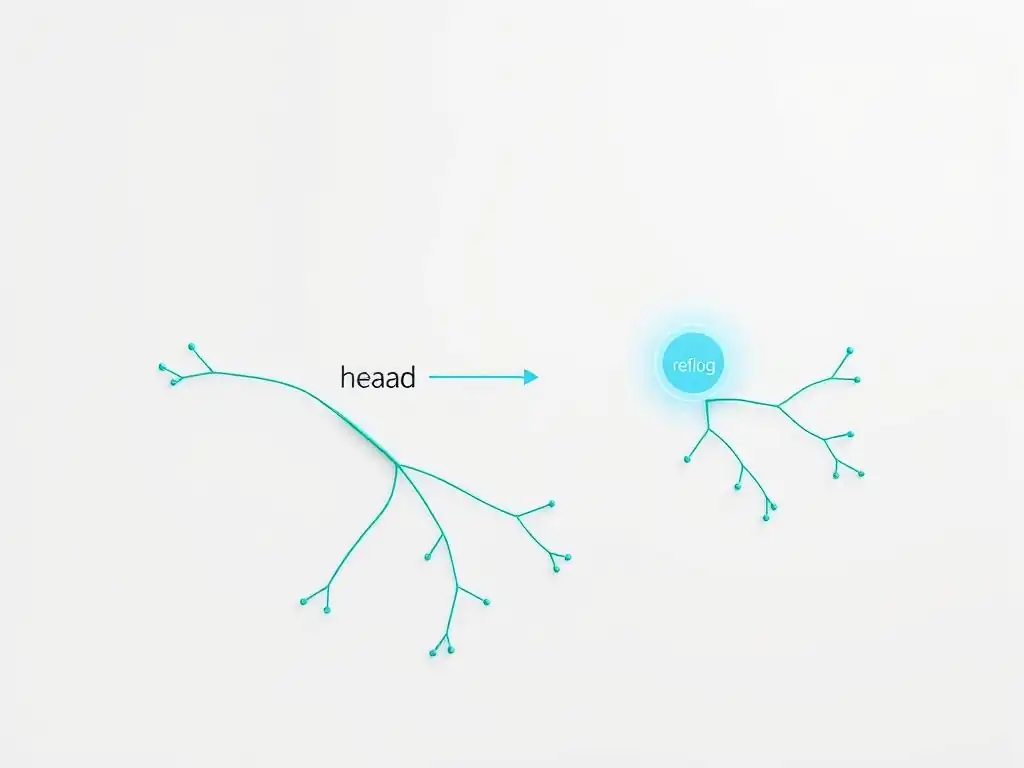
Welcome to Git and Version Control Hub!
Ever accidentally deleted a branch or lost a commit? Don't panic! Dive into Git reflog – your secret weapon for recovering lost work and understanding the hidden depths of your repository's history. This guide, "Git Reflog for Beginners: Your First Steps in Commit History Exploration," unlocks the power of git reflog, showing you how to use git reflog to trace your steps and rescue lost commits. Curious to see what's lurking in your Git history? Read on to discover the power of this often-overlooked command and become a Git recovery master!
Git Reflog: Recovering Lost Work in Git
- Introduction to Git Reflog
- Exploring the Git Reflog
- Recovering Lost Commits
- Practical Examples
- Advanced Techniques
- Git Reflog vs. Git Log
- Best Practices
- Troubleshooting
- Conclusion
- Frequently Asked Questions
- Final Reflection: Unearthing Lost Potential with Git Reflog
- Unleash the Power of Your Git History!
Introduction to Git Reflog
What is Git Reflog?
Git reflog is a powerful mechanism within Git that acts as a safety net for your local repository. Unlike the commit history which primarily tracks changes committed to your project, the reflog records updates to the tip of branches, including when branches are created, deleted, or commits are checked out. Think of it as a detailed, chronological log of everything you've done in your Git repository that has changed the HEAD pointer or branch references. This includes not just commits but also operations like resets, merges, and rebases, even if these actions are not ultimately committed to a branch.
Essentially, Git reflog is your personal time machine for your local Git repository. It diligently notes every movement you make within your repository, providing a comprehensive history of actions that might not be captured in the standard commit history.
This makes it an invaluable tool, especially when you need to understand how to use git reflog to recover from accidental changes or mistakes made during your development process. It allows you to rewind your repository to a previous state, even if that state wasn't formally saved as a commit, offering a unique layer of protection against data loss in your Git workflow.
Why is Git Reflog Important?
The importance of Git reflog stems from its ability to recover lost work that would otherwise be irrecoverable using standard Git commands like git log. Mistakes happen, and in Git, these can sometimes lead to seemingly lost commits or branches. For instance, a git reset --hard command might unintentionally discard recent commits, or a branch deletion might remove valuable work. In these scenarios, the regular commit history, accessed via git log, won't show these "lost" commits because they are no longer referenced by any branch or tag.
This is where Git reflog shines. It maintains a record of these actions, including the commit hashes before these potentially destructive operations. Because reflog tracks changes to your local repository's HEAD and branch pointers, it retains references to commits that have become detached or orphaned from your branch structure. Knowing how to use git reflog means you have a lifeline when you accidentally perform a hard reset, delete a branch containing unpushed commits, or make a mistake during a merge or rebase. It provides a detailed audit trail of repository operations, enabling you to pinpoint and recover specific states or commits that would be otherwise lost, making it an indispensable tool for any Git user.
Exploring the Git Reflog
Basic Syntax: The git reflog Command
The fundamental command to access this powerful feature is simply git reflog. When you execute this command in your terminal within a Git repository, it displays a chronological list of entries from the reflog. Each entry represents an action that has updated the reflog, such as creating a branch, checking out a commit, or resetting the repository state. The basic git reflog command provides a concise overview of recent actions performed in your local repository, showing the reflog entries for the currently checked-out ref (usually HEAD).
Beyond the basic command, git reflog can be used with various subcommands and options to refine the output or access reflog information for specific references. For example, git reflog show can be used to view the reflog for a specific reference, like a branch name (e.g., git reflog show main). Understanding the basic syntax of git reflog is the first step in learning how to use git reflog effectively for recovery and historical analysis. It's the gateway to exploring the rich history of your local Git repository's actions.
Viewing Your Reflog History
To effectively utilize the reflog, you need to know how to view its history in a way that is informative and actionable. Executing git reflog in your terminal provides a list of reflog entries. Each entry typically starts with an alphanumeric string followed by HEAD@{index}, then the action that was performed (like checkout, reset, merge), and a commit message or reference. The HEAD@{index} notation is crucial; it's how you reference specific points in your reflog history. The index is a numerical counter, with HEAD@{0} being the most recent action, HEAD@{1} the action before that, and so on.
For a more detailed view, you can use git reflog show. If you simply run git reflog show, it defaults to showing the reflog for HEAD, which is the same as just git reflog. However, git reflog show becomes more powerful when you specify a reference. For example, git reflog show main will display the reflog specifically for the main branch. This can be particularly useful when you want to trace the history of a specific branch rather than just the overall HEAD movements. Understanding how to view your reflog history using both git reflog and git reflog show is essential for navigating and leveraging this feature effectively.
Interpreting Reflog Output
Interpreting the output of git reflog is key to understanding how to use git reflog for recovery. Each line in the reflog output represents a reflog entry and typically follows a consistent format. Let's break down a typical reflog entry:
a1b2c3d HEAD@{0}: checkout: moving from feature-branch to main
e4f5g6h HEAD@{1}: reset: moving to HEAD~2
i7j8k9l HEAD@{2}: commit: added new feature
a1b2c3d,e4f5g6h,i7j8k9l: These are commit hashes. The first hash is usually the commit thatHEADor the branch was pointing to after the action, and the second (if present) is the commit before the action.HEAD@{0},HEAD@{1},HEAD@{2}: This is the reflog index.@{0}is the most recent entry,@{1}the one before it, and so on. You'll use these indices to refer to specific reflog entries when recovering lost work.checkout: moving from feature-branch to main: This describes the action performed. In this case, it's a checkout operation, indicating a switch from thefeature-branchto themainbranch.reset: moving to HEAD~2: Another action description, indicating a reset operation.HEAD~2suggests moving back two commits from the currentHEAD.commit: added new feature: This describes a commit action, often followed by the commit message (or the first line of it).
By carefully reading these entries, you can reconstruct the sequence of actions performed in your repository. Understanding how to interpret this output is crucial for identifying the specific reflog entry that corresponds to the state you want to recover. The commit hashes and the HEAD@{index} notations are the keys to navigating and utilizing the reflog effectively.
Recovering Lost Commits
Finding Lost Branches
One of the most common scenarios where Git reflog proves invaluable is when you've accidentally deleted a branch. When a branch is deleted, the branch name is removed, but the commits that were part of that branch aren't immediately purged from Git's object database, especially if they are still referenced by the reflog. Git reflog records branch creation and deletion events, making it possible to find commits from deleted branches.
To find a lost branch, you can use git reflog or git reflog show --all to view the reflog for all references, including HEAD and local branches. Look for entries that indicate branch deletion, which typically contain messages like "branch: delete" followed by the branch name. The reflog entry before the deletion will point to the last commit of the deleted branch. By identifying this commit hash or using the HEAD@{index} notation from the reflog entry preceding the deletion, you can effectively "find" the last known state of your lost branch. This is a critical step in learning how to use git reflog to recover branches that might seem permanently gone.
Restoring Lost Commits: git checkout and git reset
Once you've identified a reflog entry that points to a commit you want to restore, whether it's from a lost branch or a previous state you want to revert to, you can use git checkout or git reset commands in conjunction with the reflog reference.
git checkout <reflog-entry>: This command allows you to move yourHEADto the commit specified by the reflog entry. For instance, if you want to go back to the state atHEAD@{3}in your reflog, you would usegit checkout HEAD@{3}. This will put you in a detachedHEADstate, meaning you're not on any branch. From here, you can inspect the recovered files, create a new branch starting from this commit, or further manipulate your repository.git reset --hard <reflog-entry>: This command is more forceful. It resets your current branch (if you are on one) to the commit specified by the reflog entry, and it also updates the working directory and staging area to match. For example,git reset --hard HEAD@{2}will rewind your current branch to the state recorded atHEAD@{2}in the reflog. Usegit reset --hardwith caution, as it will discard any changes in your working directory and staging area since the reflog entry you're resetting to.
Both git checkout and git reset are powerful tools for restoring lost commits using reflog. Choosing between them depends on whether you want to simply explore a past state (use git checkout) or permanently rewind your current branch to a past state (use git reset --hard, with care). Understanding how to use git reflog with these commands is crucial for effective recovery.
Recovering Deleted Branches
Recovering a deleted branch using Git reflog is a straightforward process once you've located the relevant reflog entry. After identifying the reflog entry that precedes the branch deletion (as described in "Finding Lost Branches"), you can recreate the deleted branch at its last commit.
The command to recover a deleted branch is git checkout -b <branch-name> <reflog-entry>. Replace <branch-name> with the name you want to give to your recovered branch (it can be the original name or a new name). Replace <reflog-entry> with the reflog reference pointing to the last commit of the deleted branch, such as HEAD@{3} or a specific commit hash from the reflog.
For example, if you deleted a branch named feature-x and your reflog shows an entry like HEAD@{5}: branch: delete feature-x, and the entry before that, HEAD@{6}, points to the last commit of feature-x, you could recover it with:
git checkout -b recovered-feature-x HEAD@{6}
This command creates a new branch named recovered-feature-x (or you could use the original name feature-x if you prefer) that starts at the commit referenced by HEAD@{6}. This effectively brings your deleted branch back to life with all its commits intact, demonstrating a practical application of how to use git reflog for branch recovery.
Practical Examples
Recovering from an Accidental Hard Reset
Imagine you're working on your main branch and, in a moment of distraction, you accidentally run git reset --hard HEAD~3. This command forcefully moves your main branch back three commits, discarding any commits you made in the last three steps. Panic might set in, but thanks to Git reflog, your work is likely recoverable.
-
View your reflog: Immediately run
git reflog. You'll see a list of recent actions. Look for the entry corresponding to your accidental hard reset. It might look something like:abcdefg HEAD@{0}: reset: moving to HEAD~3 -
Identify the commit before the reset: The reflog entry before the reset (e.g.,
HEAD@{1}) will point to the commit yourmainbranch was at before you rangit reset --hard. Let's say this entry is:1234567 HEAD@{1}: commit: Added important feature
The commit hash
1234567is the one you want to recover. -
Recover your commits: You have two main options:
-
To inspect the state first (safer approach):
git checkout HEAD@{1}
This puts you in a detached
HEADstate at commit1234567. You can now examine your files to confirm this is the state you want to recover. -
To directly reset your
mainbranch back (if you're sure):git reset --hard HEAD@{1}
If you are on the
mainbranch when you run this, it will move yourmainbranch back to commit1234567, effectively undoing the hard reset.
After either of these steps, your lost commits are recovered. If you used
git checkout, you might want to create a new branch or reset yourmainbranch to this recovered commit to continue working. This example highlights how to use git reflog to undo a potentially destructive operation like a hard reset. -
Undoing a Mistaken Branch Deletion
Let's say you've accidentally deleted a branch named feature-branch using git branch -d feature-branch (or -D if it wasn't merged). You realize you deleted it prematurely and need to get it back. Git reflog to the rescue!
-
Check the reflog: Run
git reflogorgit reflog show --all. Look for entries related to branch deletion. You should find an entry like:uvwxyz0 HEAD@{0}: branch: delete feature-branch -
Find the commit before deletion: The reflog entry immediately preceding the branch deletion entry (e.g.,
HEAD@{1}) will point to the last commit of the deletedfeature-branch. It might look like:7890abc HEAD@{1}: checkout: moving from main to feature-branch
Here,
7890abcis the commit hash of the last commit onfeature-branchbefore deletion. -
Recover the deleted branch: Use
git checkout -b <branch-name> <reflog-entry>to recreate the branch.git checkout -b feature-branch HEAD@{1}
This command creates a new branch named
feature-branchstarting from the commit7890abcthat was the tip of the deleted branch. Yourfeature-branchis now restored, and you can continue working as if the deletion never happened. This demonstrates a practical application of how to use git reflog to recover from accidental branch deletions.
Fixing a Faulty Merge
Merges, while powerful, can sometimes go wrong, leading to conflicts or an undesirable state in your codebase. If you've completed a merge and then realize it was faulty or introduced regressions, Git reflog can help you revert to the state before the merge.
-
Examine the reflog: After a merge, your reflog will contain an entry for the merge operation. Run
git reflog. Look for an entry like:pqrstuv HEAD@{0}: merge feature-branch: Fast-forwardor
pqrstuv HEAD@{0}: merge feature-branch: Merge made by the 'recursive' strategy.The
HEAD@{0}entry represents the state after the merge. -
Identify the state before the merge: The reflog entry immediately before the merge (e.g.,
HEAD@{1}) will represent the state of your branch right before you executed thegit mergecommand. This is the state you likely want to revert to. It might look something like:lmnopqrs HEAD@{1}: checkout: moving from main to mainor simply a prior commit entry if you were already on the branch.
-
Revert to the pre-merge state: Use
git reset --hard <reflog-entry>to rewind your branch to the state before the merge.git reset --hard HEAD@{1}
Important: Be sure you are on the branch where you performed the merge (e.g.,
main) before running this command.git reset --hardwill discard any changes in your working directory and staging area since the state represented byHEAD@{1}.After running this, your branch will be back to the state it was in right before the faulty merge. You can then investigate the merge issues, try the merge again with different strategies, or decide to proceed with a different approach. This example illustrates how to use git reflog to undo the effects of a problematic merge operation.
Advanced Techniques
Filtering Reflog Output
As your Git repository's history grows, the reflog can become quite lengthy. To make it easier to find specific entries, git reflog provides filtering capabilities. You can use git reflog --grep=<pattern> to filter the reflog output based on a search pattern. This pattern is applied to the action descriptions in the reflog entries.
For example, if you want to find all reflog entries related to "reset" operations, you can use:
git reflog --grep=reset
This will display only the reflog entries that contain the word "reset" in their description. Similarly, to find entries related to a specific branch, say "feature-x", you could use:
git reflog --grep=feature-x
This will show entries that mention "feature-x" in the action description, such as checkouts to or merges from that branch. Filtering with --grep allows you to narrow down the reflog output, making it more efficient to locate the specific entry you need, especially when you are trying to understand how to use git reflog to recover from a particular type of operation or involving a specific branch.
Integrating with git log -g
While git reflog provides a detailed history of local repository actions, git log is primarily used to view the commit history. However, git log can be integrated with reflog to display reflog entries within the commit log output. The -g option (or --walk-reflogs) in git log enables this integration.
Using git log -g will show the regular commit history interleaved with reflog entries. This can be helpful to see how reflog actions relate to the overall commit graph. By default, git log -g shows reflog entries from HEAD's reflog. You can specify a reflog to examine using --reflog=<ref>, for example, git log -g --reflog=main to see the reflog entries for the main branch within the log output.
Furthermore, you can combine -g with other git log options. For instance, to search for commits or reflog entries related to a specific keyword, you can use git log -g -S<keyword> or git log -g --grep=<pattern>. Integrating git log -g with reflog allows for a more comprehensive view of your repository's history, combining commit history with the detailed action log provided by reflog, offering a richer context for understanding repository evolution and recovery scenarios.
Understanding Branching History
Git reflog can be particularly useful in understanding the history of branches, especially when branches have been moved around, reset, or deleted. While git log --oneline --graph --decorate --all provides a visualization of the commit graph and branch pointers at the current state, reflog offers a historical perspective on how these branch pointers have changed over time.
By examining the reflog for a specific branch (e.g., git reflog show <branch-name>), you can see a chronological record of all operations that have affected that branch. This includes branch creations, resets, merges, and checkouts that involved the branch. Each entry in the branch's reflog shows how the branch's tip (the commit it points to) has changed.
For instance, if you're trying to understand how a branch ended up at its current commit, or if you suspect a branch was accidentally reset to an earlier commit, inspecting the branch's reflog can provide valuable clues. It can reveal the sequence of operations that led to the current branch state, making it easier to diagnose issues related to branch history and potentially recover previous branch positions. This historical perspective on branch movements is a powerful aspect of how to use git reflog for in-depth repository analysis.
Git Reflog vs. Git Log
Scope of Reflog and Git Log
Understanding the difference in scope between Git reflog and Git log is crucial to knowing when to use each tool effectively. Git log, in its standard usage, focuses on the commit history of your repository. It shows the history of commits, displaying commit messages, author information, and changes made over time. git log operates on the permanent, shared history of the project, tracking changes that have been formally committed and are part of the project's lineage.
In contrast, Git reflog operates on a more local and transient scope. It tracks changes to the local repository's HEAD and branch references. It records actions like branch checkouts, resets, merges, and even attempts to commit that might not result in a formal commit object. The reflog is specific to your local repository and is not shared with others when you push or pull. It's essentially a personal history of your local Git actions. Reflog entries also have an expiry time, meaning they are not intended to be a permanent record like commit history. They are designed to be a safety net for recent local operations.
When to Use Reflog Over Git Log
Choosing between Git reflog and Git log depends on what information you are seeking and what problem you are trying to solve. Use git log when you want to:
- Review the commit history of a branch or the entire repository.
- Examine the evolution of the project through commits.
- Inspect changes introduced by specific commits.
- Understand the shared, permanent history of the project.
Use git reflog when you need to:
- Recover from accidental local changes, like a hard reset, branch deletion, or a mistaken merge.
- Undo a local Git operation that hasn't been pushed to a remote repository.
- Explore the history of your local actions, especially actions that didn't result in commits.
- Find "lost" commits or branches that are no longer referenced by the commit history.
In essence, git log is for understanding the project's commit history and shared evolution, while git reflog is for recovering from local mistakes and understanding your personal Git operation history. Knowing when to use reflog over git log significantly enhances your ability to navigate and recover from errors in your Git workflow.
Best Practices
Regularly Checking Your Reflog
While Git reflog is a powerful recovery tool, it's most effective when you are aware of its contents. Making it a habit to periodically check your reflog, especially after performing potentially risky operations like resets or branch manipulations, can be very beneficial. A quick git reflog command can give you a snapshot of your recent actions.
Regularly checking your reflog helps you:
- Become familiar with its contents: You'll get used to seeing the types of entries it generates and how actions are recorded.
- Quickly identify potential recovery points: If you do make a mistake, you'll have a recent reflog to consult and quickly pinpoint the entry you need to revert to.
- Develop a better understanding of your Git workflow: Reviewing your reflog can sometimes reveal patterns in your Git usage or highlight operations you perform frequently.
Integrating a periodic check of git reflog into your workflow, perhaps after significant Git operations or at the end of a coding session, can significantly improve your ability to recover from errors and enhance your understanding of how to use git reflog effectively.
Understanding Expiry of Entries
It's important to understand that reflog entries are not permanent. Git reflog has an expiry mechanism to prevent it from growing indefinitely and consuming excessive storage space. By default, reflog entries expire after a certain period.
- Expiry for reachable entries: Reflog entries that are reachable (i.e., still referenced by branches or tags) are kept for a longer duration, typically 90 days by default.
- Expiry for unreachable entries: Reflog entries for actions that lead to commits becoming unreachable (e.g., commits discarded by
git reset --hard) expire more quickly, usually after 30 days by default.
These expiry times are configurable. You can adjust these settings using Git configuration options like gc.reflogExpire and gc.reflogExpireUnreachable. However, for most users, the default expiry settings provide a reasonable balance between recovery window and storage usage.
Being aware of reflog expiry is important because it means that while reflog is excellent for recovering from recent mistakes, it's not a permanent archive of all your Git actions. If you need to recover work that was lost a long time ago, the reflog might not contain the necessary entries if they have expired. Therefore, it's best to use reflog for timely recovery of recent local operations, rather than relying on it for long-term historical retrieval.
Tips for Effective Recovery
To maximize the effectiveness of Git reflog for recovery, consider these tips:
- Act quickly: The sooner you realize you've made a mistake and need to recover, the better. Reflog entries expire, so prompt action increases your chances of successful recovery.
- Examine the reflog carefully: When you need to recover, take your time to examine the reflog output. Understand the actions and commit hashes in each entry to pinpoint the correct recovery point. Don't just blindly pick the first entry.
- Use
git checkoutfirst for exploration: Before usinggit reset --hardfor recovery, consider usinggit checkout <reflog-entry>to explore the state you're about to revert to. This allows you to verify it's the correct state without immediately making permanent changes to your current branch. - Create a new branch from a recovered state: After recovering a commit or branch from the reflog, it's often a good practice to create a new branch from that point, rather than directly altering your current branch history, especially when using
git reset. This preserves your recovery work and allows you to integrate it into your workflow more cautiously. - Combine reflog with other recovery techniques: Reflog is a powerful tool, but it's not the only recovery mechanism in Git. Combine it with other strategies like using backups, remote repositories, and understanding Git's object model for comprehensive data protection.
By following these tips, you can enhance your ability to effectively use Git reflog for recovering from mistakes and ensure a more resilient Git workflow.
Troubleshooting
Dealing with Empty Output
Sometimes, when you run git reflog, you might get an empty output, and wonder how to use git reflog if there's nothing to see. This can be disconcerting if you expect to see reflog entries. There are a few common reasons for an empty reflog output:
- New Repository: If you have just initialized a new Git repository and haven't performed any significant operations like commits, checkouts, or resets, the reflog might be empty or contain very few entries. Reflog records actions, so if there haven't been many actions, there won't be much to log.
- Reflog Disabled (Unlikely): It's technically possible to disable reflog, but this is very uncommon and generally not recommended. Unless you or someone else has explicitly disabled reflog in your Git configuration, this is unlikely to be the cause. You can check if reflog is enabled by looking at your Git configuration (
git config --get core.logAllRefUpdates). It should be set totrueby default. - Reflog Expiry: Although reflog entries do expire, it's unlikely you'd see a completely empty reflog due to expiry in a repository that has been actively used recently. Expiry usually affects older entries, not the entire reflog.
If you encounter an empty reflog when you expect to see entries, double-check if you are in the correct Git repository directory. Also, try performing a few Git operations (like committing a change or checking out a branch) and then run git reflog again to see if entries are now being recorded. In most cases, an empty reflog simply indicates a lack of recent ref-changing operations in your local repository.
Understanding Permissions and Access
Git reflog is primarily a local repository feature, and permissions and access control in Git typically revolve around remote repositories and branch access. Generally, permissions are not a direct concern when using git reflog in your own local repository. Reflog entries are stored locally and are based on the actions performed within that local repository.
However, there are indirect considerations related to permissions and access that might be relevant in certain collaborative scenarios:
- Shared Repositories and Local Clones: In a team environment using a shared remote repository, each developer has their own local clone. Each developer's local reflog is independent and reflects only their actions within their clone. One developer's reflog is not accessible or visible to other developers unless they explicitly share their local repository (which is not typical for reflog purposes).
- Repository Access Permissions: Permissions on the remote repository (e.g., who can push, merge, create branches) do not directly affect local reflog functionality. Reflog operates within the confines of your local clone, regardless of your permissions on the remote.
For most practical purposes of using git reflog for recovery and history exploration, permissions and access control are not primary troubleshooting concerns. Reflog is a tool for managing your local Git actions, and access restrictions usually apply to operations involving remote repositories.
Conclusion
The Power of Git Reflog
Git reflog is an incredibly powerful yet often underutilized tool in Git. It serves as a robust safety net, capturing a detailed history of your local repository's actions beyond just commits. Understanding how to use git reflog unlocks the ability to recover from a wide range of accidental errors, from hard resets and branch deletions to faulty merges, that might otherwise lead to lost work. Its ability to track changes to HEAD and branch pointers provides a unique layer of protection and recovery not available through standard commit history alone.
The reflog empowers developers to experiment more freely and confidently with Git, knowing that mistakes are often recoverable. It encourages exploration and learning, as the fear of irreversible errors is significantly reduced. By regularly checking and understanding your reflog, you gain a deeper insight into your Git workflow and develop a crucial skill for navigating and resolving Git-related issues effectively. Mastering reflog is a significant step towards becoming a proficient and confident Git user.
Next Steps
After grasping the fundamentals of Git reflog and how to use git reflog for basic recovery scenarios, there are several avenues to further enhance your understanding and skills:
- Explore Reflog Configuration: Delve into Git's configuration options related to reflog, such as
gc.reflogExpireandgc.reflogExpireUnreachable. Experiment with adjusting these settings to understand how they affect reflog entry retention. - Practice Recovery Scenarios: Intentionally create scenarios where you might need to use reflog for recovery, such as performing a hard reset or deleting a branch, and then practice using reflog to restore your repository to the desired state.
- Integrate Reflog into Your Workflow: Make it a habit to check your reflog periodically, especially after performing Git operations that could potentially lead to errors. This proactive approach will make you more comfortable and efficient with reflog when you need it for real recovery situations.
- Explore Advanced Reflog Options: Investigate more advanced
git reflogoptions and subcommands, such as different output formatting options, and further refine your filtering and searching techniques. - Combine Reflog with Git Aliases: Create Git aliases to simplify common reflog-related commands, making it even quicker and easier to access and utilize reflog in your daily workflow.
By taking these next steps, you can deepen your expertise in Git reflog, transforming it from a seldom-used emergency tool into a regular and valuable part of your Git proficiency.
Frequently Asked Questions
How does git reflog differ from git log?
git reflog tracks all updates to the HEAD pointer, including those not recorded in the commit history, while git log only shows the history of commits. This makes reflog useful for recovering lost commits or branches.
What are some common use cases for git reflog?
The main use cases involve recovering lost commits, undoing accidental resets or merges, and exploring past states of your repository that may not be readily visible through the regular commit history. It's a safety net.
How long does Git retain entries in the reflog?
By default, Git keeps reflog entries for 90 days for reachable commits and 30 days for unreachable commits. These settings can be configured using the gc.reflogExpire and gc.reflogExpireUnreachable settings.
How can I use git reflog to recover a deleted branch?
First, use git reflog to find the commit at the tip of the deleted branch. Then, use git branch <branch_name> <commit_hash> to recreate the branch pointing to that commit.
Is git reflog stored remotely on GitHub or GitLab?
No, git reflog is a local repository feature and is not pushed to remote repositories like GitHub or GitLab. It's a private record of your local Git activity.
Final Reflection: Unearthing Lost Potential with Git Reflog
The ability to recover from mistakes is paramount in any field, and in software development, Git reflog provides that crucial safety net. Understanding and utilizing git reflog isn't just about fixing errors; it's about empowering developers to experiment, learn, and push boundaries without the fear of irreversible consequences. This tool transforms potential disasters into learning opportunities, fostering a more confident and agile development process.
The impact of git reflog extends beyond individual productivity; it shapes the entire collaborative landscape. Knowing that accidental deletions or botched merges can be recovered fosters a culture of experimentation and innovation. It encourages developers to take risks, knowing they have a reliable mechanism to revert to a previous state. The only way to do great work is to love what you do.
- Steve Jobs. This quote resonates deeply with the spirit of exploration that git reflog enables, allowing developers to truly immerse themselves in their craft without the constant fear of failure.
Now, armed with the knowledge of how to use git reflog, I urge you to embrace its power. Don't shy away from trying new approaches or refactoring code, even if it seems daunting. Explore the depths of your commit history, learn from your past mistakes, and use git reflog as your guide. Let it be the key that unlocks your full potential as a developer, allowing you to build better software and contribute to a more innovative future.
Unleash the Power of Your Git History!
Thanks for exploring the world of git reflog! Now that you understand how to navigate your commit history, let's put your new skills to the test. Here's how you can continue learning:
- Recover a Lost Commit: Practice recovering a deleted branch or commit using
git reflogandgit checkoutorgit merge. This is the perfect way to solidify your understanding! - Master Advanced Git Commands: Explore powerful commands like
git rebaseandgit cherry-pickto further refine your version control workflow. - Share Your Knowledge: Help other developers by sharing this article or joining the discussion in the comments below!
What's the most unexpected discovery you've made using git reflog, and how did it help you solve a problem?