
Mastering the Git Workflow: From Initialization to the First Commit

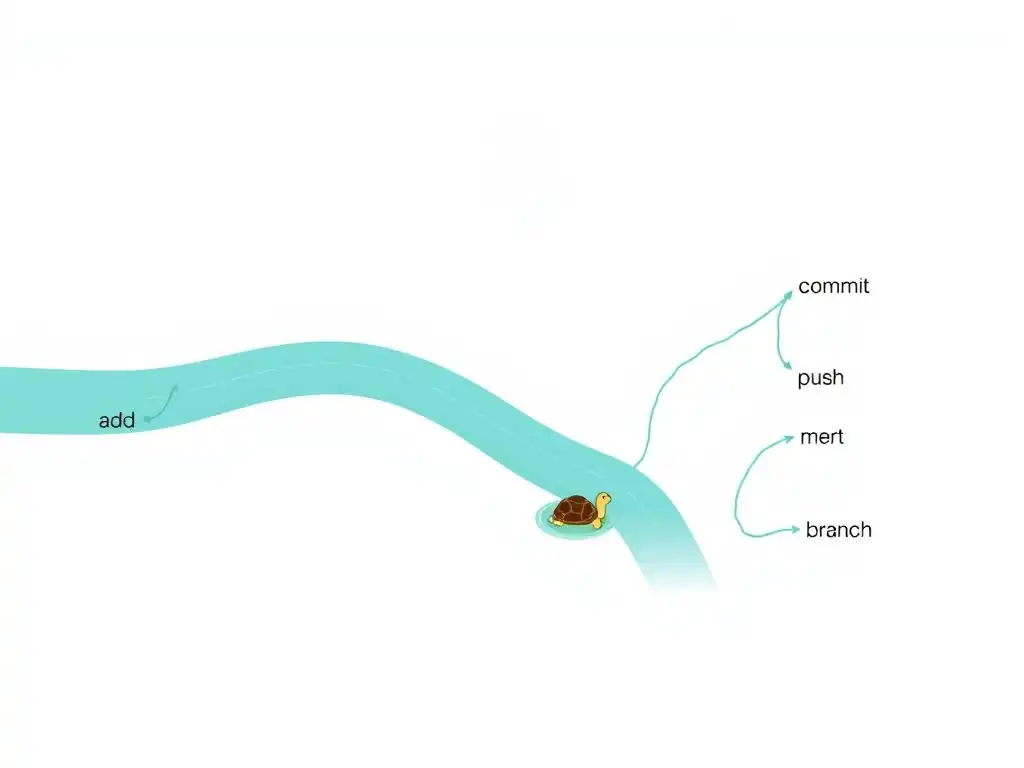
Welcome to Git and Version Control Hub, your central resource for navigating the world of Git and version control! Are you ready to streamline your development process and collaborate more effectively? This guide dives deep into crafting an effective Git workflow for beginners, demystifying the initial steps and laying the foundation for mastering Git. Curious about how to move from initialization to your first commit with confidence? Let's get started and unlock the power of version control!
Mastering Git Version Control: A Practical Guide
- Understanding Version Control with Git
- Initializing a Git Repository: Setting Up Version Control
- Staging and Committing Changes: Capturing Project Snapshots
- Examining Commit History and Repository Status
- Essential Git Practices for Effective Collaboration
- Troubleshooting Common Git Issues
- Conclusion: Building a Solid Foundation in Git
- Frequently Asked Questions
- Final Reflection: Embracing the Power of Version Control
- Unleash Your Inner Git Guru: Start Building Now!
Understanding Version Control with Git
What is Version Control and Why is it Essential?
Version control, at its core, is a system that records changes to a file or set of files over time so that you can recall specific versions later. Think of it as a sophisticated "undo" with a detailed history.
Instead of just undoing your last action, version control allows you to revert your entire project to a previous state, compare changes over time, see who modified something last and when, and much more. This capability is invaluable, especially in software development, but its benefits extend to any project that involves tracking changes in files, from writing a book to managing configuration files.
Imagine working on a large software project without version control. If you introduce a bug, finding the source of the problem becomes a nightmare. You might have to manually compare different versions of files, hoping to pinpoint the change that broke everything.
Collaboration becomes equally chaotic, with team members potentially overwriting each other's work or struggling to integrate changes seamlessly. Version control systems, like Git, solve these problems by providing a structured way to manage changes, enabling efficient collaboration, and safeguarding your project's history. For beginners in the Git workflow, understanding this fundamental need for tracking changes is the first step towards efficient project management.
Key Git Concepts: Repository, Staging Area, Commit, and Branch
Understanding the core concepts of Git is crucial for navigating the Git workflow effectively. Let's break down four fundamental terms: Repository, Staging Area, Commit, and Branch.
A repository (often called a "repo") is the heart of Git. It's essentially a directory that contains your project files along with a special .git folder. This .git folder is where Git stores all the history and metadata about your project. You can think of it as the database for your version control system. There are two main types of repositories: local repositories, which reside on your computer, and remote repositories, which are hosted on servers, often on platforms like GitHub or GitLab.
The staging area is an intermediate space between your working directory and the Git repository. It's where you prepare the changes you want to include in your next commit. Think of it as a preparation zone where you select which modifications you want to save into your project's history. Files in the staging area are ready to be committed.
A commit is a snapshot of your project at a specific point in time. When you commit changes from the staging area, you're essentially saving a version of your project in the repository's history. Each commit has a unique identifier and a commit message describing the changes included in that snapshot. Commits are the building blocks of your project's history and allow you to revert to any previous state.
Finally, a branch is a pointer to a commit in history. Branches allow you to diverge from the main line of development and work on new features or bug fixes in isolation. By default, Git repositories have a main branch (often called main or master). Creating branches allows for parallel development and experimentation without affecting the stability of the main project. Understanding these fundamental Git concepts is essential for any beginner aiming to master the Git workflow.
Initializing a Git Repository: Setting Up Version Control
Creating a New Git Repository: git init
The first step in any Git workflow is to initialize a repository. This is done using the git init command. Navigate to your project's root directory in your terminal or command prompt. For example, if your project folder is named "my-website", you would use the cd my-website command to enter that directory. Once inside, simply type git init and press Enter.
cd my-website
git init
This command creates a new subdirectory named .git in your project directory. This .git directory contains all of the necessary repository files—a Git repository skeleton. At this point, your project is under Git version control. You will notice output similar to: Initialized empty Git repository in /path/to/your/my-website/.git/. This confirms that a new, empty Git repository has been successfully initialized. It's important to note that git init only needs to be run once per project. For beginners starting their Git workflow, this command is the starting point for tracking changes and managing project versions.
Configuring User Identity: git config user.name and git config user.email
After initializing a Git repository, the next crucial step is to configure your user identity. Git uses your username and email address to associate commits with your identity. This information is recorded in each commit you make, allowing you and others to track who made specific changes and when. To configure your username, use the command git config --global user.name "Your Name", replacing "Your Name" with your actual name. Similarly, configure your email address using git config --global user.email "your.email@example.com", replacing "your.email@example.com" with your email.
git config --global user.name "John Doe"
git config --global user.email "john.doe@example.com"
The --global flag ensures that these settings are applied to all Git repositories on your system. If you want to set these configurations specifically for a single repository, you can omit the --global flag when running these commands within that repository's directory. Setting your user identity correctly is vital for proper attribution in collaborative projects and for maintaining a clear and traceable Git workflow. For beginners, understanding the importance of this configuration ensures that their contributions are correctly recorded in the project's history.
Staging and Committing Changes: Capturing Project Snapshots
Adding Files to the Staging Area: git add <filename>
Once you have initialized your repository and configured your identity, you'll start making changes to your project files. To track these changes with Git, you need to first add them to the staging area. The git add <filename> command is used to stage changes for a specific file. For example, if you've modified a file named index.html, you would use git add index.html to stage those changes.
git add index.html
To stage all changes in the current directory and its subdirectories, you can use git add .. This is a convenient shortcut when you've made changes to multiple files. The staging area is crucial because it allows you to selectively choose which changes you want to include in your next commit. You might have made several changes while working on a feature, but you might only want to commit a subset of those changes that are logically related. For beginners in the Git workflow, mastering git add is essential for controlling which modifications are included in their project's history.
Writing Clear Commit Messages: Describing Changes Effectively
After staging your changes, the next step is to commit them. When you commit, you are creating a snapshot of your staged changes along with a message describing what you did. Writing clear and informative commit messages is a crucial, yet often overlooked, aspect of an effective Git workflow. A good commit message should be concise but descriptive, explaining the why behind the changes, not just the what.
A common convention for commit messages is to use a short summary line followed by a more detailed explanation, separated by a blank line. The summary line should be 50 characters or less and should concisely describe the main change. The body of the message can provide more context, explain the reasoning behind the changes, and refer to any related issues or tickets. For example, a good commit message might look like this:
Fix: Corrected typo in navigation menu

This commit addresses a typo in the navigation menu where "About Us" was misspelled as "Abount Us".  The typo has been corrected in the header.php file.  This improves the user experience and ensures consistent branding across the website.
Writing clear commit messages is beneficial for several reasons. It makes it easier to understand the history of your project, helps with debugging and reverting changes, and facilitates collaboration by allowing team members to quickly grasp the purpose of each commit. For beginners learning the Git workflow, developing the habit of writing meaningful commit messages is a valuable skill that significantly improves project maintainability and collaboration.
Performing a Commit: git commit -m "Your commit message"
Once you have staged your changes and written a clear commit message, you are ready to perform the commit. The git commit command saves the staged changes to your local repository, creating a new commit object that represents a snapshot of your project at that point in time. The -m flag is used to provide a commit message directly in the command line. Replace "Your commit message" with your actual commit message, ensuring it is descriptive and concise, as discussed previously.
git commit -m "Add initial HTML structure for homepage"
If you omit the -m flag, Git will open a text editor (configured by default or your core.editor setting) where you can write a more detailed commit message. This is often preferable for more complex commits that require a longer explanation. After executing the git commit command, Git will output information about the commit, including the files changed and the number of insertions and deletions. This action permanently records your changes in the Git history. For beginners in the Git workflow, git commit is the command that solidifies their progress and creates meaningful checkpoints in their project's development.
Examining Commit History and Repository Status
Viewing Commit History: git log
After making several commits, you'll likely want to review the history of changes you've made to your project. The git log command is your primary tool for viewing the commit history in Git. Simply typing git log in your terminal will display a list of commits in reverse chronological order (newest first). Each commit in the log includes the commit hash (a unique identifier), author, date, and commit message.
git log
git log offers various options to customize the output. For example, git log --oneline displays each commit on a single line, showing only the commit hash and the first line of the commit message. This is useful for a quick overview of the history. Another helpful option is git log --graph, which visually displays the branching and merging history of your repository in an ASCII art format. git log --author="John Doe" filters the log to show commits made only by the author "John Doe". Exploring the git log command and its options is crucial for understanding the evolution of your project and navigating the Git workflow effectively. For beginners, git log provides a clear picture of their progress and the changes they've made over time.
Checking Repository Status: git status
Throughout your Git workflow, it's essential to keep track of the status of your repository. The git status command provides information about the current state of your working directory and staging area. Running git status will tell you about:
- Untracked files: Files in your working directory that Git is not yet tracking.
- Modified files: Files that have been changed in your working directory but have not yet been staged.
- Staged changes: Files that have been added to the staging area and are ready to be committed.
- Branch information: The current branch you are working on.
- Branch ahead/behind status: If you are working with remote repositories, it shows if your local branch is ahead or behind the remote branch.
git status
Understanding the output of git status is crucial for managing your Git workflow. It helps you determine which files need to be added to the staging area, which changes are ready to be committed, and if there are any conflicts or issues to resolve. For beginners learning the Git workflow, git status becomes a frequently used command to ensure they are aware of the current state of their project and to avoid accidental commits or loss of changes.
Essential Git Practices for Effective Collaboration
Ignoring Files: Using .gitignore to Exclude Unnecessary Files
In almost every project, there are certain files and directories that you don't want to track with Git. These might include temporary files, build artifacts, log files, dependency directories (like node_modules in Node.js projects), or sensitive configuration files. Tracking these files can clutter your repository and make it harder to manage the important source code. Git provides a mechanism to ignore these files using a special file named .gitignore.
Create a file named .gitignore in the root directory of your Git repository. Inside this file, you can specify patterns for files and directories that Git should ignore. Each line in .gitignore represents a pattern. Common patterns include:
/temp/: Ignores thetempdirectory at the root of the repository.*.log: Ignores all files ending with.login any directory.build/: Ignores thebuilddirectory at the root.node_modules: Ignores thenode_modulesdirectory at the root.
# Ignore temporary files
*.tmp
temp/

# Ignore build artifacts
build/
dist/

# Ignore log files
*.log

# Ignore node dependencies
node_modules
Once you create a .gitignore file and add patterns, Git will automatically ignore the matching files and directories. These ignored files will not be tracked, staged, or committed. Using .gitignore is a best practice for maintaining a clean and efficient Git workflow, especially in collaborative projects, as it prevents unnecessary files from being included in the repository. For beginners, understanding and utilizing .gitignore from the start helps in keeping their repositories organized and focused on relevant project files.
Branching for Feature Development: Isolating Changes
Branching is one of the most powerful features of Git and is essential for effective collaboration and feature development. A branch in Git is essentially a lightweight, movable pointer to a commit. By default, every Git repository has a main branch (often named main or master). When you create a new branch, you are creating a separate line of development that diverges from the main branch. This allows you to work on new features, bug fixes, or experiments in isolation without affecting the stability of the main branch.
To create a new branch, you can use the git branch <branch-name> command. For example, to create a branch named feature-login, you would use git branch feature-login. To switch to this new branch and start working on it, you use the git checkout <branch-name> command, or the shorthand git checkout -b <branch-name> which creates and switches to the branch in one command.
git branch feature-login
git checkout feature-login

# or

git checkout -b feature-login
While on the feature-login branch, any commits you make will be isolated to this branch. They will not affect the main branch until you explicitly merge the feature-login branch back into main. Branching enables parallel development, allowing multiple developers to work on different features simultaneously without interfering with each other's work or the main codebase. For beginners learning the Git workflow, mastering branching is crucial for organized and collaborative software development. It promotes experimentation and reduces the risk of introducing instability into the main project line.
Remote Repositories: Pushing and Pulling Changes with git remote
While local repositories are essential for version control on your computer, remote repositories are crucial for collaboration and backup. A remote repository is a Git repository hosted on a server, often on platforms like GitHub, GitLab, or Bitbucket. Remote repositories allow you to share your code with others, collaborate on projects, and back up your work in case of local data loss.
The git remote command is used to manage remote repositories. To add a remote repository, you typically use git remote add origin <remote-repository-URL>. origin is a common alias for the remote repository, but you can choose any name. <remote-repository-URL> is the URL of your remote repository (e.g., a URL from GitHub).
git remote add origin https://github.com/username/my-project.git
Once you've added a remote, you can push your local commits to the remote repository using git push origin <branch-name>. For example, to push your main branch to the origin remote, you would use git push origin main. To fetch changes from the remote repository and merge them into your local branch, you use git pull origin <branch-name>. For instance, git pull origin main fetches changes from the main branch of the origin remote and merges them into your local main branch. Working with remote repositories is fundamental for collaborative Git workflows. For beginners, understanding how to push and pull changes with git remote is essential for participating in team projects and utilizing the full potential of Git for version control and collaboration.
Troubleshooting Common Git Issues
Resolving Conflicts: Merging Changes from Different Branches
When working with branches, especially in collaborative environments, conflicts can arise when merging changes from different branches. Conflicts occur when Git cannot automatically integrate changes because the same lines of code have been modified differently in different branches. Git will mark the conflicting files and indicate the sections where conflicts exist.
To resolve conflicts, you need to manually edit the conflicting files. Git will insert conflict markers ( <<<<<<<, =======, >>>>>>>) to highlight the conflicting sections. You need to examine these sections, decide which changes to keep (or combine them), remove the conflict markers, and save the file. After resolving the conflicts in all marked files, you need to stage the resolved files using git add <filename> and then complete the merge with git commit.
# Example of a conflict marker in a file:
<<<<<<< HEAD
// Changes from your current branch
=======
// Changes from the branch being merged
>>>>>>> feature-branch
Resolving merge conflicts is a common part of collaborative Git workflows. It requires careful attention to detail and communication with team members to understand the intended changes and resolve conflicts effectively. For beginners, encountering merge conflicts can be initially daunting, but understanding the process of manually resolving them is a key skill in mastering collaborative Git workflows.
Undoing Changes: Reverting Commits and Files
Sometimes, you might need to undo changes you've made in Git. Git provides several ways to undo changes, depending on what you want to undo and how far back in history you want to go.
To discard changes in your working directory (untracked or modified files), you can use git checkout -- <filename>. This reverts the specified file to the last committed version. To unstage changes (remove files from the staging area), you can use git reset HEAD <filename>. This moves the file back to the modified state in your working directory.
To undo a commit, you can use git revert <commit-hash>. git revert creates a new commit that undoes the changes introduced by the specified commit. This is a safe way to undo changes because it preserves the history of your repository. Alternatively, for more drastic actions, you can use git reset --hard <commit-hash> to move the branch pointer to a previous commit and discard all subsequent commits. However, git reset --hard should be used with caution, especially in shared branches, as it rewrites history and can cause problems for collaborators.
Understanding how to undo changes is crucial for a robust Git workflow. It allows you to correct mistakes, experiment fearlessly, and recover from accidental commits. For beginners, learning these commands for undoing changes provides confidence and control over their Git workflow.
Conclusion: Building a Solid Foundation in Git
Next Steps: Exploring Advanced Git Commands and Workflows
Mastering the Git workflow from initialization to the first commit is just the beginning of your journey with version control. By understanding the core concepts and commands covered in this guide, you've built a solid foundation for effectively managing your projects with Git. However, Git offers a vast array of advanced features and workflows that can further enhance your productivity and collaboration.
To continue your Git learning, explore topics such as:
- Advanced Branching and Merging Strategies: Learn about different branching models like Gitflow or GitHub Flow, and explore advanced merging techniques like rebasing and cherry-picking.
- Git Hooks: Discover how to use Git hooks to automate tasks during different stages of your Git workflow, such as pre-commit checks or post-receive deployments.
- Submodules and Subtrees: Understand how to manage dependencies and external projects within your Git repository using submodules and subtrees.
- Interactive Staging and Patching: Learn how to use interactive staging (
git add -p) to selectively stage parts of changes within files. - Git GUI Clients: Explore graphical Git clients like Sourcetree, GitKraken, or GitHub Desktop to visualize your repository and simplify Git operations.
By continuously exploring these advanced Git commands and workflows, you can refine your skills and become a proficient Git user, capable of tackling complex version control challenges and collaborating effectively in any software development environment. For beginners who have grasped the fundamentals, the next step is to delve deeper and unlock the full potential of Git for version control mastery.
Frequently Asked Questions
What is the first step in establishing a Git workflow?
The first step is to initialize a Git repository in your project directory using the git init command. This creates a hidden .git folder that tracks all changes.
Why is a Git workflow important for beginners?
A proper Git workflow helps beginners manage changes effectively and avoid common mistakes. It promotes collaboration and ensures a clean project history.
What are the essential commands in a basic Git workflow?
The essential commands include git init, git add, git commit, and git status. These commands allow you to track changes, stage them, and record them in the repository.
How does branching fit into a Git workflow for beginners?
Branching allows you to work on new features or fixes in isolation without affecting the main codebase. You create a new branch with git branch <branch-name> and switch to it with git checkout <branch-name>.
What is the final step after making changes in a Git workflow?
The final step is typically to commit your changes with git commit -m "Your commit message". This saves your changes to the repository's history with a descriptive message.
Final Reflection: Embracing the Power of Version Control
The journey from initializing a Git repository to making that first, crucial commit might seem like a small step, but it unlocks a world of possibilities. Mastering the Git workflow, even at its most basic level, is now more essential than ever for collaborative software development and even individual project management. In a world increasingly reliant on code and digital collaboration, understanding version control is no longer a niche skill, but a fundamental requirement for navigating the complexities of modern workflows.
The impact of Git extends far beyond the realm of software engineering. It's a testament to the power of organized collaboration and iterative improvement, principles that resonate across various disciplines. The ability to track changes, revert to previous states, and work on features independently has revolutionized how teams operate. Version control is not just a tool; it's a philosophy of continuous improvement and collaborative innovation.
This philosophy, rooted in the Git workflow, empowers individuals and teams to build better, more resilient projects.
Now, as you embark on your Git journey, remember that every commit, every branch, and every merge represents a step forward in your understanding of this powerful tool. Embrace the learning process, experiment with different workflows, and don't be afraid to make mistakes. The Git workflow is a journey, not a destination. Take the knowledge you've gained and apply it to your own projects, fostering a culture of collaboration and continuous improvement in your own work.
Unleash Your Inner Git Guru: Start Building Now!
Thank you for exploring the world of Git and version control! You now have a solid understanding of how to initialize a repository and make your first commit. Let's build on this momentum! Here are a few ways to solidify your Git skills:
- Start your own project using Git! Hands-on practice is the best way to truly master these concepts. Don't just read about it—apply what you've learned!
- Share this article with a friend or colleague who is also learning Git. Teaching others is a great way to reinforce your own knowledge.
- Experiment with Git branching by creating a new branch in your practice repository. Consider it your personal Git sandbox!
What exciting project are you ready to start version controlling? Share your ideas in the comments below!