
Implementing Security Scans in GitLab CI/CD with Custom Components

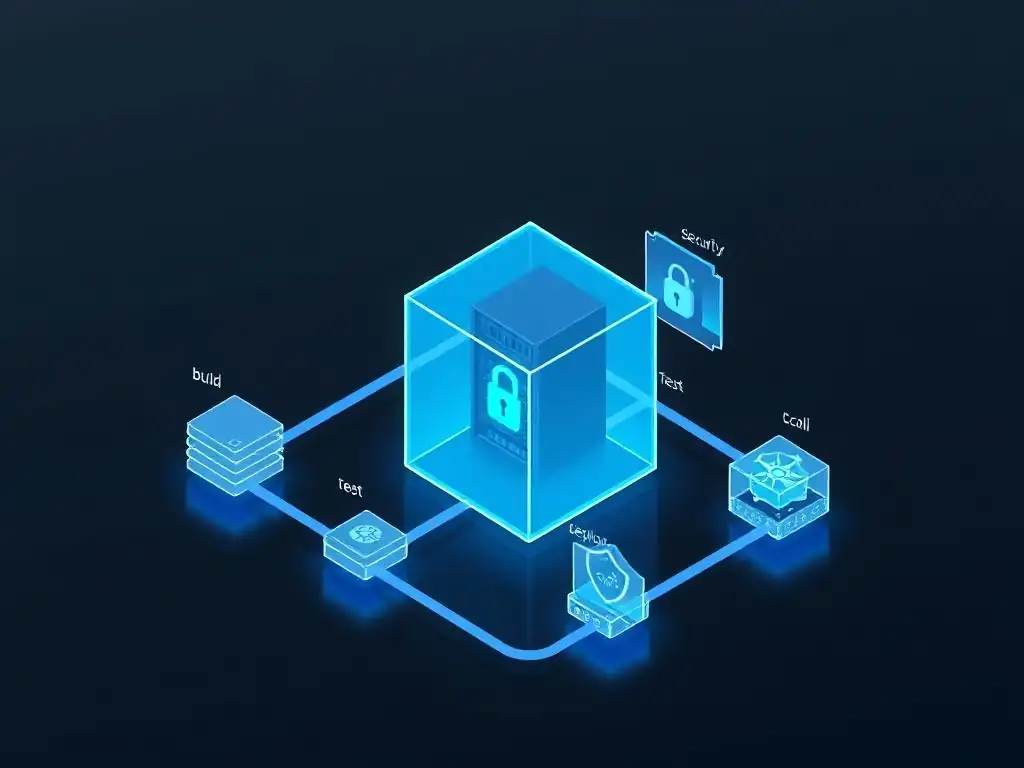
Welcome to Git and Version Control Hub, your central resource for mastering the art of version control! Dive into our latest exploration of GitLab CI/CD, where we unravel the secrets to implementing robust security scans directly within your pipelines. Curious about how to fortify your code from vulnerabilities before it even reaches production? Let's unlock the power of custom components and ensure your deployments are safe and secure. Read on to discover how!
- Introduction to GitLab CI/CD Security Scanning
- Building Custom Security Scan Components for GitLab CI/CD
- Configuring the GitLab CI/CD Pipeline for Custom Security Scans
- Implementing Specific Custom Security Scans
- Analyzing and Reporting Security Scan Results in GitLab
- Best Practices for Custom Security Scan Components in GitLab CI/CD
- Advanced Customizations for GitLab CI/CD Security
- Troubleshooting Common Issues with Custom Security Scans
- Conclusion: Enhancing Security with Custom GitLab CI/CD Components
-
Frequently Asked Questions
- What are GitLab CI/CD security scans, and why are they important?
- Can I integrate custom security scanning tools into my GitLab CI/CD pipeline?
- How do I define a custom component for a security scan in GitLab CI/CD?
- What are some benefits of using custom components for GitLab CI/CD security scans?
- How can I ensure the security of my custom security scanning components in GitLab CI/CD?
- Final Reflection: Securing the Software Pipeline
- Uncover Hidden Vulnerabilities: Secure Your Pipeline Now!
Introduction to GitLab CI/CD Security Scanning
Understanding the Importance of Security in CI/CD Pipelines
In today's fast-paced software development landscape, integrating security into the Continuous Integration and Continuous Delivery (CI/CD) pipeline is no longer optional but a necessity. Traditionally, security checks were often performed at the end of the development cycle, leading to late discovery of vulnerabilities, increased remediation costs, and delayed releases. Shifting security left, by incorporating automated security scans directly into the CI/CD pipeline, allows development teams to identify and address vulnerabilities early in the development lifecycle.
This proactive approach significantly reduces the risk of deploying vulnerable applications, minimizes potential damage from security breaches, and fosters a culture of security awareness within the development process. By automating security checks as part of the CI/CD pipeline, organizations can ensure that every code change is automatically assessed for security risks, leading to more secure and resilient software.
Furthermore, the speed and frequency of deployments in modern DevOps practices necessitate automated security measures. Manual security testing cannot keep pace with rapid iterations and frequent releases. Integrating security scans into the CI/CD pipeline provides continuous feedback to developers, enabling them to address security issues promptly and efficiently.
This integration not only accelerates the development process by preventing security bottlenecks but also enhances collaboration between development and security teams. By embedding security checks within the familiar CI/CD workflows, developers become more security-conscious, and security teams can focus on strategic security initiatives rather than being overwhelmed by last-minute vulnerability fire drills. Ultimately, integrating security into CI/CD pipelines is crucial for building secure software rapidly and reliably in today's dynamic and threat-filled environment.
Overview of GitLab's Built-in Security Scanning Tools
GitLab offers a comprehensive suite of built-in security scanning tools directly integrated into its CI/CD platform. These tools are designed to automatically detect vulnerabilities across various stages of the software development lifecycle. GitLab's built-in security scanning capabilities include Static Application Security Testing (SAST), which analyzes source code for potential vulnerabilities without executing it. This is particularly useful for identifying coding errors, security flaws, and compliance violations early in the development process.
For instance, GitLab SAST can detect common vulnerabilities like SQL injection flaws in Java code or cross-site scripting vulnerabilities in JavaScript applications by analyzing the codebase. Another key tool is Dependency Scanning, which identifies vulnerabilities in project dependencies by comparing them against known vulnerability databases. This helps ensure that applications are not using outdated or vulnerable libraries, protecting against exploits that target known weaknesses in third-party components.
Beyond SAST and Dependency Scanning, GitLab also provides Dynamic Application Security Testing (DAST), which analyzes running web applications for vulnerabilities by simulating attacks. DAST is crucial for identifying runtime vulnerabilities that may not be apparent from static code analysis, such as authentication bypasses or server misconfigurations. Container Scanning is another important feature, analyzing Docker images for vulnerabilities in the operating system packages and application dependencies within the container.
This is essential for securing containerized applications and ensuring that deployed containers are not built upon vulnerable base images. Collectively, these built-in tools provide a robust security scanning foundation directly within the GitLab CI/CD pipeline, offering a streamlined approach to DevSecOps and enabling teams to proactively manage security risks throughout the software development lifecycle.
Limitations of Default Security Scans and the Need for Custom Components
While GitLab's built-in security scanning tools offer a solid starting point for DevSecOps, they may not always fully address the unique security requirements of every project or organization. The default scans are designed to be broadly applicable and cover common vulnerability types. However, specific projects might have niche security concerns, compliance mandates, or require integration with specialized security tools that are not included in GitLab's standard offering.
For example, a highly regulated industry like healthcare or finance might need to adhere to specific security standards or utilize specialized scanning tools certified for compliance. In such cases, the generic scans might not be sufficient to demonstrate full adherence to these stringent requirements.
Furthermore, organizations may have already invested in specific security scanning tools or services that are tailored to their unique infrastructure, technology stack, or threat model. Relying solely on GitLab's default scans could mean abandoning these existing investments and potentially losing valuable, customized security insights. For instance, a company might have a mature deployment of SonarQube for code quality and security analysis, with custom rules and quality profiles configured over years.
Migrating entirely to GitLab's SAST might require significant effort to replicate this tailored setup and potentially lose the historical data and expertise built around SonarQube. Therefore, the ability to integrate custom security scan components into GitLab CI/CD provides the flexibility to address these limitations, allowing organizations to leverage their preferred tools, meet specific compliance needs, and achieve a more comprehensive and tailored security scanning strategy.
Building Custom Security Scan Components for GitLab CI/CD
Defining Custom Security Requirements for Your Project
Before embarking on building custom security scan components, it's crucial to clearly define the specific security requirements for your project. This involves understanding the unique risks, compliance obligations, and security policies that apply to your application. Start by conducting a thorough risk assessment to identify potential vulnerabilities and threats relevant to your project's context. Consider factors such as the sensitivity of the data processed, the application's attack surface, and the potential impact of a security breach. For example, an e-commerce platform handling financial transactions will have significantly different security requirements compared to a static website.
Next, document your project's security policies and compliance requirements. These policies should outline specific security controls and standards that your application must adhere to. This might include industry standards like PCI DSS for payment processing, HIPAA for healthcare data, or internal security guidelines mandated by your organization.
For example, a financial application might require adherence to OWASP guidelines, regular penetration testing, and specific encryption standards. Once these requirements are clearly defined, you can identify gaps in GitLab's built-in security scans and determine which custom components are necessary to address these specific needs and ensure comprehensive security coverage tailored to your project's unique risk profile and compliance landscape.
Choosing the Right Security Scanning Tools for Integration
Selecting the appropriate security scanning tools for integration is a critical step in building custom security scan components for GitLab CI/CD. The choice of tools should be driven by the specific security requirements defined for your project, considering factors such as the type of application, the technologies used, and the desired security coverage. For Static Application Security Testing (SAST), tools like SonarQube, Checkmarx, or Fortify offer comprehensive code analysis capabilities and support a wide range of programming languages.
For instance, if your project is primarily written in Java, SonarQube with its robust Java analysis rules could be a strong choice. For Dynamic Application Security Testing (DAST), tools like OWASP ZAP, Burp Suite, or Acunetix can effectively identify vulnerabilities in running web applications. OWASP ZAP, being open-source and actively maintained, is a popular and cost-effective option for DAST.
Dependency scanning can be enhanced by tools that leverage comprehensive vulnerability databases beyond GitLab's default sources. Tools like Snyk or WhiteSource provide enriched vulnerability data and often offer remediation advice and automated fixes. For container security, tools like Anchore or Clair can perform in-depth analysis of Docker images, identifying vulnerabilities in operating system packages and application dependencies.
When choosing tools, consider factors such as licensing costs, ease of integration with CI/CD pipelines, reporting capabilities, and the tool's accuracy and performance. Prioritize tools that offer command-line interfaces or APIs for seamless automation within GitLab CI/CD and ensure they align with your project's technology stack and security objectives.
Creating a Docker Image for Your Custom Security Scanner
Encapsulating your chosen security scanning tool within a Docker image is highly recommended for creating reusable and portable custom security scan components in GitLab CI/CD. Docker images provide a consistent and isolated environment for your security scanner, ensuring that it runs reliably across different CI/CD pipelines and environments. To create a Docker image, start by selecting a suitable base image, often one that includes the necessary runtime environment for your scanner (e.g., Python, Node.js, Java). For example, if you are using OWASP ZAP, you might start with a base image that includes Java and the necessary dependencies for ZAP.
Next, install your chosen security scanning tool within the Docker image. This typically involves downloading the tool's binaries or using package managers to install it. Configure the tool as needed, including setting up any required authentication, API keys, or configuration files.
Ensure that the Docker image includes any scripts or configurations necessary to execute the security scan from the command line, as this will be essential for integrating it into your GitLab CI/CD pipeline. For instance, for a SonarQube scanner image, you would install the SonarQube scanner CLI and configure it to connect to your SonarQube server. After building the Docker image, test it thoroughly to ensure that the security scanner runs correctly and produces the expected output.
Publish the Docker image to a container registry, such as GitLab Container Registry or Docker Hub, so that it can be easily accessed by your GitLab CI/CD pipelines. Versioning your Docker images is crucial for maintaining consistency and allowing for updates and rollbacks as needed.
Configuring the GitLab CI/CD Pipeline for Custom Security Scans
Setting Up .gitlab-ci.yml for Custom Security Components
Integrating custom security scan components into your GitLab CI/CD pipeline is primarily done through the .gitlab-ci.yml file. This file defines the stages, jobs, and configurations for your CI/CD pipeline. To incorporate custom security scans, you will typically define a new stage, such as security_scan, within your pipeline definition. Within this stage, you will define jobs that utilize your custom security scan Docker images. Each job will represent a specific type of security scan, such as SAST, DAST, or dependency scanning, using your custom tools.
In the .gitlab-ci.yml file, you'll specify the Docker image to use for each security scan job using the image keyword. This will point to the Docker image you created and published in the previous steps. For example, if you created a Docker image named my-org/custom-sast-scanner, you would use image: my-org/custom-sast-scanner in your SAST job definition. You will also use the script keyword to define the commands that GitLab CI/CD will execute within the Docker container for each job. This script will typically involve running your security scanning tool with the appropriate parameters to analyze your application code or runtime environment. Ensure that the script is configured to output the scan results in a format that can be parsed or integrated into GitLab's security reporting features, if possible. Define dependencies between jobs using the stage and needs keywords to ensure that security scans are executed at the appropriate point in your pipeline workflow, typically after build and test stages and before deployment stages.
Defining Variables for Security Scan Configuration
To make your GitLab CI/CD pipeline for custom security scans flexible and configurable, utilize CI/CD variables. Variables allow you to externalize configuration parameters, such as security tool settings, scan targets, API keys, and reporting thresholds, making it easier to manage and adjust your security scans without directly modifying the .gitlab-ci.yml file. You can define variables at different levels in GitLab, including project settings, group settings, or directly within the .gitlab-ci.yml file itself. For sensitive information like API keys or credentials, use GitLab's masked variables to ensure they are not exposed in job logs.
Within your .gitlab-ci.yml file, you can access these variables using the $VARIABLE_NAME syntax. Pass these variables as arguments or environment variables to your custom security scanning tools within the script section of your CI/CD jobs. For instance, if your SAST tool requires an API key stored in the SAST_API_KEY variable, you can pass it to the scanner command like this: script: sast-scanner --api-key $SAST_API_KEY --target ./code. Using variables makes it easy to customize scan behavior based on different environments (e.g., development, staging, production) or project configurations. Variables also enhance the reusability of your CI/CD pipeline across multiple projects, as you can adjust the scan configuration by simply changing the variable values instead of rewriting the pipeline definition.
Integrating the Custom Security Scan Docker Image into the Pipeline
To fully integrate your custom security scan Docker image into the GitLab CI/CD pipeline, you need to ensure seamless execution and proper handling of scan results. In your .gitlab-ci.yml file, within the security scan job definition, specify your custom Docker image using the image keyword. Ensure that the image is accessible to your GitLab Runner, which might require configuring access to your container registry if it's private. The script section of the job will contain the commands to run your security scan within the Docker container. This typically involves invoking the security scanning tool's command-line interface, specifying the target code or application, and configuring any necessary scan parameters.
Consider using GitLab CI/CD features like artifacts to persist the security scan results generated by your custom tool. Define an artifacts section in your job definition to upload the scan output files, such as reports in JSON, XML, or SARIF format. This allows you to access the raw scan results for further analysis or reporting. If your custom security tool outputs results in a format that GitLab can directly understand (like SARIF), you can leverage GitLab's security report features by specifying the report format in the job definition using keywords like security_report: gl-sast-report.json (for SAST reports in GitLab's format). This will automatically parse and display the security findings within the GitLab Security Dashboard, providing a centralized view of vulnerabilities detected by your custom scans alongside GitLab's built-in scans. Properly integrating your custom Docker image and configuring result handling ensures that your custom security scans become a fully functional and insightful part of your GitLab CI/CD pipeline.
Implementing Specific Custom Security Scans
Example: Static Application Security Testing (SAST) with SonarQube
Configuring SAST for Java Applications
To implement Static Application Security Testing (SAST) for Java applications using SonarQube in GitLab CI/CD, you first need a running SonarQube server. Assume you have a SonarQube instance accessible at sonarqube.example.com. You will need to generate a SonarQube token for authentication, which can be done within the SonarQube user profile settings. Store this token as a masked CI/CD variable in your GitLab project settings, for example, SONAR_TOKEN. Next, you need a Docker image with the SonarQube scanner CLI. You can either use a pre-built image or create your own. A simple Dockerfile could be based on a Java image and install the SonarQube scanner.
In your .gitlab-ci.yml file, define a job in the security_scan stage for SAST. Use a Docker image containing the SonarQube scanner, for example, sonarsource/sonar-scanner-cli. In the script section, execute the SonarQube scanner command. You'll need to configure the scanner to connect to your SonarQube server, authenticate using the token, and specify the project key and source code directory. A typical script might look like: sonar-scanner -Dsonar.projectKey=my-java-app -Dsonar.sources=. -Dsonar.host.url=https://sonarqube.example.com -Dsonar.login=$SONAR_TOKEN. Ensure your Java application is built before this stage, so the compiled code is available for analysis. Configure dependencies between stages to ensure the build stage completes successfully before the SAST job starts.
Handling SAST Results and Reporting
After the SonarQube SAST job completes, the analysis results are automatically sent to your SonarQube server. SonarQube provides a web interface to view detailed reports on code quality and security vulnerabilities. You can access these reports by navigating to your project in the SonarQube web UI.
SonarQube categorizes issues by severity and provides detailed explanations and remediation guidance for each vulnerability found. You can configure quality gates in SonarQube to define criteria for build success or failure based on the SAST results. For example, you can set a quality gate to fail if the number of critical vulnerabilities exceeds a certain threshold.
To integrate SonarQube results back into GitLab, you can use SonarQube's webhook feature. Configure a webhook in SonarQube to trigger a GitLab CI/CD pipeline when the quality gate status changes. This allows you to automatically trigger actions in GitLab based on SonarQube analysis, such as failing the pipeline, creating GitLab issues, or notifying developers. Alternatively, you can use the SonarQube API to query the analysis results from within your GitLab CI/CD pipeline and generate custom reports or integrate the findings into GitLab's security dashboard if a suitable report format is generated or can be converted.
Example: Dynamic Application Security Testing (DAST) with OWASP ZAP
Setting up DAST for Web Applications in a Staging Environment
Implementing Dynamic Application Security Testing (DAST) with OWASP ZAP in GitLab CI/CD requires a running web application in a staging environment. Ensure you have a staging environment accessible via a URL, for example, https://staging.example.com. You will use the official OWASP ZAP Docker image, owasp/zap2docker-stable, which comes pre-installed with ZAP and its dependencies. In your .gitlab-ci.yml file, define a DAST job in the security_scan stage. Use the owasp/zap2docker-stable Docker image. In the script section, execute the ZAP spider and active scan commands against your staging application URL.
A typical ZAP command for active scanning might look like: zap-cli active-scan --target https://staging.example.com --format json --output zap_report.json. The --format json flag specifies the output format as JSON, and --output zap_report.json saves the report to a file named zap_report.json. You'll need to ensure that your staging environment is deployed and running before the DAST stage starts. Define stage dependencies to ensure that deployment to staging is completed successfully before the DAST job is executed. You might also want to configure ZAP to run in headless mode ( -daemon) for CI/CD integration and potentially use ZAP API for more advanced configuration and control.
Addressing DAST Findings and Vulnerabilities
After the OWASP ZAP DAST job completes, the security scan report is generated as zap_report.json. You can use GitLab's artifacts feature to persist this report file. In your DAST job definition in .gitlab-ci.yml, add an artifacts section: artifacts: paths: - zap_report.json. This will make the zap_report.json file downloadable from the GitLab CI/CD pipeline job page. To integrate DAST findings into GitLab's security reporting, you need to convert the ZAP JSON report to a format that GitLab understands, such as SARIF or GitLab's own security report format. Tools like zap-gitlab can help convert ZAP JSON reports to GitLab-compatible formats.
Alternatively, you can parse the zap_report.json file directly within your CI/CD pipeline using scripting languages like Python or jq to extract vulnerability information. Based on the severity and type of vulnerabilities found in the ZAP report, you can implement actions in your pipeline, such as failing the pipeline if critical vulnerabilities are detected, creating GitLab issues for identified vulnerabilities, or sending notifications to security teams. Automating issue creation based on DAST findings streamlines the vulnerability remediation workflow and ensures that security issues are tracked and addressed promptly.
Example: Dependency Scanning with the NIST National Vulnerability Database
Integrating with the NVD Data Feed
To implement custom dependency scanning using the NIST National Vulnerability Database (NVD), you'll need to integrate with the NVD data feed. The NVD provides data feeds in formats like XML and JSON, which are updated regularly with new vulnerability information. You can download these feeds and process them to identify vulnerabilities in your project's dependencies. For GitLab CI/CD integration, you can create a custom script, potentially in Python, that downloads the NVD data feed, parses it, and compares it against your project's dependency list. You'll need to extract your project's dependencies into a format that your script can process. For example, for Python projects, you can use pip freeze > requirements.txt to generate a list of dependencies.
Your custom script will then iterate through your project's dependencies, query the NVD data for each dependency, and identify any known vulnerabilities. Consider using libraries or tools that simplify NVD data processing, as the raw data feeds can be quite large and complex. You can cache the NVD data locally to avoid repeatedly downloading it in every CI/CD pipeline run, and update the cache periodically to ensure you have the latest vulnerability information.
Managing Dependency Vulnerabilities in GitLab CI/CD
Once your custom dependency scanning script identifies vulnerabilities using the NVD data, you need to manage these vulnerabilities within GitLab CI/CD. Your script should generate a report of the identified vulnerabilities, including details like the vulnerable dependency, the CVE ID, severity, and description. You can format this report in JSON or XML.
To integrate with GitLab's security reporting, aim to format the report in a GitLab-compatible format like SARIF, if possible, or GitLab's custom security report format. If direct GitLab format output is not feasible, you can create a JSON report and parse it within your CI/CD pipeline to generate GitLab issues automatically.
In your .gitlab-ci.yml file, define a dependency scanning job in the security_scan stage. Use a Docker image that contains your custom dependency scanning script and any necessary dependencies (e.g., Python and libraries for NVD data processing). In the script section, execute your script to perform dependency scanning and generate the vulnerability report. Use GitLab's artifacts feature to persist the report file. Implement logic in your pipeline to parse the report and create GitLab issues for identified vulnerabilities, especially for high-severity issues. You can use GitLab's API to programmatically create issues with details from the vulnerability report, assigning them to appropriate team members for remediation. Regularly update your NVD data cache and dependency scanning script to ensure you are using the latest vulnerability information and best practices.
Analyzing and Reporting Security Scan Results in GitLab
Parsing Security Scan Output and Converting to GitLab's Format
Effectively analyzing and reporting security scan results in GitLab often requires parsing the output from your custom security scanning tools and converting it into a format that GitLab can understand and display within its security dashboards. Many security scanning tools output results in various formats like JSON, XML, CSV, or tool-specific formats. GitLab, on the other hand, prefers security reports in formats like SARIF (Static Analysis Results Interchange Format) or its own GitLab Security Report format (JSON-based). Therefore, you'll likely need to implement a parsing and conversion step in your GitLab CI/CD pipeline.
For simple text-based reports, you can use command-line tools like grep, awk, or sed to extract relevant vulnerability information. For structured formats like JSON or XML, tools like jq (for JSON) or xmlstarlet (for XML) are invaluable for parsing and manipulating the data. You can write scripts in languages like Python or Bash to process the output files, extract key vulnerability details (e.g., vulnerability name, severity, location, description), and then reformat this data into SARIF or GitLab's JSON format. For instance, if your custom SAST tool outputs a JSON report, your script would read this JSON, iterate through the findings, and construct a new JSON structure that conforms to GitLab's security report schema. This converted report can then be ingested by GitLab to populate its security dashboards. Consider using existing open-source tools or libraries that might already provide converters for common security report formats to GitLab-compatible formats to simplify this process.
Displaying Security Scan Results in the GitLab UI
To display custom security scan results within the GitLab UI, you need to leverage GitLab's security report features. After parsing and converting your custom scan output into a GitLab-compatible format (SARIF or GitLab Security Report JSON), you need to instruct GitLab CI/CD to recognize and process this report. In your .gitlab-ci.yml file, within the job definition for your custom security scan, use the security_report keyword. Specify the path to your converted report file and indicate the report format. For example, if you generated a SARIF report named custom-sast-report.sarif, you would add the following to your job definition: security_report: sast: custom-sast-report.sarif. GitLab supports different report types, such as sast, dependency_scanning, container_scanning, and dast. Choose the appropriate report type based on the nature of your custom security scan.
When the CI/CD pipeline runs and the job with the security_report configuration completes successfully, GitLab will automatically parse the specified report file. The security findings from the report will then be displayed in GitLab's Security Dashboard, alongside results from GitLab's built-in security scans. This provides a centralized view of all security vulnerabilities detected in your project, regardless of whether they were found by built-in or custom scans. You can view vulnerability details, severity levels, locations, and suggested remediations directly within the GitLab UI. This integration into the GitLab UI makes it easier for developers and security teams to review, triage, and manage security vulnerabilities identified by your custom scans in a familiar and unified environment.
Setting Up Automatic Issue Creation for Security Vulnerabilities
Automating issue creation for security vulnerabilities detected by custom scans significantly streamlines the remediation workflow in GitLab. Instead of manually creating issues for each finding, you can configure your GitLab CI/CD pipeline to automatically create GitLab issues directly from the security scan results. This ensures that vulnerabilities are promptly tracked, assigned to developers, and addressed. To implement automatic issue creation, you'll need to parse your custom security scan report and programmatically create GitLab issues using the GitLab API.
In your .gitlab-ci.yml file, after the security scan job, add another job in a subsequent stage (e.g., issue_creation). This job will use a script to parse the security report (JSON, SARIF, or your custom format). The script will iterate through the vulnerability findings in the report. For each vulnerability, it will use the GitLab API to create a new issue. You will need to authenticate with the GitLab API, typically using a project access token or a personal access token with appropriate permissions (e.g., write_repository). Store this token as a masked CI/CD variable in GitLab. When creating issues via the API, include relevant vulnerability details in the issue description, such as vulnerability name, severity, location, description from the security tool, and a link to the security report artifact. You can also assign issues to specific developers or teams based on vulnerability type or affected components. Configure issue labels and milestones to further categorize and prioritize security issues. Automated issue creation ensures that no security vulnerability goes unnoticed and facilitates efficient tracking and resolution of security findings.
Best Practices for Custom Security Scan Components in GitLab CI/CD
Versioning and Maintaining Custom Security Scan Components
Versioning and maintaining your custom security scan components is crucial for ensuring their reliability, consistency, and continued effectiveness over time. Treat your custom security scan components, including Docker images, scripts, and configurations, as code and apply version control best practices. Use Git to manage the source code for your custom components and store them in a dedicated repository, ideally within the same GitLab instance as your projects. Employ semantic versioning (e.g., v1.0.0, v1.1.0, v2.0.0) for your Docker images and component releases to clearly indicate changes and facilitate dependency management.
When updating your security scanning tools or scripts, create new versions of your Docker images and components. Avoid modifying existing versions in place to maintain reproducibility and prevent unexpected pipeline behavior. Document any changes, updates, and bug fixes in release notes associated with each version. Regularly review and update your custom security scan components to incorporate the latest security tool versions, vulnerability definitions, and best practices.
Monitor for updates from your chosen security tool vendors and the security community. Establish a process for testing and validating updates before deploying them to production CI/CD pipelines. Versioning and proper maintenance ensure that your custom security scans remain accurate, up-to-date, and reliable throughout the lifecycle of your projects.
Testing and Validating Security Scan Integrations
Thoroughly testing and validating your custom security scan integrations in GitLab CI/CD is essential to ensure they function as expected and provide accurate security findings. Before deploying custom security scans to production pipelines, set up a dedicated testing environment or project to validate their functionality. Create test cases that cover different scenarios, vulnerability types, and application components relevant to your security scanning goals.
For SAST, include code samples with known vulnerabilities of various types (e.g., SQL injection, XSS). For DAST, deploy a test application with intentionally introduced vulnerabilities. For dependency scanning, include vulnerable dependencies in your test project's dependency manifest.
Run your CI/CD pipeline with your custom security scan integrations against these test cases. Verify that the scans execute successfully, that the security tools are correctly configured and invoked, and that the scan results are generated and parsed as expected. Compare the scan findings against your expected results to assess the accuracy and effectiveness of your custom scans. Test the integration with GitLab's security reporting features to ensure that vulnerabilities are correctly displayed in the GitLab UI.
Validate automated issue creation to confirm that issues are created with the correct details and assignments. Iterate on your test cases and refine your custom security scan components based on the testing results until you are confident in their accuracy and reliability. Regularly re-run your validation tests whenever you update your custom security scan components or GitLab CI/CD pipeline configurations to maintain the integrity of your security scanning process.
Monitoring and Improving Security Scan Performance
Monitoring and continuously improving the performance of your custom security scan components is crucial for maintaining efficient and effective DevSecOps workflows in GitLab CI/CD. Monitor the execution time of your security scan jobs in your CI/CD pipelines. Long scan times can slow down the development process and increase feedback loops. Identify any bottlenecks in your scan process.
This might involve optimizing the configuration of your security scanning tools, adjusting scan parameters, or improving the performance of your custom parsing and reporting scripts. For example, for SAST, consider excluding certain directories or files from analysis if they are not critical for security or are known to cause performance issues. For DAST, optimize scan policies and reduce the scope of scans to focus on critical application areas.
Monitor the resource consumption (CPU, memory, disk I/O) of your security scan jobs. Ensure that your GitLab Runner infrastructure is adequately provisioned to handle the resource demands of your scans. If scan jobs are consistently consuming excessive resources, consider optimizing your Docker images, scripts, or security tool configurations to reduce resource usage. Regularly review the accuracy and effectiveness of your security scans.
Track false positive and false negative rates. Tune your security tool configurations and custom rules to minimize false positives and improve the detection of real vulnerabilities. Continuously evaluate new security scanning tools and techniques to enhance your security coverage and improve the overall performance of your DevSecOps pipeline. Collect metrics on scan execution times, resource usage, and vulnerability findings to track improvements over time and identify areas for further optimization.
Advanced Customizations for GitLab CI/CD Security
Integrating with External Security Tools and Services
Beyond basic custom components, GitLab CI/CD offers advanced capabilities for integrating with a wide range of external security tools and services to enhance your DevSecOps workflows. You can integrate with cloud-based security scanning services, vulnerability management platforms, threat intelligence feeds, and security information and event management (SIEM) systems. For cloud security scanning services, leverage their APIs to trigger scans directly from your GitLab CI/CD pipelines.
For example, you can integrate with cloud-based DAST services like Netsparker Cloud or Acunetix Online by using their API clients in your CI/CD scripts to initiate scans and retrieve results. For vulnerability management platforms, integrate with systems like Kenna Security or ServiceNow Security Operations to automatically ingest vulnerability findings from your custom scans into these platforms for centralized vulnerability tracking and management.
Integrate with threat intelligence feeds to enrich your security scans with up-to-date threat information. Consume threat intelligence data from providers like Recorded Future or VirusTotal and incorporate it into your custom security scanning logic to enhance vulnerability detection and prioritization. For SIEM integration, forward security scan logs and vulnerability findings to your SIEM system (e.g., Splunk, ELK Stack, Sumo Logic) for centralized security monitoring, analysis, and incident response.
Use webhooks or API integrations to push security data from GitLab CI/CD to your SIEM system in real-time. Leveraging external security tools and services extends the capabilities of your GitLab CI/CD security pipeline, providing richer security insights, broader coverage, and enhanced security operations.
Implementing Automated Remediation Workflows
Taking security automation a step further, you can implement automated remediation workflows in GitLab CI/CD to automatically address certain types of security vulnerabilities or initiate remediation actions. For vulnerabilities that can be automatically fixed, such as dependency vulnerabilities with available patches, you can create CI/CD jobs that automatically update dependencies and create merge requests with the fixes. For example, using tools like npm audit fix or pip-autoremove for dependency updates, you can automate the process of applying patches and submitting merge requests for review. For certain types of configuration vulnerabilities, you can automate the application of security hardening configurations. For instance, using configuration management tools like Ansible or Chef, you can automatically remediate misconfigurations detected by security scans and apply secure configuration baselines.
For vulnerabilities that require manual remediation, automate the process of assigning vulnerabilities to developers and tracking remediation progress. As described earlier, automate issue creation in GitLab for security findings. Extend this automation to include automatic assignment of issues to the developers responsible for the affected code or components based on code ownership rules or commit history.
Implement workflows to automatically track the status of security issues and trigger notifications or reminders to developers to ensure timely remediation. Use GitLab's workflow features, such as issue boards and milestones, to manage and track the progress of security remediation efforts. Automated remediation workflows reduce manual effort, accelerate vulnerability resolution, and improve the overall security posture of your applications.
Creating Custom Security Dashboards and Reports
While GitLab provides a built-in Security Dashboard, you may need to create custom security dashboards and reports to meet specific reporting requirements or gain deeper insights into your security posture. You can leverage GitLab's API to extract security scan data and vulnerability information and then use external dashboarding tools or reporting platforms to create customized visualizations and reports. For dashboarding, consider using tools like Grafana, Kibana, or Tableau.
Use GitLab's API to fetch security findings in JSON format and then configure your dashboarding tool to connect to GitLab's API and visualize the data. Create dashboards that display key security metrics, such as the number of vulnerabilities by severity, vulnerability trends over time, vulnerability distribution across projects or components, and remediation status.
For custom reporting, generate reports in formats like PDF, CSV, or Excel to share security insights with stakeholders who may not have direct access to GitLab. Use scripting languages like Python or reporting libraries to process GitLab security data and generate customized reports. Include summary statistics, vulnerability details, and remediation recommendations in your reports.
Automate the generation and delivery of custom security dashboards and reports on a regular schedule (e.g., daily, weekly, monthly) to provide continuous visibility into your security posture. Custom security dashboards and reports tailored to your specific needs provide enhanced security visibility, facilitate data-driven security decision-making, and improve communication about security risks and remediation efforts across your organization.
Troubleshooting Common Issues with Custom Security Scans
Debugging Failed Security Scan Jobs
Debugging failed security scan jobs in GitLab CI/CD is crucial for maintaining a healthy and functional DevSecOps pipeline. When a security scan job fails, the first step is to examine the job logs in GitLab CI/CD. Job logs often contain detailed error messages, stack traces, and output from the security scanning tool that can pinpoint the cause of the failure.
Look for error messages related to configuration issues, tool execution failures, network connectivity problems, or authentication errors. If the error messages are not immediately clear, increase the verbosity of your security scanning tool's output or add debugging statements to your custom scripts to gather more detailed information.
Check the configuration of your .gitlab-ci.yml file, especially the job definition for the failed security scan. Verify that the Docker image name is correct, that all required environment variables are set correctly, and that the script commands are properly formatted and executed. If the security scan involves network communication (e.g., DAST scanning a web application, connecting to a SonarQube server), check for network connectivity issues. Ensure that your GitLab Runner has network access to the target application or security service. Test network connectivity using tools like ping or curl from within the CI/CD job environment. If authentication is required (e.g., API keys, tokens), verify that the credentials are valid and correctly configured in GitLab CI/CD variables. Double-check masked variables to ensure they are not accidentally masked incorrectly. By systematically examining job logs, configuration, network connectivity, and authentication, you can effectively diagnose and resolve common causes of failed security scan jobs.
Resolving Configuration Errors in .gitlab-ci.yml
Configuration errors in your .gitlab-ci.yml file are a common source of issues with custom security scan components in GitLab CI/CD. Carefully review your .gitlab-ci.yml file for syntax errors, typos, and logical mistakes. Use a YAML validator to check for syntax errors and ensure that your YAML structure is valid. Pay close attention to indentation, spacing, and the correct use of YAML keywords. Verify that the job names, stage names, and keyword spellings are accurate. Double-check the image, script, variables, artifacts, and security_report sections in your job definitions. Ensure that the paths to report files and scripts are correct and relative to the project root.
If you are using CI/CD variables, verify that the variable names are spelled correctly and that the variables are defined at the appropriate level (project, group, or .gitlab-ci.yml). For masked variables, ensure that they are correctly masked and not accidentally exposed in job logs. If you are using complex scripts in your script sections, test them locally or in a separate test job before integrating them into your main security scan jobs. Break down complex CI/CD configurations into smaller, more manageable jobs to make debugging easier. Use GitLab CI/CD's pipeline editor and syntax validation features to help identify configuration errors before committing your .gitlab-ci.yml file. By meticulously reviewing and validating your .gitlab-ci.yml configuration, you can prevent and resolve many common issues related to custom security scans.
Handling Compatibility Issues with Security Scanning Tools
Compatibility issues between your custom security scanning tools and your GitLab CI/CD environment or target applications can arise. Ensure that the security scanning tools you choose are compatible with the operating system and architecture of your GitLab Runner environment. If you are using Docker images for your security scanners, verify that the base image is compatible with your GitLab Runner infrastructure. Check the system requirements and dependencies of your security scanning tools and ensure that they are met in your CI/CD environment. For example, some security tools might require specific versions of Java, Python, or other runtime environments.
Compatibility issues can also occur between security scanning tools and the technologies used in your target applications. Verify that your chosen SAST tools support the programming languages and frameworks used in your application. Ensure that your DAST tools are compatible with the web application technologies and protocols used in your staging environment. For dependency scanning, confirm that your tools can analyze the dependency management systems used in your project (e.g., Maven, npm, pip).
If you encounter compatibility issues, consult the documentation of your security scanning tools and GitLab CI/CD to find solutions or workarounds. Consider using different versions of security tools, adjusting tool configurations, or modifying your CI/CD environment to resolve compatibility problems. If necessary, reach out to the support forums or communities for your security tools and GitLab CI/CD for assistance in troubleshooting compatibility issues.
Conclusion: Enhancing Security with Custom GitLab CI/CD Components
Benefits of Custom Security Scans for Enhanced Security Posture
Implementing custom security scans in GitLab CI/CD offers significant benefits for enhancing your organization's security posture. Custom components provide tailored security coverage that goes beyond the limitations of default security scans. They allow you to integrate specialized security tools, address unique project requirements, and meet specific compliance mandates.
By using custom SAST, DAST, dependency scanning, and other security checks, you can detect a wider range of vulnerabilities and ensure more comprehensive security assessments. For instance, a financial institution might integrate custom scans to verify adherence to PCI DSS standards, while a healthcare provider might use custom components to enforce HIPAA compliance within their CI/CD pipelines.
Custom security scans improve the accuracy and relevance of security findings. By tailoring scans to your specific application technologies and risk profiles, you reduce false positives and focus on vulnerabilities that truly matter to your organization. This leads to more efficient vulnerability triage and remediation efforts.
Furthermore, custom components provide greater flexibility and control over your security scanning process. You can choose the best-of-breed security tools, configure them precisely to your needs, and adapt your security scans as your applications and threat landscape evolve. This adaptability is crucial in today's rapidly changing security environment, allowing organizations to stay ahead of emerging threats and maintain a robust security posture.
Future Trends in CI/CD Security Automation
The field of CI/CD security automation is continuously evolving, with several key trends shaping its future. One major trend is the increasing adoption of DevSecOps principles, embedding security deeper into the software development lifecycle and making it a shared responsibility of development, security, and operations teams. This trend drives the demand for more integrated and automated security solutions within CI/CD pipelines, including advanced custom security components.
Another trend is the rise of "policy as code," where security policies and compliance rules are defined and enforced programmatically within CI/CD pipelines. Custom security components play a vital role in implementing policy-as-code, enabling automated enforcement of security standards and compliance checks at every stage of the development process.
The use of artificial intelligence (AI) and machine learning (ML) in security scanning is also growing. AI-powered security tools can improve vulnerability detection accuracy, reduce false positives, and automate vulnerability triage and remediation. Future custom security components will likely incorporate AI/ML capabilities to enhance their effectiveness.
Cloud-native security is another significant trend, focusing on securing containerized applications, microservices architectures, and serverless functions. Custom security scans for cloud-native environments will become increasingly important, addressing specific cloud security risks and integrating with cloud-native security tools and services. These trends point towards a future where CI/CD security automation is more intelligent, adaptive, and deeply integrated into the entire software development lifecycle, with custom components playing a central role in achieving advanced security automation.
Resources for Further Learning about GitLab CI/CD Security
To deepen your knowledge of GitLab CI/CD security and custom security components, numerous resources are available for further learning. GitLab's official documentation provides comprehensive information on its built-in security features and CI/CD capabilities. The GitLab website offers tutorials, guides, and blog posts on DevSecOps and CI/CD security best practices. Explore GitLab's Security Dashboard documentation to understand how to interpret and utilize security scan results effectively. Consider taking GitLab's online courses and certifications related to CI/CD and security to gain practical skills and expertise.
Online communities and forums, such as the GitLab Community Forum and Stack Overflow, are valuable resources for asking questions, sharing knowledge, and learning from other GitLab users and security professionals. Attend webinars, conferences, and workshops focused on DevSecOps, CI/CD security, and GitLab to stay updated on the latest trends and best practices. Explore open-source projects and examples of custom security scan integrations in GitLab CI/CD on platforms like GitLab.com and GitHub.
Experiment with creating your own custom security components and integrating them into your GitLab CI/CD pipelines to gain hands-on experience and solidify your understanding. By continuously learning and engaging with the GitLab and security communities, you can master GitLab CI/CD security and effectively leverage custom components to build more secure and resilient applications.
Frequently Asked Questions
What are GitLab CI/CD security scans, and why are they important?
GitLab CI/CD security scans are automated tests integrated into your CI/CD pipeline to identify security vulnerabilities in your code. They are crucial for ensuring software security and preventing potential exploits.
Can I integrate custom security scanning tools into my GitLab CI/CD pipeline?
Yes, GitLab CI/CD is highly customizable. You can integrate custom security scanning tools by creating custom components and defining their execution within your .gitlab-ci.yml file, allowing for tailored security analysis.
How do I define a custom component for a security scan in GitLab CI/CD?
A custom component is defined as a Docker image containing the necessary scripts and tools for the security scan. You define its execution within your .gitlab-ci.yml file using the image keyword and specifying the commands to run.
What are some benefits of using custom components for GitLab CI/CD security scans?
Using custom components allows for greater flexibility and control over your security scanning process. You can use specific tools tailored to your project's needs, and update them independently of GitLab's built-in scanners.
How can I ensure the security of my custom security scanning components in GitLab CI/CD?
It's important to regularly update your Docker images containing the scanning tools with the latest security patches. Also, implement access controls to restrict who can modify or upload these images, ensuring your scanning process itself is secure.
Final Reflection: Securing the Software Pipeline
The journey of integrating security scans into GitLab CI/CD pipelines, as explored in this article, underscores a critical truth: proactive security is no longer optional, but essential for modern software development. In today's rapidly evolving threat landscape, waiting until the end of the development cycle to address vulnerabilities is a recipe for disaster. By embedding security checks directly into the CI/CD process, we shift left, catching potential issues early and minimizing the risk of costly breaches.
This shift towards continuous security has profoundly impacted the software development landscape. It's not just about finding vulnerabilities; it's about fostering a culture of security awareness within development teams. By empowering developers to identify and address security concerns early on, we create more robust and resilient software. Security is not a product, but a process.
This quote perfectly encapsulates the ongoing nature of security and the need for continuous vigilance, which is precisely what GitLab CI/CD security scans enable.
As you reflect on the insights shared in this article, consider how you can champion the adoption of security scans within your own GitLab CI/CD pipelines. Embrace the power of automation, customize your components to meet your specific needs, and actively contribute to a future where software is inherently more secure. The responsibility lies with each of us to build a safer digital world, one pipeline at a time.
Thanks for diving into the world of GitLab CI/CD security! We hope you now feel empowered to enhance your pipelines with robust security scans. Ready to take your code security to the next level? Here's how:
- Immediately implement at least one of the security scan types discussed in your most critical GitLab project. Don't wait, proactive security is the best security!
- Share this article with a fellow developer to spread the word about the importance of integrated security. Let's build a more secure community together!
- Explore GitLab's Security Dashboard and configure email notifications for new vulnerabilities.
What surprising security vulnerability did you discover in your project after implementing these scans? Share your experience in the comments below!