
StepbyStep Guide to Creating Your First Git Branch

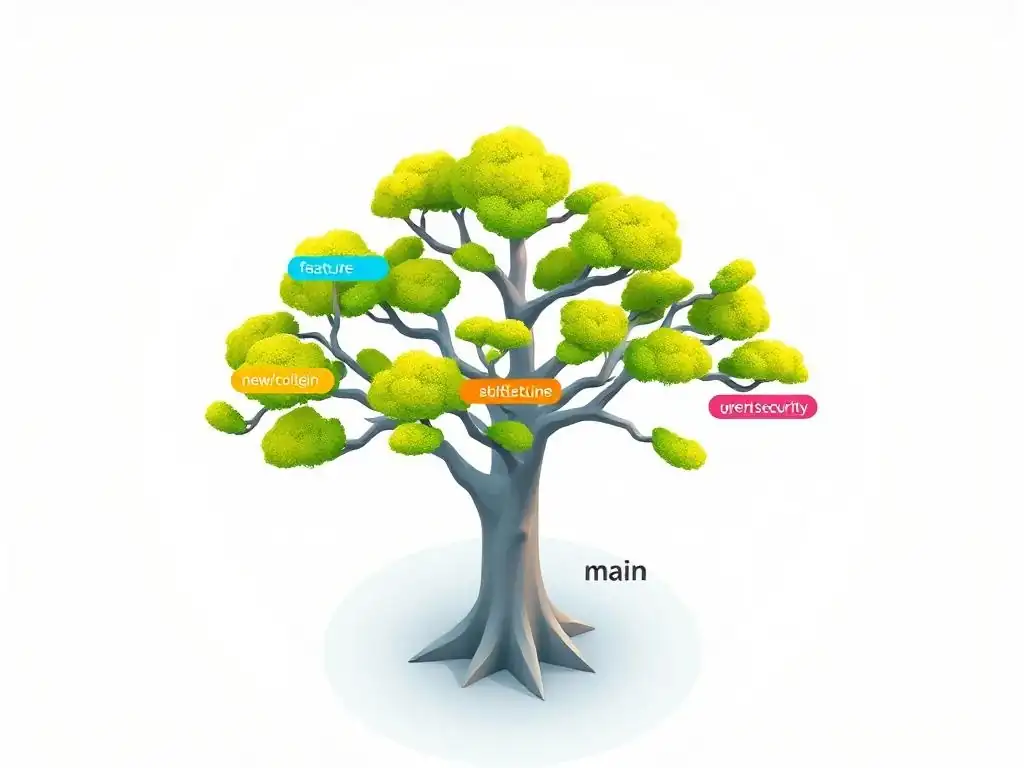
Welcome to the Git and Version Control Hub, your central resource for mastering the power of Git! Ever wondered how branching can revolutionize your workflow and prevent project chaos? Dive in to our comprehensive creating a Git branch tutorial and discover a step-by-step guide to branching like a pro. This is just the beginning – explore how branches can unlock seamless collaboration and streamlined development within our "Branching and Merging" category. Ready to level up your Git game?
Step-by-Step Guide to Creating Your First Git Branch
- Introduction to Git Branching: A Beginner's Guide
- Prerequisites: Setting Up Your Git Environment
- Step 1: Verify Your Current Branch
- Step 2: Creating a New Git Branch Locally
- Step 3: Switching to the Newly Created Branch
- Step 4: Making Changes and Committing to Your New Branch
- Step 5: Pushing Your Branch to a Remote Repository (Optional)
- Step 6: Merging Your Branch (When Ready)
- Best Practices for Git Branch Creation and Management
- Troubleshooting Common Git Branching Issues
- Conclusion: Mastering Git Branching for Effective Version Control
- Frequently Asked Questions
- Final Reflection: Embracing the Power of Branching
- Ignite Your Git Workflow: Branch Out Today!
Introduction to Git Branching: A Beginner's Guide
Why Branching is Essential in Git Version Control
Branching in Git is a fundamental concept that empowers developers to work on different features, bug fixes, or experiments in isolation without affecting the main codebase. Imagine you are building a house – branching is akin to creating separate rooms to work on different aspects like plumbing, electrical wiring, or interior design simultaneously.
This parallel development is crucial for efficiency and stability in software development. Without branching, all changes would have to be made directly to the main line of development, leading to chaos, conflicts, and a significantly higher risk of introducing bugs into the stable version of the project.
Consider a real-world scenario: a team is developing a new e-commerce website. While one developer is working on implementing a new payment gateway, another might be tasked with redesigning the user interface, and a third could be fixing a critical bug reported in the existing product catalog. Branching allows each developer to work on their respective tasks in separate, isolated environments.
This isolation prevents their changes from interfering with each other and ensures that the main codebase remains stable and deployable. Branching fosters a more organized and manageable development process, especially in collaborative projects, making it an indispensable tool for modern software development.
Understanding the Main Branch (Usually 'main' or 'master')
Every Git repository starts with a default branch, traditionally named master, but increasingly referred to as main. Think of this main branch as the trunk of a tree or the central spine of your project. It represents the primary, stable, and production-ready version of your codebase. All other branches are created from and eventually merged back into this main branch. It is considered the definitive history of your project, and best practices dictate that it should always be in a deployable state.
Historically, master was the universally accepted name for the main branch. However, in recent years, there has been a shift towards using the term main as a more inclusive alternative. Regardless of the name, the function remains the same: it is the foundational branch of your project. When you initialize a new Git repository, Git automatically creates this initial branch. It's crucial to understand that while you can technically work directly on the main branch, it's generally discouraged for anything beyond very minor changes. For any significant development work, creating branches from main is the recommended workflow to maintain the integrity and stability of your project's core history.
Prerequisites: Setting Up Your Git Environment
Installing Git on Your Local Machine
Before you can start creating and managing Git branches, you need to have Git installed on your local machine. Git is a free and open-source version control system, and installation is straightforward across various operating systems like Windows, macOS, and Linux. For Windows, you can download the installer from the official Git website ( https://git-scm.com/download/win ). macOS users can install Git using package managers like Homebrew ( brew install git) or MacPorts ( sudo port install git). Linux distributions typically offer Git through their package managers, such as apt-get install git on Debian/Ubuntu or yum install git on Fedora/CentOS.
Once you have downloaded the appropriate installer or used a package manager, follow the on-screen instructions to complete the installation. After installation, you can verify that Git is correctly installed by opening your terminal or command prompt and typing git --version. This command should display the version of Git installed on your system, confirming a successful setup. For instance, you might see an output like git version 2.39.2. Having Git properly installed is the first crucial step in your journey to mastering Git branching and version control.
Configuring Your Git Username and Email
After installing Git, the next essential configuration step is setting up your username and email. Git uses this information to associate commits with your identity. This is important for tracking changes and collaboration within a team. To configure your username, use the command git config --global user.name "Your Name" in your terminal, replacing "Your Name" with your actual name. Similarly, configure your email address with git config --global user.email "your.email@example.com", substituting "your.email@example.com" with your valid email address. The --global flag ensures these settings apply to all Git repositories on your system.
These configurations are stored in a global configuration file, typically located in your home directory. You can verify these settings by using git config --global user.name and git config --global user.email. Accurate configuration of your username and email is vital for proper attribution of your contributions to a project's history. When working in teams, this information allows others to easily identify who made specific changes and facilitates communication and collaboration. Consider it like signing your work – Git ensures that your contributions are clearly attributed to you within the project's version history.
Initializing a Git Repository (If You Don't Have One)
To start using Git for version control, you need to initialize a Git repository. If you are starting a new project, navigate to your project's root directory in the terminal and run the command git init. This command creates a hidden .git directory within your project folder, which is the core of your Git repository. This directory contains all the necessary metadata and object database to manage your project's version history.
If you are working on an existing project that is not yet under Git control, navigating to the project's root directory and executing git init will transform it into a Git repository. For example, if you have a project folder named "my-website", you would open your terminal, navigate into the "my-website" directory using cd my-website, and then run git init. After successful initialization, Git will typically output a message like "Initialized empty Git repository in /path/to/my-website/.git/". You are now ready to start tracking changes, staging files, committing, and of course, creating branches within your new Git repository.
Step 1: Verify Your Current Branch
Using the git branch Command to Check Active Branch
Before creating a new branch, it's always good practice to know which branch you are currently on. The git branch command is your go-to tool for this. Simply type git branch in your terminal within your Git repository and press Enter. This command lists all the branches in your repository, both local and remote (if you have connected to a remote repository). The currently active branch is indicated by an asterisk (*) symbol preceding its name, and it is usually highlighted in green in most terminal environments for better visibility.
For instance, if you are on the main branch, running git branch might output:
* main
  feature-x
  develop
In this example, the asterisk before main signifies that main is the currently active branch. The other branches, feature-x and develop, are also listed but are not currently active. Knowing your current branch is crucial because all Git commands you execute, such as committing changes or creating new files, will be applied to the active branch. Verifying your current branch helps prevent accidental changes being made to the wrong branch and ensures you are working in the intended context.
Understanding the Output of git branch
The output of the git branch command provides more than just the name of the active branch. It gives you a snapshot of all branches in your local repository. By default, git branch shows only local branches. To see remote branches as well, you can use git branch -r (for remote branches) or git branch -a (for all branches, both local and remote). Remote branches typically have a prefix indicating the remote repository they belong to, such as origin/main for the main branch on the remote repository named origin.
Understanding the output is essential for navigating your project's branching structure. Consider the output from git branch -a:
* main
  feature-x
  develop
  remotes/origin/HEAD -> origin/main
  remotes/origin/main
  remotes/origin/feature-y
Here, * main indicates the active local branch. feature-x and develop are other local branches. Lines starting with remotes/origin/ represent branches on the remote repository named origin. remotes/origin/HEAD -> origin/main signifies that the default branch on the origin remote is main. This comprehensive output allows you to understand the entire branching landscape of your project, both locally and remotely, and helps you make informed decisions about branch management.
Step 2: Creating a New Git Branch Locally
The git branch <branch_name> Command: Creating a New Branch
Creating a new branch in Git is a simple yet powerful operation. The command git branch <branch_name> is used to create a new branch. Replace <branch_name> with the desired name for your new branch. This command essentially creates a pointer to the current commit you are on, effectively forking your project's history at that point. It's important to note that this command only creates the branch locally; it does not switch you to the new branch. You will still be on your original branch after executing this command.
For example, if you are on the main branch and want to create a new branch named develop, you would run git branch develop. After executing this command, Git will create a new branch named develop that points to the same commit as your current main branch. To verify that the branch has been created, you can use the git branch command again. You will see develop listed among your branches, but the asterisk will still be next to main, indicating that you are still on the main branch. Creating a branch is a lightweight operation in Git, making it efficient and encouraging developers to use branches liberally for different tasks.
Choosing a Descriptive and Meaningful Branch Name
Selecting a good branch name is crucial for maintaining clarity and organization in your Git workflow, especially in collaborative projects. Branch names should be descriptive and reflect the purpose of the branch. Avoid generic names like "test" or "temp." Instead, opt for names that clearly indicate the feature, bug fix, or experiment being implemented in the branch. Common conventions include using hyphens or underscores to separate words in branch names.
For feature branches, a good naming convention is feature/<feature-name>. For bug fixes, bugfix/<issue-number-or-description>. For hotfixes intended for immediate release, hotfix/<short-description>. Examples of descriptive branch names include feature/user-authentication, bugfix/resolve-login-error, hotfix/security-patch-v1.2. Using meaningful branch names makes it easier for team members to understand the purpose of each branch at a glance, simplifies branch management, and improves overall project organization. A well-named branch acts as a self-documenting entity within your Git repository.
Example: Creating a Branch for a New Feature ( git branch new-feature)
Let's illustrate branch creation with a practical example. Suppose you are working on a project and want to add a new feature – user profile editing. First, ensure you are on the main branch, which should represent the stable codebase. You can verify this using git branch. Once confirmed, to create a new branch specifically for this feature, you would use the command git branch feature/user-profile-edit. This command creates a new branch named feature/user-profile-edit.
After running this command, you can check the list of branches using git branch. You will see feature/user-profile-edit listed along with main, but you will still be on the main branch. This new branch, feature/user-profile-edit, is now ready for you to switch to and start implementing the user profile editing feature in isolation from the main codebase. This example demonstrates how to create a feature branch with a descriptive name, following best practices for organized Git branching.
Step 3: Switching to the Newly Created Branch
The git checkout <branch_name> Command: Switching Branches
After creating a new branch, you need to switch to it to start working in that isolated environment. The git checkout <branch_name> command is used for switching branches. Replace <branch_name> with the name of the branch you want to switch to. git checkout updates your working directory to reflect the state of the chosen branch, effectively allowing you to work on that specific branch's version of the project.
For example, if you have created a branch named develop and want to switch to it, you would use the command git checkout develop. Upon successful execution, Git will output a message like "Switched to branch 'develop'". Your working directory will now reflect the files and history of the develop branch. Any changes you make, commit, and push will now be associated with the develop branch, keeping your work separate from other branches, such as main. git checkout is a fundamental command for navigating between different branches and contexts within your Git repository.
Using git switch <branch_name> (Alternative to git checkout in newer Git versions)
In more recent versions of Git (version 2.23 and later), a new command, git switch <branch_name>, was introduced as a more streamlined alternative specifically for branch switching. While git checkout is versatile and can perform multiple operations (including branch switching, file restoration, and commit checkout), git switch is dedicated solely to branch switching, making it conceptually cleaner and often preferred for this specific task. Functionally, git switch <branch_name> behaves similarly to git checkout <branch_name> for branch switching.
Using the previous example, to switch to the develop branch using git switch, you would run git switch develop. The output would be similar to git checkout, such as "Switched to branch 'develop'". Both commands achieve the same outcome of changing your active branch. However, git switch is considered more semantically clear for branch switching and is recommended for new Git users or projects adopting newer Git versions. git switch helps to simplify Git commands by separating branch operations from other functionalities previously bundled into git checkout.
Verifying You Are on the Correct Branch After Switching
After using either git checkout <branch_name> or git switch <branch_name> to switch branches, it's essential to verify that you have successfully switched to the intended branch. You can easily verify this by using the git branch command again. As mentioned earlier, git branch lists all branches, and the currently active branch is marked with an asterisk (*). After switching branches, running git branch should show the asterisk next to the branch you just switched to, confirming your current working branch.
For instance, if you switched to the develop branch, running git branch should now output something like:
  main
* develop
  feature-x
The asterisk now preceding develop confirms that you are indeed working on the develop branch. Always verifying your current branch after switching is a good practice to prevent making changes in the wrong context. This simple check can save you from potential confusion and errors, especially when working with multiple branches in a complex project.
Step 4: Making Changes and Committing to Your New Branch
Editing Files and Staging Changes ( git add .)
Once you have switched to your new branch, you can start making changes to your project files. This might involve creating new files, modifying existing ones, or deleting files, depending on the purpose of your branch. After making your desired changes, Git needs to be informed about these modifications. This is done through the staging process. The command git add . is commonly used to stage all changed files in your working directory. The . in the command refers to the current directory and all subdirectories, staging all changes within them.
Alternatively, you can stage specific files using git add <file_name>, replacing <file_name> with the name of the file you want to stage. Staging prepares your changes for the next step, which is committing. Think of staging as preparing a snapshot of your changes that you intend to save into your project's history. For example, if you modified index.html and styles.css, running git add . will stage both of these modified files, making them ready to be included in your next commit.
Committing Changes with a Clear Commit Message ( git commit -m "Your commit message")
After staging your changes, the next step is to commit them. A commit is a snapshot of your staged changes along with a descriptive message that explains what changes were made and why. The command git commit -m "Your commit message" is used to create a commit. Replace "Your commit message" with a concise and informative message summarizing your changes. A good commit message is crucial for understanding the history of your project and for collaboration.
For example, if you added a user authentication feature, a good commit message might be: git commit -m "feat: Implement user authentication functionality". The -m flag allows you to write the commit message directly in the command line. If you omit the -m flag, Git will open a text editor for you to write a more detailed commit message. Commit messages should ideally be short summaries, often following conventions like starting with a type (e.g., feat, fix, docs) followed by a colon and a brief description. Clear and well-written commit messages are invaluable for maintaining a clean and understandable project history.
Keeping Your Branch Focused and Organized
When working on a branch, it's best practice to keep it focused on a single, specific task, feature, or bug fix. Avoid making unrelated changes in the same branch. This practice makes it easier to review, merge, and manage branches. A focused branch simplifies the process of understanding the changes introduced by the branch and reduces the risk of introducing unintended side effects. Organized branches contribute to a cleaner project history and smoother collaboration.
For instance, if you are working on a feature to implement user profiles, your branch should ideally only contain changes related to user profiles – not changes related to, say, redesigning the homepage. If you need to work on the homepage redesign, create a separate branch specifically for that task. By keeping branches focused and organized, you make your codebase more maintainable, your code reviews more efficient, and your overall development workflow more streamlined. This approach aligns with the principle of small, incremental changes, which is a cornerstone of effective version control practices.
Step 5: Pushing Your Branch to a Remote Repository (Optional)
Setting Up a Remote Repository (e.g., GitHub, GitLab)
While local branches are essential for isolated development, collaborating with others or backing up your work often requires a remote repository. Platforms like GitHub, GitLab, and Bitbucket provide services for hosting Git repositories remotely. To set up a remote repository, you first need to create an account on one of these platforms. Once you have an account, you can create a new repository through their web interface. They will typically provide you with a repository URL, which you will use to connect your local repository to the remote one.
After creating a remote repository (e.g., on GitHub), you need to add it to your local Git repository as a remote. This is typically done using the command git remote add origin <remote_repository_url>, where <remote_repository_url> is the URL provided by your hosting platform and origin is a conventional name given to the main remote repository. For example, if your GitHub repository URL is https://github.com/your-username/your-repository.git, you would run git remote add origin https://github.com/your-username/your-repository.git. Setting up a remote repository is a prerequisite for sharing your local branches and collaborating with others.
The git push -u origin <branch_name> Command: Pushing for the First Time
Once you have a remote repository set up and added as origin, you can push your local branch to the remote repository. The command git push -u origin <branch_name> is used to push your local branch to a remote branch with the same name. The -u flag, short for --set-upstream, establishes a tracking connection between your local branch and the remote branch. This is particularly useful for the first push of a new branch. After the first push with -u, subsequent pushes on the same branch can simply use git push.
For example, if you have created a local branch named feature/user-profile-edit and want to push it to the remote repository origin, you would run git push -u origin feature/user-profile-edit. Git will then upload your branch and its commits to the remote repository. After successful pushing, your branch will be available on the remote repository, allowing collaborators to see your work and enabling you to create pull requests or merge requests.
Tracking Branches with -u origin
The -u origin option in the git push -u origin <branch_name> command is crucial because it sets up tracking for your local branch. Tracking means that your local branch is now directly linked to a corresponding remote branch (in this case, origin/<branch_name>). This tracking relationship provides several benefits. Firstly, it simplifies future pushes and pulls. After setting up tracking, you can simply use git push or git pull without specifying the remote and branch name, as Git now knows where to push to and pull from by default.
Secondly, tracking provides useful information about the relationship between your local and remote branches. For instance, git status will tell you if your local branch is ahead or behind the remote branch, or if they are in sync. This information is invaluable for managing your workflow, especially when collaborating with others. Tracking branches streamlines your Git workflow and makes it easier to keep your local and remote repositories synchronized.
Step 6: Merging Your Branch (When Ready)
Creating a Pull Request (or Merge Request) on Your Remote Repository
Once you have completed the work on your branch and pushed it to a remote repository, the next step to integrate your changes into the main codebase is to create a Pull Request (PR) on platforms like GitHub or a Merge Request (MR) on GitLab. A PR/MR is essentially a request to merge your branch into another branch, typically the main or develop branch. You initiate a PR/MR through the web interface of your remote repository hosting service.
When creating a PR/MR, you select your feature branch as the source branch and the target branch (e.g., main) as the destination branch. You'll be prompted to provide a title and a description for your PR/MR, summarizing the changes you've made. This information is crucial for reviewers to understand the purpose and scope of your changes. Creating a PR/MR kicks off the code review and merging process, facilitating collaboration and ensuring code quality.
Reviewing Changes Before Merging
Code review is a critical step in the merging process. After creating a Pull Request or Merge Request, team members can review your code changes. This review process typically involves examining the code for correctness, style, potential bugs, and adherence to project standards. Reviewers can leave comments and suggestions directly on the PR/MR, providing feedback and asking for clarifications or modifications.
The review process helps to catch potential issues early, improve code quality, and ensure that the changes align with the project's goals. It's a collaborative effort that fosters knowledge sharing and improves the overall robustness of the codebase. Addressing feedback and iterating on your code based on review comments is a normal and valuable part of the development workflow. Thorough code review before merging significantly reduces the risk of introducing bugs or regressions into the main codebase.
Merging Your Branch into the Main Branch (or Another Target Branch)
After the code review process is complete and all feedback has been addressed, the final step is to merge your branch into the target branch. This is typically done by clicking a "Merge" button on the Pull Request or Merge Request interface on your remote repository platform. Merging integrates the changes from your feature branch into the target branch, effectively incorporating your work into the main codebase.
Depending on the platform and project settings, merging might be done automatically after approvals or might require manual intervention. Once merged, the changes from your feature branch become part of the target branch's history. After successful merging, it's common practice to delete the feature branch, both locally and remotely, to keep the repository clean and focused. Merging completes the lifecycle of a feature branch and integrates the developed functionality into the main project line.
Best Practices for Git Branch Creation and Management
Keeping Branches Short-Lived
One of the key best practices in Git branching is to keep branches short-lived. This means branches should be created for specific, focused tasks and merged back into the main branch as soon as the task is completed. Long-lived branches can become difficult to manage, especially as the main branch evolves. The longer a branch lives, the more it can diverge from the main branch, leading to increased merge conflicts and integration challenges.
Aim to complete the work on a branch and merge it within a few days or, at most, a couple of weeks. Short-lived branches facilitate continuous integration and delivery, reduce the complexity of merging, and make it easier to track changes and revert if necessary. Frequent merging of small, focused branches keeps the main branch up-to-date and reduces the risk of large, complex merges that are prone to errors.
Using Feature Branches for New Development
For any new feature development, always use feature branches. Feature branches provide isolation, allowing developers to work on new functionalities without disrupting the stability of the main branch. Create a new branch specifically for each feature you are developing. This practice promotes parallel development, allowing multiple features to be developed concurrently without interference.
Feature branches also facilitate code review. When a feature is complete, the branch can be reviewed independently before merging into the main branch. This ensures code quality and reduces the likelihood of introducing bugs into the stable codebase. Using feature branches is a cornerstone of modern Git workflows and is essential for effective collaboration and project management.
Regularly Merging from the Main Branch to Stay Up-to-Date
While working on a feature branch, it's crucial to regularly merge changes from the main branch into your feature branch. This practice, often referred to as rebasing or merging from main, helps to keep your feature branch up-to-date with the latest changes in the main codebase. Regularly integrating changes from main reduces the likelihood of significant merge conflicts when you eventually merge your feature branch back into main.
Staying up-to-date with main also ensures that your feature branch incorporates the latest bug fixes and updates from the main development line. This proactive approach minimizes integration headaches and ensures that your feature is built on the most current version of the project. Make it a habit to merge from main into your feature branch frequently, especially if your feature development is long-running.
Troubleshooting Common Git Branching Issues
Resolving Merge Conflicts
Merge conflicts are a common occurrence when working with Git branches, especially when multiple developers are working on the same files in different branches. Conflicts arise when Git cannot automatically determine how to integrate changes from different branches. When a merge conflict occurs, Git will mark the conflicting files with special markers ( <<<<<<<, =======, >>>>>>>) indicating the conflicting sections from different branches.
To resolve a merge conflict, you need to manually edit the conflicting files, deciding which changes to keep and which to discard. After resolving the conflicts and editing the files to your satisfaction, you need to stage the resolved files using git add <file_name> and then complete the merge with git commit. Merge conflict resolution is a skill that developers need to develop proficiency in, and understanding the conflict markers is the first step in effectively resolving them.
Undoing Accidental Commits to the Wrong Branch
Accidentally committing changes to the wrong branch can happen, especially when working quickly. If you realize you have committed to the wrong branch, you can undo the commit without losing your changes. The command git reset --soft HEAD~1 can be used to undo the last commit. This command moves the branch pointer back by one commit but keeps your changes staged. After running this command, you can switch to the correct branch using git checkout <correct_branch> and then commit your staged changes to the correct branch.
Alternatively, if you have already pushed the commit to a remote branch, undoing it becomes slightly more complex and might involve using git revert or git reset --hard (with caution). However, for local accidental commits, git reset --soft HEAD~1 is a safe and effective way to undo the commit and relocate your changes to the correct branch.
Deleting Local and Remote Branches After Merging
After successfully merging a feature branch into the main branch (or another target branch), it's good practice to delete the feature branch. Keeping too many branches around can clutter your repository and make it harder to manage. To delete a local branch, use the command git branch -d <branch_name>. Git will prevent you from deleting a branch that hasn't been merged yet unless you use -D (force delete), but it's generally recommended to ensure branches are merged before deleting them.
To delete a remote branch, use the command git push origin --delete <branch_name>. This command removes the branch from the remote repository. Deleting branches after they are no longer needed helps to keep your repository clean, organized, and easier to navigate. Regularly cleaning up merged branches is a part of good Git hygiene and contributes to a more streamlined workflow.
Conclusion: Mastering Git Branching for Effective Version Control
Further Learning Resources for Git Branching
Mastering Git branching is a journey that requires continuous learning and practice. Numerous resources are available to deepen your understanding of Git branching and version control in general. The official Git documentation ( https://git-scm.com/doc ) is an excellent starting point, providing comprehensive information on all Git commands and concepts. Online platforms like GitHub Learning Lab ( https://lab.github.com/ ) and GitLab Learn ( https://learn.gitlab.com/ ) offer interactive tutorials and courses on Git and related topics.
Websites like Atlassian Git Tutorials ( https://www.atlassian.com/git/tutorials ) and resources from companies like Tower ( https://www.git-tower.com/learn/git/ ) offer detailed guides and articles covering various aspects of Git branching and workflows. Exploring these resources will significantly enhance your Git skills and enable you to leverage the full power of Git branching in your development projects.
The Power of Git Branches for Collaboration and Development
Git branches are a cornerstone of modern software development workflows, providing a robust mechanism for parallel development, feature isolation, and effective collaboration. By mastering Git branching, developers can significantly improve their productivity, code quality, and team collaboration. Branches enable teams to work on multiple features concurrently, fix bugs without disrupting ongoing development, and experiment with new ideas in a safe and isolated environment.
From small personal projects to large-scale enterprise applications, Git branching empowers developers to manage complexity, maintain code stability, and streamline the development process. Understanding and effectively utilizing Git branches is an essential skill for any developer working in a version-controlled environment. Embracing Git branching best practices will lead to more efficient, organized, and successful software development projects.
Frequently Asked Questions
What is the purpose of creating a Git branch?
Creating a Git branch allows you to isolate changes and experiment with new features without affecting the main codebase. This fosters parallel development and safer experimentation.
How do I create a new branch in Git?
You can create a new branch using the command git branch <branch_name>. This command only creates the branch; you still need to switch to it to start working on it.
What's the difference between git branch and git checkout -b?
git branch <branch_name> only creates the branch, while git checkout -b <branch_name> creates the branch and switches to it in a single step, making it more convenient.
Can I create a branch from a specific commit other than the current one?
Yes, you can specify a commit hash when creating a branch: git branch <branch_name> <commit_hash>. This allows you to branch off from a previous state of your project.
How do I switch between different Git branches?
Use the command git checkout <branch_name> to switch between branches. This updates your working directory to reflect the state of the selected branch.
Final Reflection: Embracing the Power of Branching
The ability to manage and isolate changes through branching is fundamental to modern software development, and this tutorial has aimed to demystify that process. The principles of creating and utilizing Git branches, once a daunting prospect for newcomers, are now more accessible than ever, empowering developers to experiment, collaborate, and innovate with greater confidence. This accessibility is crucial in today's fast-paced tech landscape, where iterative development and continuous integration are the norm.
The impact of branching extends far beyond simply managing code; it fosters a culture of experimentation and collaboration. My own journey with Git has been one of continuous learning and appreciation for its power to streamline workflows and prevent catastrophic errors. The best way to predict the future is to create it.
- Peter Drucker. This quote resonates deeply with the spirit of branching, allowing developers to explore new features and fix bugs without jeopardizing the stability of the main codebase, essentially creating the future of their software.
Now that you've taken your first steps in creating Git branches, I encourage you to embrace this powerful tool in your own projects. Don't be afraid to experiment, to create branches for even the smallest changes, and to collaborate with others using branching strategies. The more you practice, the more comfortable and proficient you'll become, unlocking a world of possibilities for your development workflow. Go forth and branch out!
Ignite Your Git Workflow: Branch Out Today!
Thanks for diving into the world of Git branching! We hope this guide has empowered you with the knowledge to confidently manage your code and collaborate effectively. Now, it's time to put that knowledge into action. Ready to unlock the power of parallel development?
Here are a few ways you can get started:
- Boldly create your first branch! Pick a feature or bug fix, and use the
git branch <branch_name>command to start working independently. - Share your branching success (or stumbles!) Share your experience of creating your first branch on Twitter or LinkedIn and tag GitAndVersionControlHub.com. Help others learn from your journey!
- Explore advanced branching strategies like Gitflow or GitHub Flow and see how they can optimize your team's workflow.
What interesting feature or experiment will your next Git branch be dedicated to?