
Git CherryPick for Beginners: Your First Steps to Selective Commits

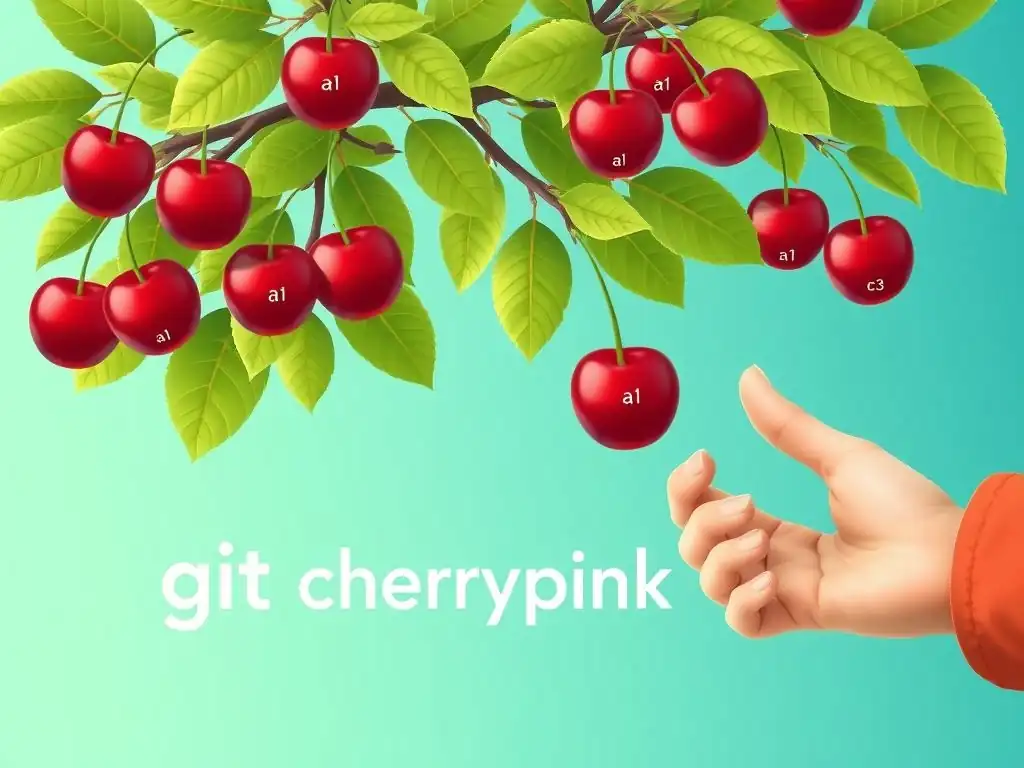
Welcome to Git and Version Control Hub, your central resource for mastering the art of version control! Are you ready to unlock the power of Git and streamline your development workflow? This week, we're diving into Advanced Git Techniques and exploring a powerful tool that can revolutionize how you manage commits: **git cherry-pick**. Ever needed to selectively apply changes from one branch to another? Discover how to use git cherry-pick in our detailed guide and learn how to cherry-pick like a pro. Let's get started!
Git Cherry-Pick: Selective Commit Integration
Understanding Git Cherry-Pick
What is Git Cherry-Pick?
Git cherry-pick is a powerful command in Git that allows you to selectively incorporate changes from specific commits into your current branch. Unlike git merge or git rebase, which integrate entire branches, cherry-pick lets you pick individual commits as if you were hand-picking cherries from a tree. This is particularly useful when you want to apply a specific fix or feature from one branch to another without merging the entire branch. Imagine you're working on a stable release branch and a critical bug fix is implemented in a development branch. Instead of merging the potentially unstable development branch, you can cherry-pick just the commit containing the bug fix to apply it directly to your release branch.
At its core, git cherry-pick takes the changes introduced by a commit, identified by its unique hash, and replays those changes onto your current branch. Git attempts to apply these changes cleanly. If the changes conflict with the current state of your branch, Git will pause the cherry-pick process, allowing you to resolve the conflicts before finalizing the operation. This selective approach makes cherry-pick an indispensable tool for managing code changes with precision and control, especially in collaborative development environments.
Cherry-Pick vs. Merge/Rebase
While git cherry-pick, git merge, and git rebase all serve to integrate changes between branches, they differ significantly in their scope and impact on the commit history. Git merge integrates an entire branch into your current branch, creating a new merge commit that represents the combined history. This preserves the history of both branches, making it easy to track when and how branches were integrated. On the other hand, git rebase rewrites the commit history of your current branch by applying your commits on top of another branch. This results in a linear commit history, which can be cleaner and easier to follow but alters the original commit timestamps and SHA-1 hashes.
Git cherry-pick stands apart by focusing on individual commits. It doesn't merge entire branches or rewrite history in the same way as rebase. Instead, it picks a single commit and applies its changes as a new commit on your current branch. This creates a duplicate commit in terms of changes but with a different commit hash and potentially different commit message, depending on how you choose to proceed. For instance, if you have a commit with hash abcdefg on branch feature-branch that fixes a typo, and you git cherry-pick abcdefg onto your main branch, it will create a new commit on main with the same typo fix but a different hash, say xyz1234. This makes cherry-pick ideal for targeted fixes or feature integrations where a full branch merge or rebase is not desired or appropriate.
Use Cases: Bug Fixes, Feature Porting
Git cherry-pick shines in several practical scenarios, particularly when dealing with bug fixes and feature porting across branches. Imagine a situation where a critical bug is discovered in your production branch. The fix is quickly developed and committed to a hotfix branch. Instead of merging the entire hotfix branch into production immediately, which might include other changes not yet fully tested for production, you can cherry-pick just the bug fix commit. This allows you to apply the essential fix rapidly and safely to production, minimizing the risk of introducing unintended changes.
Another common use case is feature porting. Suppose you are developing a new feature on a feature branch, and you realize that a specific commit from that branch would be beneficial to another ongoing project on a different branch. Instead of merging the entire feature branch, which might be incomplete or contain work-in-progress elements, you can cherry-pick the specific commit that contains the useful part of the feature. This selective approach is invaluable for maintaining branch stability and controlling the flow of changes between different development streams, ensuring that only necessary and well-understood changes are integrated. For example, if commit 1234567 on feature-A implements a useful utility function, you can cherry-pick 1234567 onto feature-B to reuse that function without merging or rebasing feature-A into feature-B.
Prerequisites
Git Installation and Configuration
Before you can effectively use git cherry-pick, you need to ensure that Git is properly installed and configured on your system. Git is a version control system widely used in software development, and its command-line tools are essential for interacting with Git repositories. Most modern operating systems offer straightforward ways to install Git. For example, on macOS, you can use Homebrew and run brew install git. On Debian or Ubuntu Linux distributions, you can use apt-get install git. Windows users can download a Git installer from the official Git website, which provides a user-friendly installation wizard.
Once Git is installed, basic configuration is crucial. This typically involves setting up your username and email address, which Git uses to identify you as the author of commits. You can configure these using the git config command. For instance, git config --global user.name "Your Name" sets your global username, and git config --global user.email "your.email@example.com" sets your global email address. These configurations are usually done only once and apply to all Git repositories you work with on your system. Verifying your installation and configuration can be done by running git --version to check the installed Git version and git config --list to see your current Git configuration settings.
Understanding Commit Hashes
A fundamental aspect of using git cherry-pick is understanding commit hashes. In Git, every commit is uniquely identified by a SHA-1 hash, a 40-character hexadecimal string. This hash acts like a fingerprint for each commit, representing the state of the repository at that point in time, including the changes introduced, the author, timestamp, and commit message. Commit hashes are crucial for precisely specifying which commits you want to cherry-pick.
When you use commands like git log, Git displays the commit history, including these commit hashes. For example, running git log --oneline will show a concise list of commits, each line starting with a short 7-character abbreviation of the commit hash followed by the commit message. While the full 40-character hash provides absolute certainty, often the abbreviated hash is sufficient, especially when referring to recent commits within the same repository. Understanding how to locate and copy these commit hashes is essential for effectively using git cherry-pick because you need to provide the hash of the commit you wish to select and apply to your current branch.
Clean Working Directory
Before initiating a git cherry-pick operation, it's considered best practice to ensure you have a clean working directory. A clean working directory means that there are no uncommitted changes in your current branch. You can check the status of your working directory using the command git status. If Git reports "nothing to commit, working tree clean," it indicates a clean working directory. If there are changes listed as "Changes not staged for commit" or "Changes to be committed," you should either commit or stash these changes before proceeding with git cherry-pick.
Having a clean working directory minimizes the risk of conflicts and unexpected behavior during the cherry-pick process. When you cherry-pick a commit, Git applies the changes from that commit to your current branch. If you have uncommitted changes, these might interfere with the cherry-picked changes, potentially leading to more complex conflict resolutions or even data loss if not handled carefully. By starting with a clean working directory, you create a predictable and safe environment for applying cherry-picked commits, making the process smoother and less error-prone.
How to Use Git Cherry-Pick
Step 1: Find the Commit Hash
Using git log
The first step in using git cherry-pick is to identify the commit you want to apply to your current branch and obtain its commit hash. The primary tool for this is the git log command. git log displays the commit history of your repository, providing information about each commit, including its hash, author, date, and commit message. Running git log in your terminal will show a detailed commit history, which can be quite extensive in repositories with a long history.
To make it easier to find a specific commit, you can use various options with git log. For instance, git log --oneline provides a more compact view, showing each commit on a single line with a shortened commit hash and the first line of the commit message. You can also filter commits by author using --author="Author Name", by date using --after="YYYY-MM-DD" or --before="YYYY-MM-DD", or by keyword in the commit message using --grep="keyword". Combining these options can help you quickly locate the exact commit you need. For example, to find a commit made by "John Doe" after January 1, 2023, related to "bug fix", you might use: git log --oneline --author="John Doe" --after="2023-01-01" --grep="bug fix". Once you find the target commit in the git log output, copy its commit hash, which you will need for the next step.
Examining Commit Messages
While commit hashes are the definitive identifiers for commits, examining commit messages is crucial for confirming that you've selected the correct commit to cherry-pick. Commit messages ideally provide a concise summary of the changes introduced by the commit and often explain the why behind the changes. By carefully reading the commit message, you can verify that the commit indeed contains the changes you intend to apply to your current branch.
When using git log, pay close attention to the commit messages displayed. A well-written commit message acts as valuable documentation, helping you understand the purpose and impact of the commit. For example, a commit message like "Fix: Resolved issue with user authentication" clearly indicates that this commit addresses a bug related to user authentication. If you are looking for a bug fix related to authentication, this commit message strongly suggests it's the correct one. In contrast, a commit message like "Refactor: Improved code readability in module X" might be relevant if you are aiming to port code improvements, but less so if you are specifically looking for bug fixes. Therefore, always cross-reference the commit message with your intended purpose to ensure you are cherry-picking the right commit.
Step 2: Execute git cherry-pick
Basic Syntax
Once you have identified the commit hash you want to apply, the next step is to execute the git cherry-pick command. The basic syntax for git cherry-pick is straightforward: git cherry-pick <commit-hash>. Replace <commit-hash> with the actual commit hash you obtained in the previous step. Before running this command, ensure you are on the branch where you want to apply the changes. For example, if you want to cherry-pick a commit onto your main branch, first switch to the main branch using git checkout main.
After switching to the target branch and having the commit hash at hand, you simply run git cherry-pick <commit-hash> in your terminal. Git will then attempt to apply the changes from the specified commit to your current branch. If the cherry-pick is successful and there are no conflicts, Git will automatically create a new commit on your current branch that incorporates the changes from the cherry-picked commit. This new commit will have a different hash from the original commit but will contain the same code changes. Git will usually open your default text editor to allow you to review and modify the commit message before finalizing the cherry-pick operation. You can then save and close the editor to complete the cherry-pick.
Handling Conflicts
While git cherry-pick often proceeds smoothly, there are situations where it can encounter conflicts. Conflicts arise when the changes introduced by the commit you are cherry-picking overlap with changes already present in your current branch. This typically happens when the same lines of code have been modified in both the commit being cherry-picked and in your current branch since the commit being cherry-picked was originally made. When a conflict occurs, Git will pause the cherry-pick process and notify you that conflicts need to be resolved.
Git will mark the files with conflicts, inserting conflict markers ( <<<<<<<, =======, >>>>>>>) into the affected files to indicate the conflicting sections. Your terminal output will also display messages indicating which files have conflicts. For example, you might see output like "CONFLICT (content): Merge conflict in file.txt". When conflicts occur, git cherry-pick does not automatically create a commit. Instead, it requires you to manually resolve these conflicts before you can proceed. The next step involves resolving these conflicts by editing the conflicted files.
Step 3: Resolve Conflicts
Identifying Conflict Markers
When git cherry-pick encounters conflicts, it modifies the affected files by inserting conflict markers. These markers clearly delineate the conflicting sections within the files, allowing you to identify and resolve the discrepancies. A conflict marker block typically looks like this:
<<<<<<< HEAD
// Changes in your current branch
=======
// Changes from the cherry-picked commit
>>>>>>> commit-hash:commit-message
<<<<<<< HEAD marks the beginning of the section showing the code in your current branch (HEAD). ======= separates the changes from your branch and the changes from the commit you are cherry-picking. >>>>>>> commit-hash:commit-message marks the end of the section showing the code from the cherry-picked commit, including the commit hash and a brief commit message for context. By examining the code between these markers, you can understand the nature of the conflict and decide how to reconcile the changes.
To resolve the conflict, you need to manually edit the file, removing the conflict markers and choosing which changes to keep or how to merge them. You might decide to keep the changes from your current branch, the changes from the cherry-picked commit, or a combination of both. The goal is to edit the file until it reflects the desired outcome, resolving the conflict in a way that makes sense for your project.
Staging Resolved Files with git add
After you have manually edited the conflicted files and resolved all the conflicts by removing the conflict markers and merging the changes as needed, you need to tell Git that you have resolved these conflicts. This is done by staging the resolved files using the git add command. For each file where you resolved conflicts, you must run git add <file-name>. This command tells Git that the conflicts in <file-name> have been resolved and that Git should now consider the current version of the file as the resolved state.
You can use git status to check which files are marked as conflicted and which files are staged. After running git add on a resolved file, it will move from the "Unmerged paths" section to the "Changes to be committed" section in the git status output. Make sure to stage all files that had conflicts after you've resolved them. Failing to stage a resolved file will prevent you from completing the cherry-pick operation.
Completing Cherry-Pick with git cherry-pick --continue
Once you have resolved all conflicts and staged the resolved files using git add, you are ready to finalize the cherry-pick operation. To do this, you use the command git cherry-pick --continue. This command instructs Git to proceed with the cherry-pick process now that the conflicts have been addressed. Git will then create a new commit that incorporates the changes from the cherry-picked commit, along with your conflict resolutions.
After running git cherry-pick --continue, Git might open your default text editor again, allowing you to review and modify the commit message for the cherry-picked commit. Often, Git will pre-populate the commit message with a standard message indicating that it's a cherry-pick, along with the original commit's message. You can accept this default message or customize it further to reflect any specific resolutions you made during the conflict resolution process. After reviewing and saving the commit message in the editor, Git will finalize the cherry-pick, and you will have successfully integrated the selected commit into your current branch.
Step 4: Commit Changes
Writing a Commit Message
After a successful git cherry-pick, whether it proceeded smoothly or required conflict resolution, Git creates a new commit on your current branch. It's crucial to write a clear and informative commit message for this new commit. By default, git cherry-pick often reuses the original commit message from the cherry-picked commit, prefixed with "(cherry picked from commit <original-commit-hash>)". While this default message provides traceability back to the original commit, you may want to refine it to better reflect the context in your current branch, especially if you had to resolve conflicts.
A good commit message should summarize the changes introduced by the cherry-picked commit and, if necessary, explain any modifications made during conflict resolution. For instance, if you cherry-picked a bug fix and had to adapt it slightly to fit into your branch, you might adjust the commit message to reflect this adaptation. Following best practices for commit messages, aim for a concise summary line followed by a more detailed explanation if needed. This ensures that the commit history remains clear and understandable for you and your team.
Pushing to Remote Repository
Once you have successfully cherry-picked a commit and created a new commit on your local branch, the changes are only present locally. To share these changes with your team and integrate them into the remote repository, you need to push your local branch to the remote. This is done using the git push command. Typically, you would use git push origin <your-branch-name>, replacing <your-branch-name> with the name of your current branch. For example, if you are on the main branch and want to push your changes to the origin remote, you would run git push origin main.
Pushing your changes makes them accessible to other collaborators and ensures that your local branch is synchronized with the remote repository. Make sure you have the necessary permissions to push to the remote branch. In collaborative environments, it's often a good practice to communicate with your team before pushing, especially after operations like cherry-picking, to ensure everyone is aware of the changes being integrated and to avoid potential conflicts or confusion in the shared repository.
Advanced Cherry-Pick Techniques
Cherry-Picking a Range of Commits
Syntax: git cherry-pick <start-commit>..<end-commit>
Beyond cherry-picking single commits, Git allows you to cherry-pick a range of consecutive commits. This is useful when you want to apply a series of related commits from another branch. The syntax for cherry-picking a range is git cherry-pick <start-commit>..<end-commit>. Here, <start-commit> is the hash of the earliest commit in the range you want to pick, and <end-commit> is the hash of the latest commit. Git will apply all commits from <start-commit> to <end-commit> (inclusive) onto your current branch, in the order they appear in the original branch's history.
For example, if you want to cherry-pick commits with hashes abcdefg, hijklmn, and opqrstu from another branch, and these commits are consecutive in that branch's history, you can use git cherry-pick abcdefg..opqrstu. Git will then attempt to apply abcdefg, followed by hijklmn, and then opqrstu to your current branch, creating new commits for each in your branch's history. It's important to note that when cherry-picking a range, Git applies the commits in the order they appear in the source branch's history, which might be different from the order you might intuitively expect.
Using the -x Option
Tracking Commit Origin
When you cherry-pick a commit, Git creates a new commit on your current branch with a different hash. While the default commit message often includes a note about the original commit, the -x option for git cherry-pick provides a more explicit way to track the origin of cherry-picked commits. Using git cherry-pick -x <commit-hash> adds a "cherry-picked from commit..." line to the commit message of the newly created commit. This line clearly indicates the original commit from which the changes were cherry-picked.
For instance, if you cherry-pick commit 1234567 using git cherry-pick -x 1234567, the resulting commit message will include a line like "cherry-picked from commit 1234567". This is particularly useful for maintaining traceability and understanding the history of changes, especially in projects where cherry-picking is used frequently. The -x option helps teams easily identify the source of cherry-picked commits, making it simpler to track changes back to their original context and understand why certain commits were introduced.
Aborting Cherry-Pick
Using git cherry-pick --abort
During a git cherry-pick operation, especially when conflicts arise, you might decide to stop the process and revert back to the state before you started cherry-picking. Git provides the git cherry-pick --abort command for this purpose. Running git cherry-pick --abort will stop the current cherry-pick process and reset your branch back to the state it was in before you initiated the git cherry-pick command. This is a safe way to back out if you encounter complex conflicts that you don't want to resolve at the moment, or if you realize you cherry-picked the wrong commit.
For example, if you start a git cherry-pick and encounter numerous conflicts that seem too complicated to resolve quickly, or if you accidentally cherry-picked the wrong commit hash, you can simply run git cherry-pick --abort. This will undo any changes made by the cherry-pick so far, leaving your working directory and branch in their original state. It's a useful command to remember as it provides a clean way to recover from an unwanted or problematic cherry-pick operation without causing any lasting changes to your repository.
Best Practices
Minimize Cherry-Pick Usage
While git cherry-pick is a powerful tool, it's generally considered a best practice to minimize its usage in your Git workflow. Frequent and excessive cherry-picking can lead to a more complex and harder-to-follow commit history. Because cherry-picking duplicates commits, it can make it more difficult to trace the evolution of features and bug fixes over time, especially if not carefully documented and communicated. Over-reliance on cherry-picking can also indicate underlying issues in your branching strategy or workflow.
In many cases, merging or rebasing branches might be a more appropriate and cleaner way to integrate changes. Cherry-picking is most effective for specific scenarios like hotfixes to release branches or porting very targeted features between branches. If you find yourself frequently using cherry-pick to integrate changes, it might be worth re-evaluating your branching strategy to see if a more streamlined workflow, such as feature branching and merging, could be more effective in the long run. Aim to use cherry-pick judiciously, reserving it for cases where its selective commit application truly offers a significant advantage over branch merging or rebasing.
Communicate with Team
Effective communication with your team is crucial when using git cherry-pick, especially in collaborative projects. Since cherry-picking alters the commit history in a way that's different from standard merges or rebases, it's important to keep your team informed about when and why you are using it. When you cherry-pick a commit and push the changes, it can affect the shared commit history, and other team members need to be aware of these changes to avoid confusion or conflicts.
Before cherry-picking and pushing, especially in shared branches like main or develop, it's a good practice to notify your team. Explain which commit you are cherry-picking, the reason for cherry-picking it, and the branch you are applying it to. This communication can be done through team chat, project management tools, or during team meetings. Transparency helps ensure that everyone is on the same page and understands the changes being introduced into the codebase, reducing the chances of misunderstandings and promoting smoother collaboration.
Thoroughly Test Changes
After cherry-picking a commit, it's essential to thoroughly test the changes in your current branch. Even though you are applying changes from a commit that was presumably already tested in its original context, cherry-picking introduces these changes into a potentially different codebase state. This new context might reveal unforeseen interactions or issues that were not apparent in the original branch. Therefore, testing is a critical step to ensure the cherry-picked changes work as expected in their new environment.
Run all relevant tests, including unit tests, integration tests, and end-to-end tests, to verify that the cherry-picked commit hasn't introduced any regressions or unexpected behavior. Pay particular attention to areas of the codebase that might be affected by the cherry-picked changes, and perform manual testing if necessary to cover all bases. Thorough testing after cherry-picking helps maintain code quality and stability, ensuring that the integrated changes are safe and reliable in your current branch.
Troubleshooting
Conflict Resolution
Conflict resolution is a common part of using git cherry-pick. When you encounter conflicts during a cherry-pick operation, the key is to carefully examine the conflict markers in the affected files. Understand the changes from both your current branch ( HEAD) and the cherry-picked commit to make informed decisions about how to resolve the conflict. Git’s conflict markers ( <<<<<<<, =======, >>>>>>>) are your primary guide. Use a good code editor or a Git conflict resolution tool to help you visualize and merge the changes effectively.
When resolving conflicts, consider the purpose of the cherry-picked commit and the current state of your branch. Decide which changes to keep, modify, or combine to achieve the desired outcome. After resolving conflicts in a file, remember to use git add <file-name> to stage the resolved file. Repeat this for all conflicted files. If you are unsure about how to resolve a conflict, it's often helpful to consult with team members who are familiar with the affected code areas. If the conflicts are too complex or you're unsure how to proceed, remember you can always abort the cherry-pick using git cherry-pick --abort and seek further guidance before attempting again.
Handling Dependencies
Cherry-picking commits, especially those that introduce new features or significant changes, can sometimes lead to dependency issues. A commit might rely on other commits or changes that are not yet present in your current branch. When you cherry-pick such a commit, you might encounter errors or unexpected behavior if the necessary dependencies are missing. For example, a cherry-picked commit might rely on a new function or library introduced in a different commit.
If you encounter dependency problems after cherry-picking, you might need to cherry-pick additional commits that contain the required dependencies. Carefully examine the error messages and logs to understand what dependencies are missing. Look at the commit history of the original branch to identify related commits that might provide these dependencies.
You might need to cherry-pick a sequence of commits to ensure that all necessary dependencies are in place. In more complex cases, it might be more appropriate to merge the entire branch or a larger portion of it to bring in all the required dependencies at once, rather than cherry-picking individual commits.
Recovering from Failures
Mistakes can happen when using git cherry-pick. You might accidentally cherry-pick the wrong commit, or encounter unexpected issues after cherry-picking. Git provides ways to recover from these situations. If you realize immediately after a cherry-pick that you made a mistake, and you haven't pushed your changes yet, you can easily undo the last cherry-pick commit. One way to do this is using git reset --hard HEAD^. This command will move your branch pointer back one commit, effectively removing the last cherry-pick commit and reverting your working directory to the previous state.
If you have already pushed the erroneous cherry-pick commit to a remote branch, recovery becomes a bit more complex, especially in shared branches. In such cases, depending on your team's policies and the impact of the mistake, you might need to use git revert to create a new commit that undoes the changes introduced by the cherry-picked commit. Alternatively, in less critical situations, you might consider amending the remote branch's history, but this should be done with caution and only when you are certain of the consequences and have communicated with your team, as rewriting shared history can cause issues for collaborators. In most cases, for shared branches, using git revert is the safer and recommended approach to undo changes that have already been pushed.
Further Learning
Advanced Git Techniques
To deepen your understanding of Git and version control, exploring advanced Git techniques is highly beneficial. Beyond git cherry-pick, Git offers a wide array of powerful features for managing complex development workflows. Techniques like interactive rebasing ( git rebase -i) allow you to rewrite commit history more flexibly, while git bisect helps efficiently locate the commit that introduced a bug. Understanding Git's internals, such as the staging area and the object model, can provide a more profound grasp of how Git works and enable you to troubleshoot issues more effectively.
Delving into advanced branching strategies, like Gitflow or GitHub Flow, can help you structure your development process more efficiently, especially in team environments. Learning about Git hooks allows you to automate tasks and enforce repository policies. Resources like the Pro Git book (available online for free) and advanced Git tutorials can significantly enhance your Git skills and enable you to leverage Git's full potential in managing your projects. Mastering these advanced techniques will make you a more proficient and effective developer in any Git-based project.
Workflow Integration
Integrating git cherry-pick effectively into your overall development workflow is key to maximizing its benefits while minimizing potential drawbacks. Consider when cherry-pick is the most appropriate tool compared to merging or rebasing. For instance, reserve cherry-pick for specific scenarios like hotfixes, targeted feature porting, or undoing specific commits, rather than using it as a primary method for integrating changes. Define clear guidelines within your team about when and how cherry-pick should be used to maintain consistency and avoid misuse.
Document your cherry-pick operations, especially when used in shared branches. Use the -x option to track commit origins and write informative commit messages that explain why a commit was cherry-picked. Regularly review your team's Git workflow and adapt it as needed to incorporate best practices for using cherry-pick and other Git commands. Integrating cherry-pick thoughtfully into your workflow, with clear guidelines and communication, will help you harness its power effectively while maintaining a clean and understandable project history.
Resources: Documentation, Tutorials
For continuous learning and to stay up-to-date with Git best practices, utilizing available resources is essential. The official Git documentation is an invaluable resource, providing comprehensive information about all Git commands, concepts, and configurations. The documentation is well-structured, searchable, and regularly updated, making it a reliable source for in-depth knowledge. Websites like GitHub, GitLab, and Atlassian offer numerous tutorials and guides on Git, covering various aspects from basic commands to advanced workflows, often tailored to different skill levels and use cases.
Online learning platforms like Coursera, Udemy, and edX also host courses on Git and version control, ranging from beginner introductions to advanced masterclasses. These courses often include practical exercises, video lectures, and community forums to enhance your learning experience. Exploring blog posts and articles from Git experts and communities can provide insights into real-world use cases, best practices, and troubleshooting tips for git cherry-pick and other Git functionalities. By actively utilizing these diverse resources, you can continuously expand your Git knowledge and become a proficient user.
Frequently Asked Questions
How does git cherry-pick differ from git merge?
git cherry-pick applies a single commit from one branch to another, while git merge integrates entire branches. This makes cherry-pick ideal for selectively incorporating specific changes.
When would I use git cherry-pick instead of other Git commands?
Use git cherry-pick when you want to port a specific commit to another branch, perhaps to fix a bug or include a feature without merging the entire branch. It's useful in situations requiring surgical precision.
What happens if a conflict arises during a git cherry-pick?
If a conflict occurs, Git will pause the cherry-pick process. You'll need to resolve the conflict manually, just as you would during a merge, and then complete the cherry-pick.
Can I cherry-pick multiple commits at once?
Yes, you can cherry-pick a range of commits using the syntax git cherry-pick <commit1>..<commit2>. This is useful for applying a series of related changes.
Is git cherry-pick considered a best practice in all situations?
While powerful, git cherry-pick should be used cautiously. Overuse can lead to duplicate commits and a confusing history. Consider alternatives like merging or rebasing if appropriate.
Final Reflection: Embracing Selective Change
The power of selective change through git cherry-pick resonates deeply in today's fast-paced development landscape. Understanding how to precisely extract and apply specific commits, as we've explored, is no longer just a niche skill, but a crucial tool for efficient collaboration, bug fixing, and feature management in any modern software project.
The ability to cherry-pick allows for a more agile and responsive workflow, preventing the need to merge entire branches for a single, critical fix or feature. This granular control over code integration empowers developers to adapt quickly to changing requirements and maintain a cleaner, more manageable codebase. The key is not to prioritize what's on your schedule, but to schedule your priorities.
- Stephen Covey. Cherry-picking embodies this principle by allowing us to prioritize and integrate the most impactful changes first.
Now, consider how you can apply this newfound knowledge of git cherry-pick in your own projects. Embrace the power of selective change to streamline your workflow, address critical issues with precision, and contribute more effectively to your team's success. The ability to choose wisely and apply changes strategically is a skill that will undoubtedly elevate your development prowess and empower you to build better software, faster.
Unleash the Power of Selective Commits!
Thanks for diving into the world of git cherry-pick with us! We hope this guide has clarified how to selectively incorporate changes and provided you with the confidence to manage your commits more effectively. Now, let's put that knowledge to work!
Here are a few actionable steps you can take to solidify your understanding:
- Experiment with
git cherry-pickon a personal test repository: The best way to learn is by doing! Create a small repository and intentionally make commits, then usecherry-pickto move them between branches. - Share this article with a fellow developer who might find it useful! Collaboration is key to mastering version control.
- Consider contributing a real-world use case where you've successfully applied
git cherry-pickto our community forum. Your experience could help others overcome similar challenges!
What's the first commit you're planning to cherry-pick and why?