
Switching Branches in Git: Seamlessly Navigate Your Project's History

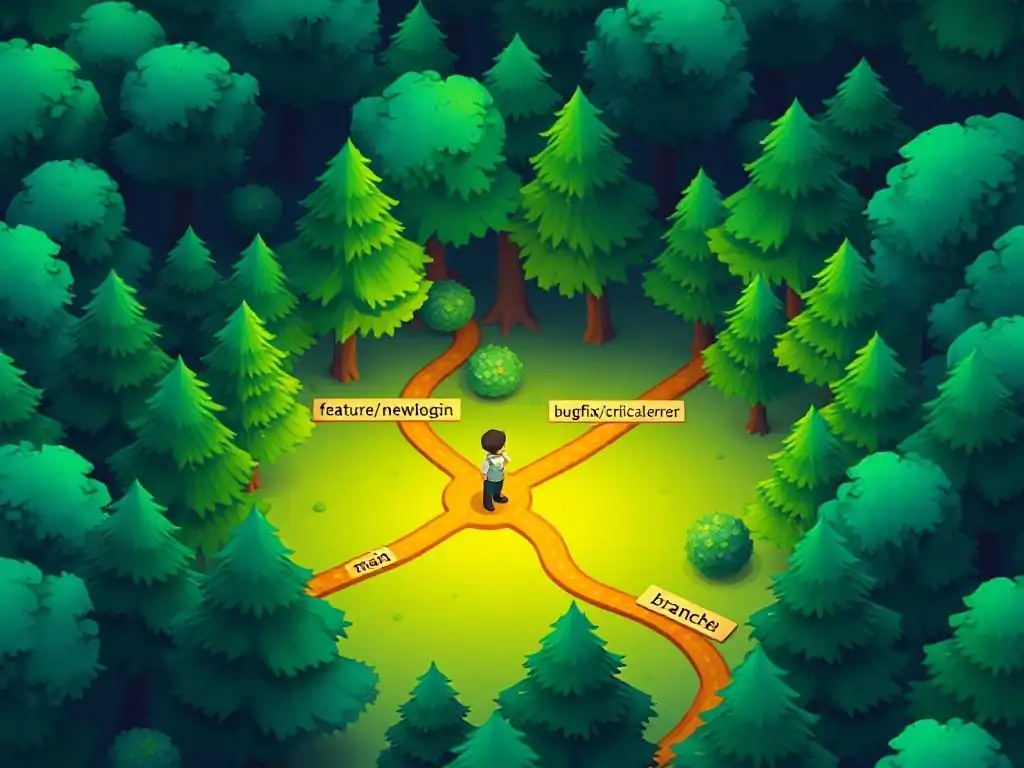
Welcome to Git and Version Control Hub! Ever feel lost in the labyrinth of your project's history? Mastering Git branching is key to efficient development, and in this article, we'll demystify how to switch Git branches like a pro. Unlock the power to seamlessly navigate between features, bug fixes, and experiments. Intrigued? Let's dive in and supercharge your workflow!
Navigating Git Branches: A Comprehensive Guide
- Understanding Git Branches and Their Importance
- Switching Branches: The git checkout and git switch Commands
- Handling Uncommitted Changes During Branch Switching
- Working with Remote Branches
- Best Practices for Branch Management
- Advanced Branching Techniques
- Troubleshooting Common Branch Switching Issues
- Further Exploration of Git Branching
-
Frequently Asked Questions
- How do I switch between existing branches in Git?
- What happens if I have uncommitted changes when I try to switch branches?
- Can I create a new branch and switch to it simultaneously?
- What is a "detached HEAD" state, and how does it relate to switching branches?
- How can I view all the branches in my Git repository?
- Final Reflection: Mastering the Art of Git Navigation
- Dive Deeper: Master the Art of Branching!
Understanding Git Branches and Their Importance
Git Branches: A Fundamental Concept
In Git, branches are a powerful feature that allows developers to diverge from the main line of development and work on features, fixes, or experiments in isolation. Think of a branch as a parallel version of your project's codebase. Initially, you start with a single branch, typically named main or master. This branch represents the primary, stable version of your project. When you decide to work on a new feature or bug fix, instead of directly modifying the main branch, you create a new branch. This new branch acts as a dedicated workspace, keeping your changes separate from the main codebase until they are ready to be integrated.
Branches in Git are incredibly lightweight. They are essentially just pointers to a specific commit in your project's history. This means creating and switching between branches is very fast and efficient, encouraging developers to use branching extensively. By utilizing branches effectively, teams can work on multiple features concurrently without interfering with each other's work or destabilizing the main codebase. This isolation is crucial for maintaining a stable and deployable version of the software while ongoing development takes place in separate, dedicated branches.
Why Branch Switching is Essential for Collaboration and Development
Branch switching is the action of moving your working directory from one branch to another. This is a fundamental operation in Git workflows and is essential for effective collaboration and organized development. Imagine a team of developers working on a large project. Each developer might be assigned different tasks or features. Branch switching enables each developer to have their own isolated environment (their feature branch) to work on their assigned task without directly impacting the work of others or the stability of the main project.
Furthermore, branch switching facilitates experimentation and iterative development. If a developer wants to try out a new approach or implement a risky feature, they can create a new branch, experiment freely, and switch back to a stable branch if things don't work out as expected. This ability to easily switch between different versions of the project is invaluable for exploring new ideas and fixing bugs efficiently.
For example, consider a scenario where a critical bug is discovered in the production version of a software. Developers can quickly switch to a branch representing the production version, create a hotfix branch to address the bug, and then switch back to their feature branch to continue their ongoing work, all without disrupting their primary development tasks.
Common Branch Switching Scenarios
Developers frequently switch branches for a variety of reasons throughout the software development lifecycle. One common scenario is feature development. When starting work on a new feature, a developer will typically create a new branch dedicated to that feature. They will then switch to this new branch to isolate their work and prevent it from affecting other parts of the project until the feature is complete and tested.
Another frequent use case is bug fixing. When a bug is reported, developers often create a dedicated branch to fix it. This allows them to address the bug without interrupting ongoing feature development. After fixing the bug and verifying the solution, they can switch back to their main development branch or feature branch. Furthermore, developers regularly switch branches to review code from colleagues. When someone submits a pull request or merge request, developers can switch to the branch containing the proposed changes to examine the code, test it, and provide feedback before it is integrated into the main branch. Finally, switching back to the main branch to ensure it's up to date with the latest integrated changes is a routine task, keeping the local repository synchronized with the central project repository.
Switching Branches: The git checkout and git switch Commands
git checkout: Syntax and Usage
The git checkout command has historically been the primary command in Git for switching branches. While still widely used and functional, it's important to understand its syntax for both branch switching and other operations like reverting files. The basic syntax for switching to an existing branch using git checkout is:
git checkout <branch_name>
Here, <branch_name> is the name of the branch you want to switch to. For example, to switch to a branch named develop, you would execute:
git checkout develop
git checkout also has options for more advanced scenarios. For instance, to create and switch to a new branch simultaneously, you can use the -b flag:
git checkout -b <new_branch_name>
This command creates a new branch named <new_branch_name> and immediately switches your working directory to it. It's crucial to note that git checkout is a versatile command, also used for discarding changes in your working directory and staging area, operations that are distinct from branch switching but share the same command.
git switch: Syntax and Usage
Introduced in Git version 2.23, git switch is a more streamlined and specialized command specifically designed for branch switching. It aims to separate branch management operations from other functionalities of git checkout, making the commands more intuitive and less prone to accidental misuse. The syntax for switching to an existing branch using git switch is straightforward:
git switch <branch_name>
This is very similar to git checkout <branch_name> and achieves the same result – switching your working directory to the specified branch. To switch to the feature-x branch, you would run:
git switch feature-x
Like git checkout, git switch also provides an option to create and switch to a new branch in a single command. The -c flag (for "create") is used for this purpose:
git switch -c <new_branch_name>
This command creates a new branch named <new_branch_name> and immediately switches to it. The introduction of git switch enhances clarity in Git commands, making branch switching operations more explicit and less ambiguous compared to the multi-functional git checkout. While git checkout remains functional for branch switching, git switch is generally recommended for this specific purpose in modern Git workflows due to its focused design.
Switching to Existing Branches
Switching to an existing branch is a common operation when you need to work on a specific feature, bug fix, or simply check the state of a particular branch. Both git checkout and git switch can be used effectively for this. Assuming you have a branch named feature/user-authentication already created in your repository, and you are currently on the main branch, you can switch to the feature/user-authentication branch using either command:
git checkout feature/user-authentication
or
git switch feature/user-authentication
Upon executing either of these commands, Git will update your working directory to reflect the state of the feature/user-authentication branch. You will see a confirmation message in your terminal indicating the branch you have switched to, typically something like "Switched to branch 'feature/user-authentication'". After switching, any modifications you make, commits you create, will be applied to the feature/user-authentication branch, keeping your work isolated from other branches in your repository. This seamless transition between branches is fundamental for managing concurrent development tasks and maintaining organized project history.
Creating and Switching to New Branches
Creating a new branch and immediately switching to it is a frequent workflow when starting a new feature or bug fix. This ensures that your changes are isolated from the main branch and other development efforts right from the beginning. Using git checkout, you can create and switch to a new branch named feature/implement-payment-gateway with the command:
git checkout -b feature/implement-payment-gateway
Similarly, using git switch, the equivalent command is:
git switch -c feature/implement-payment-gateway
Both commands will perform two actions: first, create a new branch named feature/implement-payment-gateway based on your currently active branch (usually main or develop), and second, switch your working directory to this newly created branch. You will receive a confirmation message indicating the creation and switching to the new branch, such as "Switched to a new branch 'feature/implement-payment-gateway'". From this point forward, all commits you make will be added to the feature/implement-payment-gateway branch, allowing you to develop the payment gateway feature in isolation until it's ready to be merged into a more integrated branch.
Handling Uncommitted Changes During Branch Switching
Impact of Uncommitted Changes on Branch Switching
When you have uncommitted changes in your working directory or staging area, Git's behavior during branch switching can be affected. Git's primary concern is to prevent you from losing work. Therefore, if switching branches would overwrite your uncommitted changes, Git will typically prevent the switch and display an error message. This is a safety mechanism to ensure that you don't inadvertently discard your in-progress work.
For instance, if you have modified a file in your current branch but haven't committed the changes, and you attempt to switch to another branch that also modifies the same file (or where the file's content differs), Git will likely refuse to switch. The error message often indicates that your local changes would be overwritten by the checkout. This situation arises because Git needs to modify files in your working directory to reflect the state of the branch you are switching to. If these modifications conflict with your uncommitted changes, Git prioritizes data integrity and halts the branch switch.
Stashing: Preserving Changes Before Switching
Stashing is a powerful Git feature designed to temporarily save uncommitted changes, allowing you to switch branches cleanly and then reapply those changes later. When you have uncommitted modifications that you are not ready to commit but need to switch branches, stashing provides a safe way to shelve these changes. To stash your current uncommitted changes, you use the command:
git stash
This command takes your uncommitted changes (both staged and unstaged) and saves them in a "stash stack," effectively cleaning your working directory to match the HEAD commit. You can then switch branches without any conflicts from uncommitted changes. After switching to the desired branch and completing your work there, you can return to your original branch and reapply the stashed changes using:
git stash apply
This command retrieves the most recently stashed changes from the stash stack and applies them to your current working directory. Stashing is incredibly useful for quickly switching contexts without committing unfinished work, allowing for a more fluid and less disruptive workflow. For example, imagine you are in the middle of coding a feature, and a critical bug is reported in the main branch. You can quickly stash your current work, switch to the main branch to create a hotfix branch, fix the bug, and then switch back to your feature branch and apply your stashed changes to continue your feature development.
Committing or Discarding: Choosing the Right Approach
When faced with uncommitted changes preventing a branch switch, stashing is not always the only or best solution. Depending on the context, committing your changes or discarding them might be more appropriate. If your uncommitted changes represent a logical unit of work or a meaningful intermediate state, committing them, even if they are not fully complete, might be a good option. You can always amend or add to this commit later.
To commit your changes, you first stage them using git add <files> and then commit them with git commit -m "Your commit message". This creates a snapshot of your current work, allowing you to switch branches without conflicts. Alternatively, if your uncommitted changes are experimental, unwanted, or you decide to abandon them, discarding them might be the quickest way to proceed. You can discard unstaged changes using git checkout -- <files> to revert specific files to the state in the staging area (or HEAD if not staged). To discard both staged and unstaged changes, you can use git reset --hard HEAD, but be extremely cautious with this command as it permanently removes uncommitted changes. Choosing between stashing, committing, or discarding depends on whether you need to preserve your uncommitted work for later use or if it's expendable and you want to start with a clean working directory.
Resolving Conflicts: A Practical Guide
While Git tries to prevent conflicts during branch switching, there are situations where conflicts can arise even when you don't have uncommitted changes, particularly when branches have diverged significantly. If you encounter a conflict during branch switching, Git will halt the process and display messages indicating the files with conflicts. These conflicts occur when changes in the branch you are switching to overlap with changes in your current branch that have not yet been merged or are incompatible in some way.
To resolve these conflicts, you need to manually edit the conflicted files. Git inserts conflict markers within the files, showing you the conflicting sections from both branches, typically enclosed within <<<<<<<, =======, and >>>>>>> markers. You must manually review these sections, decide which changes to keep (or merge them), remove the conflict markers, and save the file. After resolving all conflicts in a file, you need to stage it using git add <resolved_file>. Once all conflicted files are resolved and staged, you can complete the branch switching process using git checkout --continue (for git checkout) or git switch --continue (for git switch). Resolving conflicts is a crucial skill in Git, especially in collaborative environments where branch divergence is common. Understanding how to identify, edit, and mark conflicts as resolved is essential for smooth branch management.
Working with Remote Branches
Tracking and Fetching Remote Branches
Remote branches are branches that exist in remote repositories, such as on platforms like GitHub, GitLab, or Bitbucket. When you clone a repository, Git automatically sets up a remote connection, typically named origin, pointing to the repository you cloned from. Your local repository receives copies of the remote branches, which are referred to as remote-tracking branches. These branches are like read-only snapshots of the remote branches at the time of your last synchronization. Remote-tracking branches are named in the format remote-name/branch-name, for example, origin/main or origin/develop.
To update your local repository with the latest changes from the remote repository, including new branches, updates to existing branches, and deleted branches, you use the git fetch command. For example, git fetch origin fetches all updates from the origin remote. Fetching doesn't automatically merge these changes into your local branches; it only updates your remote-tracking branches. This allows you to review the changes from the remote repository before integrating them into your local work. Tracking remote branches and regularly fetching updates are vital for staying synchronized with the collaborative codebase and ensuring you are working with the most recent information.
Switching to Remote Branches
You can switch to a remote branch to inspect its content or to start working on a feature based on the state of the remote branch. However, you cannot directly modify a remote-tracking branch (like origin/main) because it is a read-only representation of the remote branch. To work on a remote branch, you first need to create a local branch based on the remote branch. You can do this using the git checkout or git switch command with the remote-tracking branch name. For example, to create a local branch named feature/remote-feature based on the remote branch origin/feature-branch and switch to it, you can use:
git checkout -b feature/remote-feature origin/feature-branch
or
git switch -c feature/remote-feature origin/feature-branch
These commands create a new local branch feature/remote-feature that tracks origin/feature-branch. This means that your local branch is set up to push changes to and pull changes from the remote origin/feature-branch. Switching to a local branch based on a remote branch is essential when you want to contribute to or collaborate on work that is being developed in a remote repository.
Updating Local Branches with Remote Changes
After switching to a local branch that is tracking a remote branch, it's important to keep your local branch synchronized with the remote branch to incorporate the latest changes made by other collaborators. To update your local branch with changes from its tracked remote branch, you can use the git pull command. For example, if you are on your local branch feature/remote-feature which is tracking origin/feature-branch, you can run:
git pull origin feature-branch
or, more simply, if your local branch is properly set up to track the remote branch, just:
git pull
git pull is essentially a combination of git fetch and git merge. It first fetches the latest changes from the remote branch and then merges them into your current local branch. This ensures that your local branch is up-to-date with the remote branch, incorporating any new commits, modifications, or deletions. Regularly pulling changes from remote branches is crucial for collaborative development, preventing divergence and minimizing merge conflicts when integrating your work with the work of others.
Best Practices for Branch Management
Commit or Stash Before Switching
One of the most fundamental best practices for branch management is to always ensure your working directory is clean before switching branches. This means either committing all your changes or stashing them if they are not yet ready for a commit. Committing your changes ensures that your work is saved and tracked in the project history, preventing data loss and allowing you to easily revert to previous states if needed.
Stashing is useful for temporarily shelving uncommitted changes when you need to switch branches quickly to address a different task, such as reviewing code or fixing a bug, and plan to return to your current work later. By committing or stashing before switching, you avoid potential conflicts and errors that can arise from uncommitted changes interfering with the branch switching process. This practice leads to a smoother, more predictable workflow and reduces the risk of losing valuable work due to unexpected branch operations.
Maintain Organized and Focused Branches
Effective branch management relies on maintaining organized and focused branches. Each branch should ideally be dedicated to a single feature, bug fix, or specific task. This principle, often referred to as feature branching, helps to keep branches concise, manageable, and easier to understand. When branches are focused, it simplifies the process of code review, testing, and merging. It also reduces the likelihood of conflicts and makes it easier to track the progress of individual features or fixes.
Avoid creating branches that encompass multiple unrelated changes or tasks. Large, sprawling branches become difficult to manage, merge, and can introduce instability into the codebase. By keeping branches focused and task-oriented, you promote a more modular and iterative development approach, making it easier to integrate changes and maintain a healthy project history.
Adopt Clear and Descriptive Branch Names
Branch names should be clear, descriptive, and follow a consistent naming convention. Well-chosen branch names significantly improve the readability and understandability of your project's branch structure. Branch names should clearly indicate the purpose of the branch, whether it's for a new feature, a bug fix, or an experimental change. Common conventions include using prefixes to categorize branches, such as feature/, bugfix/, hotfix/, or experiment/.
For example, instead of a branch name like new-changes, a more descriptive name would be feature/user-authentication or bugfix/login-error. Using hyphens or underscores to separate words in branch names enhances readability. Consistent and informative branch naming makes it easier for team members to understand the purpose of each branch at a glance, facilitating collaboration and navigation within the repository.
Minimize Interruptions During Complex Tasks
When working on complex tasks that require significant code changes or intricate problem-solving, it's beneficial to minimize interruptions during branch switching. Frequent context switching can disrupt your workflow, reduce focus, and potentially lead to errors or oversights. While Git makes branch switching efficient, mentally re-orienting yourself to a different branch and task context still takes time and cognitive effort.
For complex tasks, try to complete a logical unit of work or reach a natural stopping point before switching branches. If you must switch branches, ensure you have properly committed or stashed your changes to preserve your progress. Minimize unnecessary branch switching during periods of intense concentration to maintain momentum and reduce the cognitive overhead associated with frequent context shifts. Effective time management and task prioritization can help in minimizing disruptive branch switching and maximizing productivity.
Advanced Branching Techniques
Using git worktree for Concurrent Branch Development
git worktree is a powerful command that allows you to have multiple working directories connected to the same Git repository, each associated with a different branch. This enables true concurrent development on multiple branches without the need to constantly switch branches in a single working directory. Traditionally, switching branches modifies the files in your single working directory, which can be limiting when you need to work on multiple features or bug fixes simultaneously.
git worktree add <path> <branch_name> creates a new working directory at <path> that is linked to the branch <branch_name>. You can then work in this new directory independently, without affecting your other working directories. Changes made in one worktree are reflected in the shared repository but are isolated from other worktrees until merged. git worktree list shows all active worktrees. git worktree remove <path> removes a worktree. git worktree is especially useful for tasks like reviewing a pull request while continuing your own development, or working on a hotfix while simultaneously developing a new feature, all without the overhead of frequent branch switching and potential conflicts in a single working directory.
Cherry-Picking Commits Between Branches
Cherry-picking is the process of selecting specific commits from one branch and applying them to another branch. This is useful when you want to incorporate particular changes from one branch into another without merging the entire branch. For example, if you have a bug fix commit on a feature branch that you want to apply to the main branch without merging the entire feature branch, cherry-picking is the ideal solution.
To cherry-pick a commit, you first need to identify the commit hash of the commit you want to cherry-pick. You can find this using git log. Then, switch to the target branch where you want to apply the commit and use the command git cherry-pick <commit-hash>. Git will attempt to apply the changes from the specified commit to your current branch. In some cases, cherry-picking may result in conflicts if the changes in the commit being cherry-picked clash with the current state of the target branch. If conflicts occur, you need to resolve them manually, similar to merge conflicts, and then stage the resolved files and continue the cherry-pick process using git cherry-pick --continue. Cherry-picking is a surgical way to selectively incorporate changes between branches, offering fine-grained control over code integration.
Rebasing Branches for a Linear History
Rebasing is an alternative to merging for integrating changes from one branch into another. While merging preserves the entire history of both branches, creating a merge commit, rebasing aims to create a linear project history by rewriting the commit history of the target branch. When you rebase a branch (e.g., feature branch) onto another branch (e.g., main), Git takes the commits from your feature branch and reapplies them one by one on top of the main branch. This results in a linear sequence of commits, as if you had developed your feature directly on top of the latest main branch.
To rebase your current branch onto main, you would use the command git rebase main. Rebasing can make the project history cleaner and easier to follow, especially for teams that prefer a linear commit history. However, rebasing also rewrites commit history, which can cause issues in collaborative environments if others have already based their work on the commits you are rebasing. Therefore, rebasing is generally recommended for local feature branches that have not been shared with others or for branches where you are the sole developer. When rebasing shared branches, it's crucial to communicate with your team to avoid potential conflicts and confusion due to rewritten commit history.
Troubleshooting Common Branch Switching Issues
Resolving "Your local changes would be overwritten" Errors
The "Your local changes would be overwritten by checkout" error is a common issue encountered when attempting to switch branches in Git. This error occurs when you have uncommitted changes in your working directory or staging area that would be lost or overwritten if Git were to switch to the target branch. Git prevents the switch to protect your uncommitted work.
To resolve this, you have several options. The most common and recommended approach is to commit your changes using git add and git commit. If you are not ready to commit but want to save your work temporarily, you can use git stash to stash your changes. After switching branches, you can reapply the stashed changes using git stash apply. If you are sure you want to discard your local changes, you can use git checkout -- . (be very careful with this command as it permanently discards uncommitted changes in your working directory). Choosing the right approach depends on whether you want to preserve your uncommitted work or discard it. Always consider committing or stashing as the safer options to avoid accidental data loss.
Addressing "Reference is not a tree" Errors
The "Reference is not a tree" error in Git typically indicates that the branch name you are trying to switch to is not valid or does not exist. This can happen due to typos in the branch name, attempting to switch to a branch that has been deleted, or if your local repository is out of sync with the remote repository and doesn't know about a recently created branch.
First, double-check the branch name for any typos. Use git branch to list all your local branches and verify the correct name. If you are trying to switch to a remote branch, make sure you have fetched the latest changes from the remote repository using git fetch. Then, list remote branches using git branch -r to confirm the remote branch exists and to get its exact name (e.g., origin/feature-branch). If the branch exists remotely but not locally, you might need to create a local branch based on the remote branch using git checkout -b <local_branch_name> <remote_branch_name>. Ensuring the branch name is correct and that your local repository is synchronized with the remote are key steps in resolving this error.
Managing Stale or Orphaned Branches
Over time, Git repositories can accumulate stale or orphaned branches. Stale branches are branches that have not been updated in a long time and may no longer be relevant. Orphaned branches are branches that, due to various reasons, might not be properly connected to the main line of development or other active branches. Managing these branches is important for keeping your repository clean and efficient.
To identify stale branches, you can use commands to list branches sorted by their last commit date and identify those that are significantly older than others. For example, git branch --sort=committerdate. You can then examine these branches to determine if they are still needed. To delete a local branch, use git branch -d <branch_name> (or -D for force delete if it's not fully merged). To delete a remote branch, use git push origin --delete <branch_name>. Regularly reviewing and cleaning up stale and orphaned branches helps to reduce clutter, improve repository navigation, and maintain a more organized and manageable project history. Automated scripts or tools can also be used to help identify and manage stale branches in larger repositories.
Further Exploration of Git Branching
Merging and Rebasing Strategies
Merging and rebasing are the two primary methods for integrating changes from one branch into another. Understanding the nuances and trade-offs of each strategy is crucial for effective Git workflows. Merging preserves the complete history of all branches, creating a merge commit to integrate changes. This approach is safe and non-destructive, making it suitable for collaborative environments where maintaining a full history is important. However, it can lead to a more complex and branching commit history.
Rebasing, on the other hand, rewrites commit history to create a linear sequence of commits. This results in a cleaner and easier-to-follow history, but it can be more complex to manage in collaborative settings due to history rewriting. Choosing between merging and rebasing depends on team preferences, project needs, and the desired commit history structure. Teams often adopt specific branching strategies, like Gitflow or GitHub Flow, which dictate when to use merging and rebasing based on the development workflow.
Branching Models: Gitflow and GitHub Flow
Branching models provide structured guidelines for how to use branches in a Git repository to manage development workflows. Two popular branching models are Gitflow and GitHub Flow. Gitflow is a more comprehensive model suitable for projects with scheduled releases. It defines branches like main, develop, feature branches, release branches, and hotfix branches, each with specific roles and lifecycles. Gitflow is designed for larger teams and projects with formal release cycles.
GitHub Flow is a simpler, more lightweight model, often preferred for projects with continuous delivery or simpler release cycles. It primarily uses main and feature branches. Feature branches are created from main, and once features are ready, they are merged back into main. GitHub Flow emphasizes continuous integration and deployment, with main always being deployable. The choice of branching model depends on the project's size, complexity, release frequency, and the team's development practices. Understanding these models helps teams adopt a consistent and efficient approach to branch management.
Branch Permissions and Access Control
In collaborative Git environments, especially when using platforms like GitHub, GitLab, or Bitbucket, branch permissions and access control are essential for managing code integrity and collaboration. Branch permissions allow you to define who can perform specific actions on certain branches, such as pushing changes, merging branches, or deleting branches. For example, you can protect the main branch by restricting direct pushes and requiring code reviews through pull requests before changes can be merged.
Access control mechanisms enable you to manage who has read and write access to the repository and its branches. You can assign roles and permissions to team members, controlling their level of access and the actions they can perform. Implementing branch permissions and access control policies helps to enforce code quality standards, prevent accidental or unauthorized changes to critical branches, and streamline collaborative workflows. These features are typically configured at the repository level on Git hosting platforms and are crucial for maintaining a secure and well-governed codebase in team environments.
Frequently Asked Questions
How do I switch between existing branches in Git?
You use the git checkout command followed by the branch name. This command updates your working directory to match the selected branch and its history. Ensure you have committed or stashed any changes before switching to avoid losing work.
What happens if I have uncommitted changes when I try to switch branches?
Git will usually prevent you from switching branches if you have uncommitted changes that would be overwritten. You can either commit your changes, stash them, or force the switch (not recommended).
Can I create a new branch and switch to it simultaneously?
Yes, you can use the command git checkout -b <new_branch_name>. This command creates a new branch based on your current branch and immediately switches to it.
What is a "detached HEAD" state, and how does it relate to switching branches?
A "detached HEAD" state occurs when you're not on a branch but directly viewing a specific commit. Switching to a branch using git checkout <branch_name> reattaches the HEAD to that branch, allowing you to make changes and commit them to that branch's history.
How can I view all the branches in my Git repository?
You can use the command git branch to list all local branches. Add the -a flag (git branch -a) to show both local and remote branches. This helps you choose which branch to switch to.
The ability to seamlessly navigate a project's history through Git branches, as we've explored, is not merely a technical skill; it's the cornerstone of collaborative and efficient software development. Understanding how to switch Git branches empowers developers to experiment, iterate, and contribute without fear of disrupting the main codebase, fostering innovation and accelerating project timelines in today's fast-paced tech landscape.
This mastery of Git branching profoundly impacts how we build and maintain software. It allows for parallel development, feature isolation, and rapid prototyping, all crucial for adapting to evolving user needs and market demands. The ability to confidently switch branches is not just about executing commands; it's about embracing a workflow that encourages exploration and minimizes risk. Version control is not just about keeping track of changes; it's about enabling collaboration and innovation.
This quote encapsulates the spirit of Git branching, highlighting its role in fostering a dynamic and collaborative development environment.
Now, consider the power you wield with this knowledge. How can you leverage your newfound understanding of Git branching to streamline your workflow, enhance collaboration within your team, and ultimately, build better software? Embrace the freedom to experiment, the confidence to contribute, and the foresight to manage your project's history with grace. The journey of mastering Git is a continuous one, but with each branch you switch, you gain a deeper understanding of your project and your craft.
Dive Deeper: Master the Art of Branching!
Thank you for exploring the power of Git branching! We hope this guide has given you the confidence to navigate your project's history with ease. Now, let's put that knowledge into action.
Here are a few ways to elevate your Git skills:
- Master the Rebase: Try rebasing on a personal project to streamline your commit history and create a cleaner, linear project flow. Document any challenges you encounter and how you solved them. This hands-on approach is the best way to truly understand rebase and how it helps manage branches efficiently after merging.
- Explore Advanced Git Workflows: Learn more about complex branching strategies like Gitflow or GitHub Flow. These provide structured methods for managing features, releases, and urgent bug fixes.
- Share Your Branching Tips: Join the GitAndVersionControlHub.com community forums (when available) and share your best Git branching tips. Help others and learn from their experiences!
Ready to transform your workflow and become a Git branching expert?