
Your First Open Source Contribution: A StepbyStep Git Workflow

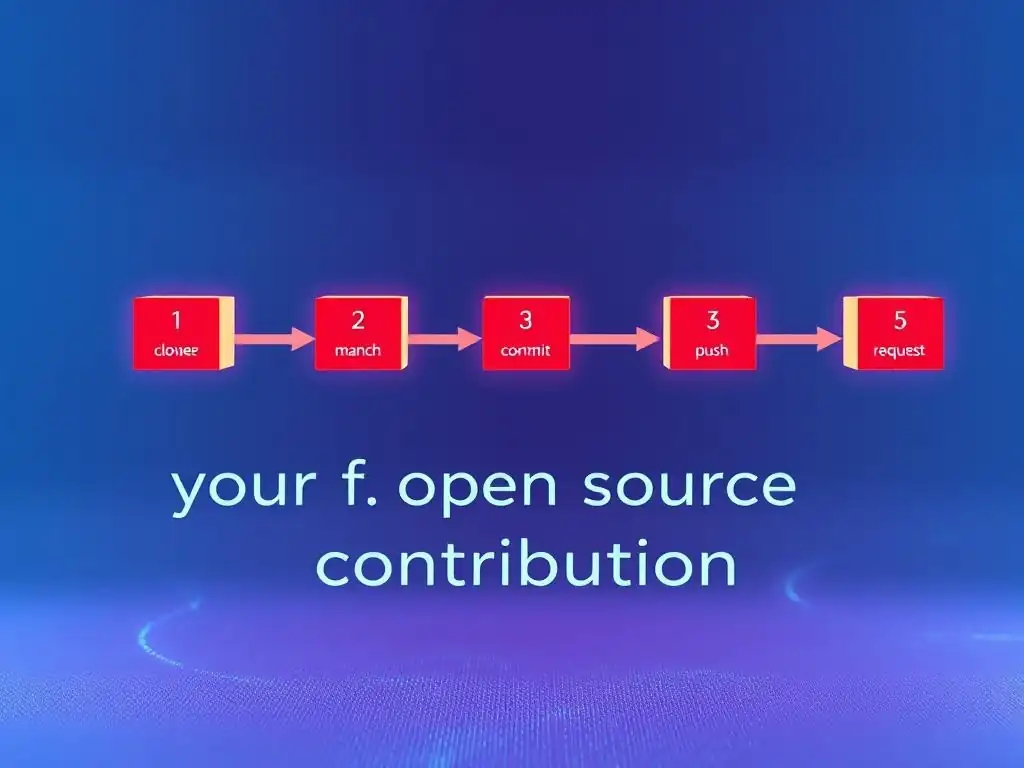
Welcome to Git and Version Control Hub, your central resource for mastering the art of version control! Are you ready to dive into the world of open source? This hub provides you with all of the tools you need to master Git.
Want to make your mark on the world of open source, but don't know where to start? This guide will take you through a step-by-step git contribution guide, demystifying the process and empowering you to contribute with confidence. Unlock the secrets to effective collaboration and build your portfolio – let's get started!
Your First Open Source Contribution: A Step-by-Step Git Workflow
- Introduction to Open Source Contributions with Git
-
A Step-by-Step Git Contribution Guide: From Fork to Pull Request
- Preparing Your Environment for Open Source Git Contribution
- Step 1: Forking the Repository on GitHub or GitLab
- Step 2: Cloning the Forked Repository to Your Local Machine
- Step 3: Creating a New Branch for Your Feature or Bug Fix
- Step 4: Making Changes and Committing Them to Your Branch
- Step 5: Pushing Your Branch to Your Forked Repository
- Step 6: Creating a Pull Request (PR) to the Original Repository
- Step 7: Addressing Code Review Feedback and Making Necessary Changes
- Step 8: Merging Your Contribution (If Approved)
- Mastering the Git Workflow for Open Source: Best Practices
- Git Contribution Guide: Avoiding Common Pitfalls
- Advanced Git Techniques for Open Source Contributors
- Conclusion: Embracing Open Source Contributions with Git
-
Frequently Asked Questions
- How does this guide help me with open source contributions?
- What are the basic Git commands I need to know before starting?
- What is the importance of branching in the open source contribution workflow?
- How do I submit my changes after I've made my contribution?
- What is a pull request and why is it important?
- Final Reflection: Empowering the Open Source Journey
- Unlock Your Contribution Potential!
Introduction to Open Source Contributions with Git
Why Contribute to Open Source Projects Using Git?
Contributing to open source projects using Git is a rewarding endeavor for several compelling reasons. Firstly, it provides an unparalleled learning experience. By diving into real-world projects, you expose yourself to diverse coding styles, project structures, and problem-solving approaches that extend far beyond typical academic or closed-source environments. Imagine you're a Python developer and you decide to contribute to a popular library like requests. You’ll not only hone your Python skills but also learn about network protocols, API design, and collaborative development practices within a large codebase. Furthermore, contributing to open source is a fantastic way to build your portfolio. Employers highly value contributions to open source as tangible evidence of your coding abilities, collaboration skills, and commitment to the software development community.
Beyond personal development, contributing to open source allows you to give back to the community and improve the software you rely on daily. Many open source projects form the backbone of the internet and modern technology. By contributing, you directly influence the direction and quality of these tools.
For instance, if you're a frequent user of the Linux operating system and identify a bug or a potential improvement, contributing a patch ensures that the software becomes better for everyone, including yourself. This sense of collective improvement and community involvement is a powerful motivator for many open source contributors. Moreover, open source participation often leads to networking opportunities, connecting you with developers worldwide who share your interests and passions, potentially opening doors to collaborations and career advancements.
Understanding the Benefits of Contributing to Open Source
The benefits of contributing to open source extend far beyond just improving your technical skills. One significant advantage is personal and professional growth. Contributing to open source projects pushes you to work on code that is scrutinized by a community of peers, often leading to higher code quality and a deeper understanding of best practices.
For example, submitting a feature to a project like the VLC media player, which has millions of users, requires you to write clean, efficient, and well-documented code that can withstand the scrutiny of experienced developers. This rigorous process accelerates your learning curve in ways that isolated personal projects simply cannot.
Furthermore, open source contributions significantly enhance your professional reputation. Your contributions on platforms like GitHub or GitLab serve as a public portfolio showcasing your skills and experience. Many recruiters and hiring managers actively look at open source profiles to assess candidates' abilities. A consistent history of contributions to well-regarded projects can be a powerful differentiator in a competitive job market.
Consider the case of Linus Torvalds, the creator of Linux; his open source work has not only revolutionized the computing world but also solidified his position as a leading figure in software engineering. Contributing to open source is an investment in your career, providing tangible evidence of your capabilities and dedication to the craft of software development. It also fosters valuable networking opportunities within the global developer community, leading to collaborations, mentorships, and even job offers.
The Importance of Version Control (Git) in Open Source
Version control, particularly Git, is absolutely fundamental to the world of open source software development. It's the backbone that enables collaboration, tracks changes, and ensures the stability and maintainability of projects with potentially hundreds or even thousands of contributors spread across the globe. Without Git, managing the complexity of open source development would be virtually impossible.
Imagine trying to coordinate contributions to a project like the Apache web server via email or shared documents – chaos would quickly ensue. Git elegantly solves this problem by providing a robust system for managing code changes, branching, merging, and reverting to previous states.
Git's distributed nature is particularly well-suited for open source. Each contributor has a complete copy of the project's history, allowing for independent work and experimentation without disrupting the main codebase. Features like branching allow developers to work on new functionalities or bug fixes in isolation, ensuring that unstable code doesn't impact the main project.
When a contribution is ready, Git's pull request mechanism facilitates a structured code review process, where maintainers and other community members can examine the changes, provide feedback, and ensure code quality before it's integrated. This rigorous process, powered by Git, is crucial for maintaining the integrity and reliability of open source projects, ensuring that they remain valuable and dependable resources for users worldwide. Projects like Kubernetes, with its massive contributor base, rely heavily on Git's features to manage their complex development lifecycle effectively.
A Step-by-Step Git Contribution Guide: From Fork to Pull Request
Preparing Your Environment for Open Source Git Contribution
Before you embark on your open source contribution journey, setting up your development environment is crucial. This initial setup ensures a smooth and efficient workflow. Firstly, you'll need a GitHub or GitLab account, depending on where the project you want to contribute to is hosted. These platforms are the central hubs for open source collaboration and version control. Creating an account is typically straightforward and free.
Next, you must install Git on your local machine. Git is the version control system that underpins the entire contribution process. You can download the appropriate Git installer for your operating system (Windows, macOS, Linux) from the official Git website. Installation guides are readily available online if you encounter any issues.
Once Git is installed, configure it with your name and email address. These details will be associated with your commits, allowing project maintainers and other contributors to identify you. Use the following commands in your terminal, replacing "Your Name" and "your_email@example.com" with your actual information:
git config --global user.name "Your Name"
git config --global user.email "your_email@example.com"
Optionally, for enhanced security and convenience, you can set up SSH keys for authentication with GitHub or GitLab. SSH keys eliminate the need to repeatedly enter your username and password when interacting with remote repositories. Both GitHub and GitLab provide detailed guides on how to generate and add SSH keys to your account settings. Taking these preparatory steps ensures that you have a solid foundation for contributing effectively to open source projects using Git.
Step 1: Forking the Repository on GitHub or GitLab
Creating Your Own Copy of the Project
The first concrete step in contributing to an open source project using Git is forking the repository. Forking, in Git terms, is essentially creating your personal copy of the project's repository under your own account on platforms like GitHub or GitLab. Think of it as making a branch of the entire project, but hosted on your own online space. This fork acts as your workspace, completely separate from the original project repository, often referred to as the "upstream" repository. You'll make your changes and contributions within this forked repository.
To fork a repository, navigate to the project's page on GitHub or GitLab in your web browser. Look for the "Fork" button, usually located at the top right of the page. Clicking this button initiates the forking process. GitHub or GitLab will then create a new repository in your account that is an exact copy of the original project at that point in time. For example, if you wish to contribute to the popular JavaScript library React, you would go to React's GitHub repository ( facebook/react) and click the "Fork" button. After a brief moment, you'll have a repository at yourusername/react which is your personal fork. This forked repository is where you will clone the project to your local machine and begin making your contributions. Forking ensures you can experiment and make changes without directly affecting the original project, providing a safe and isolated environment for your contributions.
Step 2: Cloning the Forked Repository to Your Local Machine
Setting Up Your Local Git Environment
After forking the repository, the next crucial step is cloning it to your local machine. Cloning essentially downloads the entire repository, including all its files, history, and branches, from your forked repository on GitHub or GitLab to your computer. This local clone becomes your working copy of the project, where you can make changes, test them, and prepare them for contribution.
To clone your forked repository, you will need the "clone URL," which can be found on your forked repository's page on GitHub or GitLab, usually under a "Code" button. The URL will typically be in either HTTPS or SSH format.
Open your terminal or command prompt and navigate to the directory where you want to store the project on your local machine. Then, use the git clone command followed by the clone URL you copied. For example:
git clone https://github.com/yourusername/react.git
Replace https://github.com/yourusername/react.git with the actual clone URL of your forked repository. After running this command, Git will download the entire repository to a new directory named react (or whatever the repository's name is). Once the cloning process is complete, navigate into the newly created directory using the cd command:
cd react
Now you are inside your local Git repository. You can verify that it's correctly set up by listing the remote repositories using git remote -v. You should see at least one remote named origin, pointing to your forked repository on GitHub or GitLab. This confirms that your local environment is correctly connected to your online fork, ready for you to start making contributions.
Step 3: Creating a New Branch for Your Feature or Bug Fix
Branching Strategy for Open Source Contributions
Once you have cloned the forked repository to your local machine, it's highly recommended to create a new branch for each feature you are developing or bug you are fixing. Branching is a fundamental Git concept that allows you to work on isolated changes without directly affecting the main codebase, typically the main or master branch. This practice is crucial for open source contributions because it keeps your work organized, makes it easier for maintainers to review your changes, and prevents potential conflicts with other ongoing development. Imagine if multiple developers were making changes directly to the main branch – it would quickly become a chaotic and unmanageable situation.
To create a new branch, use the git checkout -b command followed by a descriptive name for your branch. The branch name should clearly indicate the purpose of your changes, such as fix-typo-in-documentation or add-new-feature-x. For example, if you are fixing a bug related to user authentication, you might create a branch named fix-user-authentication-bug:
git checkout -b fix-user-authentication-bug
This command does two things simultaneously: it creates a new branch named fix-user-authentication-bug and switches your working directory to that new branch. You can verify that you are on the correct branch using the git branch command, which will list all branches and highlight the currently active one. Adopting a clear branching strategy is a cornerstone of effective Git workflow, especially in collaborative open source environments. It ensures that contributions are isolated, well-organized, and easier to manage and integrate into the project.
Step 4: Making Changes and Committing Them to Your Branch
Writing Effective Commit Messages for Open Source
With your dedicated branch created, you can now start making the necessary code changes to implement your feature or fix the bug. Use your preferred code editor to modify the relevant files in your local repository. As you make changes, Git tracks these modifications in your working directory. You can see the changes using the git status command, which shows you which files have been modified, added, or deleted. Once you have made a set of related changes, you need to "stage" them using the git add command. Staging prepares the changes to be included in your next commit. To stage all modified files, you can use:
git add .
After staging your changes, you need to commit them. A commit is a snapshot of your changes at a specific point in time, along with a commit message describing those changes. Writing effective commit messages is crucial in open source projects. A good commit message should be concise yet informative, clearly explaining the what and why of your changes. It helps maintainers and other contributors understand the evolution of the project and the purpose of each commit. Use the git commit -m "Your commit message here" command to create a commit. For example:
git commit -m "Fix: Corrected typo in documentation for API endpoint"
For more detailed commit messages, you can omit the -m flag, and Git will open a text editor where you can write a multi-line commit message. A common practice is to have a short summary line followed by a blank line and then a more detailed explanation if needed. Consistently writing clear and descriptive commit messages is a valuable contribution to the project's history and maintainability.
Step 5: Pushing Your Branch to Your Forked Repository
Syncing Your Fork with the Original Repository (Upstream)
After making commits on your local branch, the next step is to push these changes to your forked repository on GitHub or GitLab. Pushing uploads your local branch and its commits to your online fork, making your work accessible remotely and ready to be submitted as a contribution. Use the git push origin your-branch-name command to push your branch. Replace your-branch-name with the name of the branch you created (e.g., fix-user-authentication-bug). For example:
git push origin fix-user-authentication-bug
The origin in this command refers to the remote repository that your local repository is connected to, which by default is your forked repository. After executing this command, Git will upload your branch and its commits to your fork. You can then verify that the push was successful by checking your forked repository on GitHub or GitLab; you should see your newly pushed branch listed there with your commits.
Before pushing your branch, it's often a good practice to ensure your forked repository is up-to-date with the original "upstream" repository. This helps minimize potential merge conflicts later on. To do this, first, you need to configure the upstream repository as a remote in your local Git setup. If you haven't already, you can add it using:
git remote add upstream <upstream-repository-url>
Replace <upstream-repository-url> with the URL of the original project repository (not your fork). You can find this URL on the original project's GitHub or GitLab page. Once you've added the upstream remote, you can fetch changes from it:
git fetch upstream
Then, you can rebase your branch onto the latest main branch of the upstream repository:
git rebase upstream/main
This command replays your commits on top of the latest changes from the upstream main branch, effectively syncing your fork with the original repository. After rebasing (or merging upstream changes if you prefer), you can then push your updated branch to your fork. Keeping your fork synced with the upstream repository is a good habit that contributes to a smoother contribution process.
Step 6: Creating a Pull Request (PR) to the Original Repository
Writing a Clear and Concise Pull Request Description
With your changes pushed to your forked repository, you are now ready to submit a Pull Request (PR) to the original project repository. A Pull Request is the mechanism for proposing your changes to the project maintainers for review and potential inclusion in the main project. It's essentially a request to "pull" your changes from your fork into their repository.
To create a PR, navigate to your forked repository on GitHub or GitLab in your web browser. You will usually see a prompt to "Compare & pull request" or a similar button related to your recently pushed branch. Click this button to initiate the PR creation process.
You will be taken to a page where you can review your changes and write a description for your Pull Request. Writing a clear and concise PR description is crucial for maintainers to understand the purpose and scope of your contribution. A good PR description should include:
- A brief summary of the changes: What problem does this PR solve? What feature does it add?
- Motivation: Why is this change necessary? What is the context?
- Detailed explanation of the changes: Explain the implementation details if necessary, especially for complex changes.
- Steps to reproduce (if applicable): If you are fixing a bug, provide clear steps for maintainers to reproduce the issue.
- Screenshots or screen recordings (if applicable): For UI changes, visual aids are extremely helpful.
- References to relevant issues: If your PR addresses a specific issue in the project's issue tracker, link to it.
For example, a good PR description for a bug fix might look like this:
Fix: Resolves issue #123 - User login failing intermittently

Summary:
This PR fixes an intermittent login failure issue reported in issue #123. The problem was traced to a race condition in the authentication module.

Motivation:
Users were experiencing inconsistent login failures, leading to a poor user experience. This fix ensures a more reliable login process.

Detailed Changes:
- Implemented a mutex lock to synchronize access to the authentication module, preventing the race condition.
- Added unit tests to verify the fix and ensure login reliability.

Steps to Reproduce (for verification):
1. Attempt to log in multiple times in rapid succession.
2. Before this fix, logins would occasionally fail.
3. After this fix, logins should be consistently successful.

References:
- Issue #123: [Link to issue #123]
A well-written PR description significantly facilitates the review process and increases the likelihood of your contribution being accepted.
Step 7: Addressing Code Review Feedback and Making Necessary Changes
Responding to Comments on Your Pull Request
After submitting your Pull Request, project maintainers and other community members will review your code. This code review process is a vital part of open source development, ensuring code quality, identifying potential issues, and maintaining project standards. Be prepared to receive feedback, which may range from minor suggestions to requests for significant changes. It's crucial to approach code review feedback constructively and professionally. View it as an opportunity to learn and improve your code, rather than as criticism.
Maintainers will often leave comments directly on your Pull Request on GitHub or GitLab, pointing out areas for improvement, asking clarifying questions, or suggesting alternative approaches. Engage actively with the feedback by responding to each comment thoughtfully. If you agree with a suggestion, implement the changes in your local branch, commit them, and push the updated branch to your fork. Your PR will automatically update with the new commits. If you disagree with a comment or need clarification, explain your reasoning politely and respectfully. Open and constructive communication is key to a successful code review process.
When addressing feedback, make sure to:
- Understand the feedback: If you are unsure about a comment, ask for clarification.
- Respond promptly: Acknowledge feedback and indicate when you plan to address it.
- Be open to suggestions: Consider the maintainers' perspective and be willing to make changes.
- Explain your choices: If you choose not to implement a suggestion, explain why.
- Keep the PR focused: Avoid introducing unrelated changes while addressing feedback.
For example, if a maintainer comments, "Could you please add more unit tests for this function? ", your response might be: "Sure, I'll add more unit tests to cover edge cases and improve test coverage. I expect to push the updated code with new tests within the next few hours." Actively addressing code review feedback demonstrates your commitment to contributing high-quality code and working collaboratively with the open source community.
Step 8: Merging Your Contribution (If Approved)
Understanding the Open Source Project's Contribution Guidelines
If your Pull Request successfully passes the code review process and the maintainers are satisfied with your changes, congratulations! Your contribution is likely to be merged into the main project. Merging is the final step where your changes are integrated into the project's codebase. The maintainers will typically handle the merging process themselves after approving your PR. Once merged, your code becomes part of the project, and you have officially contributed to open source! You will usually receive a notification on GitHub or GitLab when your PR is merged.
However, it's important to understand that not all Pull Requests are merged. Maintainers may decide not to merge a PR for various reasons, such as if it doesn't align with the project's goals, introduces regressions, or doesn't meet the project's quality standards. If your PR is not merged, don't be discouraged. Ask for feedback on why it wasn't merged, learn from the experience, and consider contributing to other issues or projects. Open source contribution is a learning journey, and even rejected PRs provide valuable learning opportunities.
Before you even start working on a contribution, it's highly recommended to thoroughly review the open source project's contribution guidelines. Most projects have a CONTRIBUTING.md file or similar documentation that outlines the project's contribution process, coding style, testing requirements, and community expectations. Familiarizing yourself with these guidelines beforehand significantly increases the chances of your contributions being accepted and ensures a smoother and more positive contribution experience. These guidelines are there to help you contribute effectively and maintain the project's quality and consistency. Adhering to them demonstrates respect for the project and its community.
Mastering the Git Workflow for Open Source: Best Practices
Keeping Your Fork Synced with the Upstream Repository
Maintaining synchronization between your forked repository and the original "upstream" repository is a crucial best practice for open source contributors. As the original project continues to evolve with contributions from other developers, your fork can become outdated if not regularly synced. Working with an outdated fork can lead to merge conflicts, compatibility issues, and wasted effort working on code that is already addressed in the upstream repository. Therefore, it's essential to establish a routine for keeping your fork up-to-date.
The process of syncing your fork involves fetching changes from the upstream repository and then integrating those changes into your local repository and, subsequently, your forked repository. As described earlier, you should have already configured the upstream repository as a remote named upstream. To sync your fork, follow these steps:
-
Fetch changes from upstream:
git fetch upstream
This command retrieves the latest branches and commits from the upstream repository without merging them into your local branches.
-
Update your local
mainbranch:git checkout main git rebase upstream/main
This first switches to your local
mainbranch and then rebases it onto theupstream/mainbranch. Rebasing replays your local commits on top of the latest upstream commits, effectively bringing yourmainbranch up-to-date. Alternatively, you could usegit merge upstream/mainif you prefer merging over rebasing. -
Push the updated
mainbranch to your fork:git push origin main
This pushes your now-synced
mainbranch to your forked repository on GitHub or GitLab, ensuring your fork'smainbranch reflects the latest state of the upstreammainbranch.
It's recommended to perform this syncing process regularly, especially before starting work on a new feature or bug fix, and before submitting a Pull Request. A good frequency might be daily or every few days, depending on the activity level of the upstream project. Keeping your fork synced minimizes merge conflicts, ensures you are working on the latest codebase, and contributes to a smoother and more efficient contribution workflow.
Resolving Merge Conflicts During Open Source Contribution
Merge conflicts are a common occurrence in collaborative Git workflows, especially in open source projects with multiple contributors working concurrently. A merge conflict arises when Git is unable to automatically merge changes from different branches, typically because the same lines of code have been modified in conflicting ways. While merge conflicts can seem daunting at first, they are a normal part of the development process, and Git provides tools to resolve them effectively. Understanding how to resolve merge conflicts is a valuable skill for any open source contributor.
When a merge conflict occurs, Git will mark the conflicting files in your working directory. You can identify these files using git status, which will list them as "Unmerged paths." Open the conflicting file in your code editor. You will see conflict markers inserted by Git, which look something like this:
<<<<<<< HEAD
// Your changes in your branch
=======
// Changes from the branch you are merging with
>>>>>>> branch-to-merge
The section between <<<<<<< HEAD and ======= represents the changes in your current branch, and the section between ======= and >>>>>>> branch-to-merge represents the changes from the branch you are trying to merge. Your task is to manually edit the file to resolve the conflict. This usually involves deciding which changes to keep, which to discard, or how to combine them. Carefully examine both sections of the conflict and decide on the desired outcome. Remove the conflict markers ( <<<<<<< HEAD, =======, >>>>>>> branch-to-merge) and edit the code to reflect your resolution.
After resolving all conflicts in a file, stage the resolved file using git add <resolved-file>. Repeat this process for all conflicting files. Once all conflicts are resolved and staged, complete the merge by running git commit. Git will usually pre-populate the commit message with information about the merge conflict resolution. Review and amend the commit message if necessary, and then save and close the editor to finalize the merge commit. Practicing resolving merge conflicts, perhaps in a test repository, can build your confidence and make you more proficient at handling them when they arise during open source contributions. Remember to communicate with other contributors if you encounter complex or unclear conflicts to ensure a collaborative resolution.
Effective Communication with the Open Source Community
Effective communication is paramount in open source collaboration. Open source projects thrive on community interaction, and clear, respectful, and timely communication is essential for successful contributions and a healthy project environment. Communication happens in various forms within open source projects, including Pull Request discussions, issue tracker conversations, mailing lists, forums, and chat channels. Mastering these communication channels and adopting good communication practices significantly enhances your open source contribution experience.
When participating in discussions, whether on Pull Requests or issue trackers, be mindful of the following:
- Be respectful and professional: Treat all community members with courtesy and respect, even when disagreements arise. Open source communities are diverse, and respectful communication fosters a positive and inclusive environment.
- Be clear and concise: Communicate your ideas and questions clearly and concisely. Well-articulated messages are easier to understand and respond to, saving time and preventing misunderstandings.
- Provide context: When reporting bugs or proposing features, provide sufficient context and details to help others understand the issue or proposal. Include steps to reproduce, error messages, and relevant background information.
- Be responsive: Respond to comments and questions in a timely manner. Prompt responses keep discussions flowing and demonstrate your engagement with the community.
- Use appropriate channels: Choose the right communication channel for your message. Use Pull Requests for code contributions, issue trackers for bug reports and feature requests, and mailing lists or forums for general discussions or project-wide announcements.
- Read existing communication: Before asking questions, search the issue tracker, mailing lists, and documentation to see if your question has already been answered. This shows initiative and avoids redundant inquiries.
- Assume good faith: Assume that other community members are acting in good faith and with positive intentions. Constructive dialogue is more productive than assuming negativity or malice.
By practicing effective communication, you contribute not only code but also to a positive and collaborative open source community. Active and respectful communication builds trust, fosters collaboration, and makes the open source experience more rewarding for everyone involved.
Git Contribution Guide: Avoiding Common Pitfalls
Common Mistakes to Avoid When Contributing to Open Source Projects
Contributing to open source is a fantastic way to learn and give back, but it's also easy to make common mistakes, especially for newcomers. Being aware of these pitfalls can help you avoid frustration and contribute more effectively. One frequent mistake is not reading the project's contribution guidelines. Most open source projects have guidelines outlining their preferred workflow, coding style, commit message conventions, and communication protocols. Ignoring these guidelines can lead to your contributions being rejected or requiring significant rework. Always start by locating and carefully reading the CONTRIBUTING.md file or similar documentation.
Another common mistake is making large, monolithic Pull Requests. Pull Requests that introduce extensive changes are difficult to review and increase the risk of introducing bugs. It's generally better to break down large features or changes into smaller, more manageable PRs. Smaller PRs are easier to review, test, and integrate, increasing the likelihood of them being accepted quickly.
Focus on addressing one issue or feature per PR. Furthermore, not testing your changes thoroughly before submitting a PR is another common pitfall. Ensure your code is well-tested, including unit tests, integration tests, and manual testing where appropriate. Submitting code that breaks existing functionality or introduces new bugs is detrimental to the project.
Ignoring code review feedback is also a mistake to avoid. Code review is a crucial part of the open source contribution process, and feedback is provided to help improve code quality and maintain project standards. Be receptive to feedback, address comments thoughtfully, and be willing to make changes based on suggestions. Defensive or dismissive responses are counterproductive. Finally, not keeping your fork synced with the upstream repository can lead to merge conflicts and wasted effort. Regularly sync your fork with the upstream main branch, as described earlier, to avoid working with an outdated codebase. By being mindful of these common pitfalls, you can significantly improve your open source contribution experience and make more valuable contributions.
Understanding Licensing and Open Source Compliance
Understanding open source licenses and ensuring compliance is crucial when contributing to open source projects. Open source licenses define the terms under which software can be used, modified, and distributed. Different licenses have varying levels of permissiveness and requirements. As a contributor, it's important to be aware of the license under which the project you are contributing to is distributed and ensure your contributions are compatible with that license. Most open source projects will clearly state their license, often in a LICENSE file at the root of the repository.
Common open source licenses include the MIT License, Apache License 2.0, GNU General Public License (GPL), and BSD licenses. Permissive licenses like MIT and Apache 2.0 are relatively liberal, allowing for broad usage, modification, and redistribution, even in proprietary software, with minimal restrictions. Copyleft licenses like GPL are more restrictive, requiring that derivative works also be licensed under the GPL, ensuring that open source principles are maintained in derived software. BSD licenses fall somewhere in between.
When contributing code, you are implicitly agreeing to license your contribution under the project's license. Therefore, ensure you understand the implications of the project's license. If you are contributing code that you have written elsewhere, especially in a commercial context, ensure that you have the necessary rights to contribute it under the project's open source license. In some cases, projects may require contributors to sign a Contributor License Agreement (CLA).
A CLA is a legal document that clarifies the licensing of your contributions and often grants the project maintainers certain rights to your contributions. If a project requires a CLA, review it carefully before signing. Understanding open source licensing and compliance ensures that your contributions are legally sound and aligned with the project's open source ethos. If you have any doubts about licensing, it's always best to ask the project maintainers for clarification.
Respecting Code of Conduct and Community Guidelines
Beyond technical contribution guidelines, most open source projects also have a Code of Conduct and community guidelines. These documents outline expected behavior within the project community and aim to foster a welcoming, inclusive, and respectful environment for all contributors. Respecting these guidelines is as important as adhering to technical contribution rules. A Code of Conduct typically addresses topics such as respectful communication, inclusivity, tolerance, and unacceptable behaviors like harassment or discrimination. Community guidelines may also cover topics like communication channels, decision-making processes, and community norms.
Before engaging in an open source project, take the time to read and understand its Code of Conduct and community guidelines. These documents often reflect the project's values and culture. Adhering to these guidelines demonstrates your commitment to being a positive and constructive member of the community. When participating in discussions, whether in Pull Requests, issue trackers, or community forums, ensure your communication is respectful, considerate, and aligned with the project's Code of Conduct. Avoid personal attacks, offensive language, or any behavior that could make others feel unwelcome or uncomfortable.
If you witness or experience behavior that violates the Code of Conduct, most projects have a process for reporting such incidents, often outlined in the Code of Conduct itself. Reporting violations helps maintainers address inappropriate behavior and reinforce community standards. Contributing to open source is not just about writing code; it's also about being part of a community. Respecting the Code of Conduct and community guidelines is essential for creating a positive and productive environment where everyone can contribute and thrive. A healthy and respectful community is a vital asset for any successful open source project.
Advanced Git Techniques for Open Source Contributors
Using Git Rebase for a Cleaner Commit History
While merging is a common way to integrate changes in Git, git rebase offers an alternative approach that can result in a cleaner and more linear commit history, which is often preferred in open source projects. Rebasing essentially replays your commits on top of another branch, typically the main branch. Instead of creating a merge commit, rebasing rewrites your branch's history as if you had branched off from the latest point in the target branch. This results in a linear history without merge branches, making it easier to follow the project's evolution and understand the sequence of changes.
For open source contributions, rebasing can be particularly useful before submitting a Pull Request. By rebasing your feature branch onto the latest main branch of the upstream repository, you ensure that your changes are based on the most current codebase and that your PR will be a fast-forward merge if no conflicts arise. To rebase your branch, first, ensure you have fetched the latest changes from the upstream repository:
git fetch upstream
Then, switch to your feature branch and rebase it onto the upstream main branch:
git checkout your-feature-branch
git rebase upstream/main
If conflicts occur during rebasing, you will need to resolve them as described earlier. After resolving conflicts, use git add <resolved-file> to stage the resolved files and then git rebase --continue to continue the rebase process. If you need to abort the rebase for any reason, use git rebase --abort. Once the rebase is complete, you will likely need to force-push your branch to your forked repository since rebasing rewrites history:
git push --force origin your-feature-branch
Use force-push with caution, especially in shared branches, as it can overwrite history for others. In the context of your own feature branch in your fork, force-pushing after rebasing is generally safe. While rebasing offers a cleaner history, it does rewrite commit history, which can be a disadvantage in some collaborative scenarios. Therefore, it's important to understand the implications of rebasing and follow the project's guidelines regarding its use. Some projects prefer merging over rebasing, so always check the project's contribution guidelines.
Understanding Git Cherry-Pick for Specific Contributions
git cherry-pick is a powerful Git command that allows you to select specific commits from one branch and apply them to another branch. This can be particularly useful in open source contributions when you want to contribute a specific fix or feature from one branch to another without merging the entire branch. For example, you might have a bug fix commit on a separate branch that you want to apply to the main branch without merging the entire feature branch that contains other unrelated changes. git cherry-pick provides a way to selectively apply individual commits.
To use git cherry-pick, first, identify the commit hash of the commit you want to cherry-pick. You can find commit hashes using git log. Once you have the commit hash, switch to the branch where you want to apply the commit (e.g., the main branch) and use the git cherry-pick <commit-hash> command. For example:
git checkout main
git cherry-pick abc123def456
Replace abc123def456 with the actual commit hash you want to cherry-pick. Git will then attempt to apply the changes from that commit to your current branch. If the cherry-pick is successful, a new commit will be created on your current branch with the changes from the cherry-picked commit. If conflicts arise during cherry-picking, you will need to resolve them similarly to merge conflicts. After resolving conflicts, stage the resolved files and use git commit to complete the cherry-pick. If you want to abort the cherry-pick process, use git cherry-pick --abort.
git cherry-pick is a useful tool for selectively incorporating specific changes into your branch, but it should be used judiciously. Overuse of cherry-pick can sometimes lead to a less coherent commit history and potential duplication of code. However, in specific scenarios, such as backporting bug fixes to stable branches or selectively applying individual contributions, git cherry-pick can be a valuable technique for open source contributors.
Exploring Git Bisect for Bug Hunting in Open Source Projects
git bisect is a powerful Git tool designed to help you efficiently identify the commit that introduced a bug in a project's history. When you encounter a bug in an open source project, and you know that a previous version of the project did not have the bug, git bisect can automate the process of pinpointing the culprit commit. Instead of manually checking each commit, git bisect uses a binary search algorithm to quickly narrow down the range of commits to examine.
To use git bisect, you need to identify a "bad" commit (a commit where the bug exists) and a "good" commit (a commit where the bug does not exist). Start by running git bisect start. Then, tell Git the "bad" commit (usually the current HEAD) and the "good" commit (a known commit before the bug was introduced):
git bisect bad HEAD
git bisect good <good-commit-hash>
Replace <good-commit-hash> with the commit hash of a known good commit. Git will then check out a commit in the middle of the commit range. Test if the bug exists in this commit. If the bug is present, run git bisect bad. If the bug is not present, run git bisect good. Git will then narrow down the commit range and check out another commit. Repeat this process of testing and marking commits as "good" or "bad" until git bisect identifies the exact commit that introduced the bug. Git bisect will output the hash of the "bad" commit when it's finished.
Once git bisect has identified the culprit commit, you can examine the changes in that commit to understand the root cause of the bug and develop a fix. After you are done with bisecting, run git bisect reset to return to your original branch. git bisect is an invaluable tool for bug hunting in open source projects, especially in projects with a long and complex commit history. It significantly reduces the time and effort required to find the commit that introduced a bug, making the debugging process much more efficient.
Conclusion: Embracing Open Source Contributions with Git
The Journey of an Open Source Contributor
Embarking on the journey of an open source contributor can be both exciting and rewarding. It’s a path of continuous learning, skill development, and community engagement. Your first contribution, no matter how small, is a significant step that opens doors to a world of collaborative software development.
From fixing minor typos in documentation to implementing complex features, every contribution counts and helps shape the future of open source software. The process, as outlined in this step-by-step Git contribution guide, may seem detailed, but with practice, it becomes second nature. Each fork, clone, branch, commit, push, and Pull Request builds your proficiency and confidence in Git and open source workflows.
The open source community is a vibrant and welcoming ecosystem of developers from diverse backgrounds and skill levels. Contributing to open source not only enhances your technical skills but also connects you with a global network of peers, mentors, and collaborators. The feedback you receive during code reviews, the discussions you participate in, and the challenges you overcome all contribute to your growth as a software developer.
Remember that every experienced open source contributor started somewhere, often with small contributions and a willingness to learn. Embrace the learning process, be patient with yourself, and celebrate each milestone along your open source journey.
Resources for Further Learning About Git and Open Source
To deepen your understanding of Git and open source contribution, numerous resources are available online. For mastering Git, the official Git documentation ( https://git-scm.com/doc ) is an invaluable resource, providing comprehensive information on Git commands, concepts, and workflows. Websites like "Learn Git Branching" ( https://learngitbranching.js.org/ ) offer interactive tutorials to visualize and practice Git concepts. Platforms like GitHub and GitLab themselves have extensive documentation and guides on using Git for collaboration and open source contributions.
For learning more about open source, the Open Source Initiative (OSI) ( https://opensource.org/ ) is a central hub of information about open source definitions, licenses, and community resources. Websites like "opensource.com" ( https://opensource.com/ ) publish articles, tutorials, and stories related to open source development and communities. Exploring popular open source projects on GitHub and GitLab is also a great way to learn by example. Study their contribution guidelines, examine their codebases, and observe their community interactions.
Online courses on platforms like Coursera, edX, and Udemy offer structured learning paths for Git and open source development. Search for courses on "Git and GitHub," "Version Control with Git," or "Open Source Software Development." Engaging with online communities and forums like Stack Overflow and project-specific mailing lists is also a valuable way to ask questions, seek guidance, and learn from experienced developers. Continuously exploring these resources and actively practicing Git and open source contribution will solidify your skills and empower you to become a proficient and impactful open source contributor.
Contributing Back to the Community: A Rewarding Experience
Contributing back to the open source community is an inherently rewarding experience that extends beyond personal skill development. It's about being part of a collective effort to build and improve software that benefits everyone. Open source projects are often driven by passionate individuals and communities who dedicate their time and expertise to create valuable resources that are freely available to the world. By contributing, you become part of this movement and help sustain and enhance these essential tools and technologies.
The act of contributing code, documentation, bug fixes, or even just participating in discussions and providing feedback makes a tangible difference to the project and its users. Your contributions help improve software quality, add new features, and address user needs. Knowing that your work is being used and appreciated by others is a powerful motivator and source of satisfaction. Furthermore, contributing to open source fosters a sense of community and belonging. You connect with like-minded individuals, build relationships, and become part of a collaborative network that shares a common goal.
The open source community thrives on reciprocity. By contributing back, you are also giving back to the community that has likely provided you with valuable tools and resources. It's a cycle of giving and receiving, where everyone benefits from collective contributions.
Whether you are a seasoned developer or just starting your coding journey, there are countless ways to contribute to open source. Find projects that align with your interests and skills, start with small contributions, and gradually expand your involvement. Embrace the rewarding experience of contributing back to the open source community and making a positive impact on the world of software development.
Frequently Asked Questions
How does this guide help me with open source contributions?
This guide provides a step-by-step Git workflow to help you navigate the contribution process. It focuses on making your first open source contribution easier to understand and execute.
What are the basic Git commands I need to know before starting?
You should be familiar with git clone, git branch, git add, git commit, git push, and git pull. These are the fundamental Git commands for managing changes and interacting with a repository.
What is the importance of branching in the open source contribution workflow?
Branching allows you to isolate your changes and work on a specific feature or bug fix. This prevents your work from interfering with the main development branch until it's ready to be merged.
How do I submit my changes after I've made my contribution?
After committing your changes to your branch, you need to push your branch to your forked repository. Then, you'll create a pull request to the original repository, requesting that your changes be merged.
What is a pull request and why is it important?
A pull request is a request to the maintainers of the original repository to review and merge your changes. It's a crucial step in the open source contribution process as it allows for code review and discussion.
Final Reflection: Empowering the Open Source Journey
The journey into open source can seem daunting, but as this guide has shown, it's a path paved with manageable steps and collaborative spirit. The power of open source lies in its accessibility, allowing anyone, regardless of experience, to contribute to projects that shape our digital world. This guide aimed to demystify the process, providing a clear roadmap for first-time contributors to navigate the Git workflow and make their mark.
The impact of open source extends far beyond lines of code; it fosters a culture of shared knowledge, innovation, and community. My hope is that this guide empowers individuals to not only contribute code but also to embrace the open-source ethos of learning, sharing, and collaboration. The best way to learn is to teach.
This sentiment perfectly encapsulates the spirit of open source, where contributing back to the community is both a learning experience and a valuable service.
Now, armed with this step-by-step guide, I encourage you to take the leap and make your first open-source contribution. Don't be afraid to start small, ask questions, and learn from others. Your unique perspective and skills are valuable assets to the open-source community. Embrace the opportunity to contribute, collaborate, and shape the future of technology, one commit at a time.
Okay, I'm ready. Here's a Call to Action (CTA) designed for the end of a web article titled "Your First Open Source Contribution: A Step-by-Step Git Workflow" hosted on GitAndVersionControlHub.com:
Unlock Your Contribution Potential!
Thanks for diving into the world of open source! We hope this guide has demystified the process and empowered you to take the leap. Now, let's put that knowledge into action!
Here are a few ways you can solidify your understanding and contribute to the community:
- Boldly take the first step: Identify a project on GitHub that interests you and submit your first pull request!: Even a small documentation fix counts!
- Explore the GitAndVersionControlHub.com forums and help fellow learners by sharing your newfound Git wisdom.
- Share this article with a friend who's also curious about open source – let's build a community of contributors together!
What small change will you propose to an open-source project this week? We'd love to hear about it in the comments!