
Git's Core Workflow: Mastering the Sequence of Initialization, Staging, and Committing

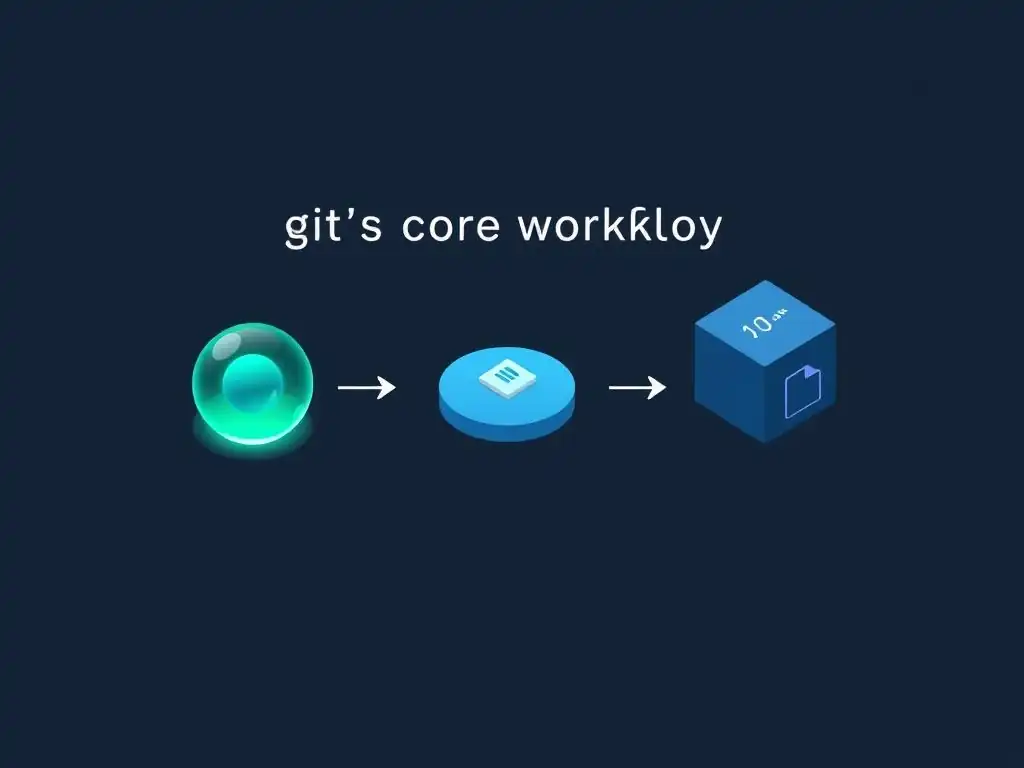
Welcome to Git and Version Control Hub, your comprehensive resource for mastering the art of version control! Unravel the power of Git and elevate your development workflow. Curious about how to seamlessly manage your projects? Dive into our Git core workflow tutorial and discover the fundamental sequence of initialization, staging, and committing. Let's unlock the secrets to efficient collaboration and robust project management, starting with the very core of Git.
Git's Core Workflow: Mastering the Sequence of Initialization, Staging, and Committing
- Understanding the Git Core Workflow: An In-Depth Tutorial
- 2. Staging Changes: Preparing for Your Commit
- 3. Committing Changes: Saving Your Work
- 4. Checking the Status: Staying Informed
- 5. The Complete Git Core Workflow: From Initialization to Commit
- 6. Troubleshooting Common Issues in the Git Workflow
- 7. Git Core Workflow: Summary and Key Takeaways
- Frequently Asked Questions
- Final Reflection: Embracing the Power of Version Control
- Solidify Your Git Skills: Unlock the Power of Seamless Commits!
Understanding the Git Core Workflow: An In-Depth Tutorial
1.1. Creating a New Repository with git init
The journey into version control with Git begins with repository initialization. The command git init is the cornerstone of this process, transforming a regular directory into a Git repository. Executing this command within your project's root directory sets up all the necessary internal structures for Git to track changes. It's a lightweight operation that doesn't modify your existing files but rather adds the foundational Git framework around them.
Upon running git init, Git creates a hidden subdirectory named .git in your project's root. This directory is the heart of your Git repository, containing all the configuration files, logs, and internal data structures Git uses to operate. Crucially, at this stage, git init initializes an empty repository. Your files are not yet under version control; you've merely laid the groundwork for tracking them. Think of it as preparing your canvas before starting to paint – the canvas exists, but it’s still blank.
1.2. Understanding the .git Directory: The Heart of Your Repository
The .git directory, often unseen by default in file explorers due to its hidden nature (starting with a dot), is the central repository for all of Git's metadata and object database. It's where Git stores everything it needs to manage your project's history and versions. Within this directory, you'll find subdirectories like objects, refs, config, and HEAD, each serving a distinct purpose in Git's internal workings. Modifying files directly within the .git directory is generally discouraged, as it can lead to repository corruption and data loss.
The objects directory is particularly important. It's Git's object store, where all versions of your files, commit messages, and directory structures are stored as content-addressable objects, compressed for efficiency. refs manages pointers to commits, like branches and tags, while config holds repository-specific settings. HEAD is a pointer to the current branch you are working on. Understanding that .git is the repository's core is essential for grasping how Git manages version control. It is the hidden engine driving all Git operations.
1.3. Initializing a Repository from an Existing Project: Seamless Integration
Initializing Git in an existing project is straightforward and designed for seamless integration. Navigate to the root directory of your project using your terminal or command prompt, and simply execute git init. Git will then set up the .git directory within your project without altering your existing files. This is a non-destructive operation, meaning your project files remain untouched during initialization.
After initialization, Git starts in a state where no files are tracked. You will need to explicitly tell Git which files to include in version control using the staging process, which we will cover in the next sections. This approach allows for a gradual adoption of version control in existing projects, giving you control over what gets tracked from the outset. It's a crucial first step in adopting the Git core workflow in any project, big or small, new or existing.
2. Staging Changes: Preparing for Your Commit
2.1. The Staging Area: Your Preparation Zone
The staging area, also known as the index, is a crucial intermediate step in Git's core workflow. It acts as a preparation zone where you curate the changes you intend to include in your next commit. Think of it as a temporary holding area where you assemble the pieces of your next snapshot of the project. Files in your working directory that have been modified are not automatically included in commits. They must first be explicitly added to the staging area.
This separation between the working directory and the staging area provides significant flexibility. It allows you to make numerous changes, selectively choose which ones are relevant and ready to be committed, and group related changes into logical commits. Without the staging area, commits would become monolithic and less focused, making it harder to track and understand project history. The staging area empowers developers to create clean, coherent commits that accurately reflect incremental progress.
2.2. Adding Files to the Staging Area with git add
The git add command is used to move changes from your working directory to the staging area. This command tells Git that you want to include specific files or changes in your next commit. For instance, if you've modified a file named script.js, running git add script.js will stage the current version of script.js. Git then prepares this staged version to be included in the subsequent commit.
git add is versatile; it can stage new files, modified files, and even deleted files. To stage all changes in your working directory, you can use git add . (note the dot), which is a common shortcut, especially for smaller projects or when you want to stage all modifications. However, be cautious with git add . in larger projects, as it might unintentionally stage files you didn't intend to commit, such as temporary files or build artifacts.
2.3. Staging Specific Files and Directories: Granular Control
Git's git add command provides granular control over what gets staged. You can add specific files by name, like git add index.html styles.css. This is useful when you've made changes across multiple files but only want to commit a subset of them. You can also add entire directories using git add <directory_name>. This will stage all files within that directory and any subdirectories, recursively.
For example, if you have a directory named components containing several React components, git add components will stage all changes within the components directory. This level of control allows you to create focused commits that address specific features or bug fixes, making your commit history cleaner and easier to understand. Staging specific files or directories is a best practice for maintaining organized and meaningful commits.
2.4. Interactive Staging with git add -p: Fine-Grained Control
For even finer-grained control, git add -p (or git add --patch) offers interactive staging. This powerful option presents you with the changes you've made in chunks, and asks you interactively whether you want to stage each chunk. This is particularly useful when you've made multiple logical changes within a single file and want to commit them separately.
When you run git add -p, Git displays the changes in a diff format and prompts you with options like y (yes, stage this chunk), n (no, don't stage this chunk), s (split the chunk further), e (edit the chunk), and more. This interactive process allows you to meticulously select exactly which lines of code get staged, enabling you to create highly focused and atomic commits. While it might seem more time-consuming initially, git add -p can significantly improve the clarity and quality of your commit history, especially when dealing with complex changes.
3. Committing Changes: Saving Your Work
3.1. Understanding Commits: Snapshots of Your Project
Commits in Git are fundamental units of version control. They represent snapshots of your entire project at a specific point in time. Each commit captures the state of all tracked files and directories in your repository when the commit was created. Commits are not merely diffs or changesets; they are complete snapshots. This design allows Git to efficiently switch between different versions of your project and reconstruct any point in its history.
Every commit is uniquely identified by a SHA-1 hash, a long string of characters that acts as a fingerprint for that specific snapshot. This hash is calculated based on the content of the commit, including the files, commit message, author information, and timestamp. Because the hash is derived from the content, any change to the commit, however small, will result in a completely different hash. This cryptographic hashing ensures the integrity of your commit history, making it tamper-proof.
3.2. Creating Commits with git commit
The git commit command is used to create a new commit with the changes that have been staged in the staging area. When you run git commit, Git packages up the staged changes into a new commit object. By default, git commit will open a text editor (configured by your Git settings) where you can write a commit message. This message is crucial for documenting the changes included in the commit.
Once you save and close the editor, Git creates the commit. The commit includes the snapshot of the staged changes, the commit message you wrote, your name and email (configured in Git), and a timestamp. It also points back to the previous commit (or commits, in the case of merges), forming a chain of commits that represents the history of your project. Without a commit message, Git will abort the commit process, emphasizing the importance of documenting your changes.
3.3. Writing Effective Commit Messages: Best Practices for Clarity
Writing clear and informative commit messages is a cornerstone of effective version control. A well-crafted commit message explains why the changes were made, not just what was changed. Following established best practices for commit messages significantly improves the readability and maintainability of your project's history. A widely adopted convention is to use a concise summary line, followed by a blank line, and then a more detailed explanation if necessary.
The summary line should be limited to around 50 characters and should complete the sentence "If applied, this commit will...". It should be written in the imperative mood, e.g., "Fix bug in user authentication" rather than "Fixed bug in user authentication". The optional body of the commit message can provide more context, explain the reasoning behind the changes, and reference related issues or tickets. Well-written commit messages act as valuable documentation of your project's evolution over time, aiding collaboration and future understanding.
3.4. Skipping the Staging Area with git commit -a: A Shortcut (Use with Caution)
Git provides a shortcut, git commit -a, which automatically stages all tracked files that have been modified and then creates a commit. This command combines the git add and git commit steps for modified, tracked files into a single command. It's important to note that git commit -a only stages modifications to tracked files. It does not stage new, untracked files.
While git commit -a can be a convenient shortcut, it should be used with caution, especially in larger projects or when you are working on complex features. Over-reliance on -a can lead to accidentally committing changes you didn't intend to include, or forgetting to stage new files altogether. For greater control and clarity, especially when learning the Git core workflow tutorial, explicitly using git add followed by git commit is generally recommended.
4. Checking the Status: Staying Informed
4.1. Using git status to Monitor Changes
The git status command is your primary tool for monitoring the state of your working directory and staging area. It provides a concise overview of the changes Git is aware of, telling you about modified files, staged changes, and untracked files. Running git status frequently is a good habit to maintain a clear understanding of your project's current state in relation to version control.
git status is invaluable for preventing accidental commits of unwanted changes and for ensuring that you are staging and committing the correct files. It helps you answer questions like: "What files have I changed? ", "Have I staged all the changes I intend to commit? ", and "Are there any untracked files in my project?". By regularly checking the status, you can maintain a clean and controlled workflow, minimizing errors and confusion.
4.2. Understanding the Output of git status: Interpreting the Results
The output of git status is designed to be informative and easy to understand. It typically presents information in different sections, categorized by the state of the files. Files in the "Changes to be committed" section are those that are staged and ready to be included in the next commit. Files in the "Changes not staged for commit" section are tracked files that have been modified in your working directory but are not yet staged. "Untracked files" are files in your working directory that Git is not currently tracking.
Git uses color-coding in the git status output (if your terminal supports it) to further differentiate the states. For example, staged changes are often displayed in green, while unstaged changes are in red. Understanding these categories and color codes is key to effectively interpreting the output of git status and using it to guide your workflow. By carefully analyzing the status output, you can ensure you are progressing through the Git core workflow tutorial correctly and efficiently.
5. The Complete Git Core Workflow: From Initialization to Commit
5.1. A Practical Example: Putting It All Together
Let's illustrate the Git core workflow with a practical example. Imagine you're starting a new web project. First, you navigate to your project directory in the terminal and run git init. This initializes your Git repository. Next, you create an index.html file and a styles.css file. Running git status will show these as untracked files.
To start tracking them, you use git add index.html styles.css. Now, git status will show these files in the staging area, under "Changes to be committed." You then modify styles.css to change the background color. Running git status again will now show styles.css in both "Changes to be committed" (the staged version from the first git add) and "Changes not staged for commit" (the more recent modification in your working directory). To stage the latest changes to styles.css, you need to run git add styles.css again. Finally, you commit your staged changes with git commit -m "Initial commit: basic HTML structure and styles". This completes one cycle of the Git core workflow tutorial.
5.2. Best Practices for Efficient Version Control
To maximize the benefits of Git's core workflow and ensure efficient version control, several best practices are recommended. Commit frequently and keep commits focused on logical units of change. Small, atomic commits are easier to understand, revert, and manage. Write clear and concise commit messages that explain the why behind the changes. Use the staging area effectively to curate your commits and ensure you are only committing intended changes.
Regularly use git status to stay informed about the state of your repository and avoid surprises. Avoid committing large, sweeping changes that are difficult to review and understand. Instead, break down complex features into smaller, manageable commits. By adhering to these best practices, you'll establish a robust and efficient version control workflow that enhances collaboration, reduces errors, and makes your project history a valuable asset.
6. Troubleshooting Common Issues in the Git Workflow
6.1. Resolving Staging Issues
Encountering issues during the staging process is common, especially for beginners. One frequent problem is accidentally staging files you didn't intend to commit. If you realize you've staged a file in error, you can use git reset HEAD <file_name> to unstage it. This command removes the file from the staging area but leaves your working directory untouched.
Another common issue is forgetting to stage changes before committing. If you make modifications but then run git commit without staging, Git will commit only the previously staged changes, potentially leading to incomplete commits. Always use git status before committing to ensure you have staged all the intended changes. If you find unstaged changes, use git add to stage them before committing. Understanding these common pitfalls and their solutions is crucial for a smooth Git core workflow tutorial.
6.2. Addressing Commit Problems
Commit problems can arise from various situations. One common issue is forgetting to write a commit message. If you run git commit without the -m option and close the editor without writing a message, Git will abort the commit. Always ensure you provide a meaningful commit message. If you need to amend the last commit message, you can use git commit --amend.
Another potential problem is committing sensitive data, like passwords or API keys, accidentally. If this happens, you'll need to rewrite your commit history to remove the sensitive data. Tools like git filter-branch or BFG Repo-Cleaner can be used for this purpose, but these are advanced operations and should be used with caution. Preventing such issues by carefully reviewing staged changes and commit messages is always preferable.
6.3. Dealing with Untracked Files
Untracked files are files in your working directory that Git is not currently monitoring. git status will list these files under the "Untracked files" section. Common untracked files might include temporary files, build artifacts, or newly created files that you haven't explicitly added to Git. If you want to include these files in version control, you need to use git add <file_name> to stage and track them.
If you have untracked files that you intentionally don't want Git to track, you should add them to a .gitignore file. This file specifies patterns for files that Git should ignore. For example, adding *.log to .gitignore will prevent Git from tracking any files with the .log extension. Using .gitignore effectively keeps your repository clean and prevents accidental tracking of unnecessary files.
7. Git Core Workflow: Summary and Key Takeaways
The Git core workflow, encompassing initialization, staging, and committing, is the foundation of effective version control. Mastering these three steps – git init, git add, and git commit – is essential for any developer using Git. Initialization sets up the repository; staging prepares changes; and committing saves snapshots of your project's progress. Understanding the staging area as a preparation zone is key to creating focused and meaningful commits.
Regularly checking the status with git status ensures you are always aware of the state of your working directory and staging area. Writing clear and informative commit messages provides valuable context and documentation for your project's history. By consistently applying these core concepts and best practices outlined in this Git core workflow tutorial, you can leverage Git to its full potential, enhancing your development workflow, improving collaboration, and ensuring the integrity of your codebase.
Frequently Asked Questions
How do I initialize a new Git repository?
To initialize a new Git repository, you use the git init command. This creates a hidden .git directory which is essential for tracking changes in your project. Remember to run this command at the root of your project.
What does the "staging area" in Git do?
The staging area, also known as the index, is where you prepare changes for a commit. It allows you to selectively add files or modifications using git add before permanently saving them. Think of it as a preparation zone before committing.
What is the purpose of committing changes in Git?
Committing in Git saves a snapshot of your staged changes to the repository's history. This creates a permanent record that allows you to revert to previous versions of your project. Use the git commit command.
What's the difference between git add . and git add <specific_file>?
git add . stages all modified and untracked files in the current directory and its subdirectories. git add <specific_file> only stages the specified file. Choosing the correct one ensures only intended changes are committed.
Why is understanding Git's core workflow important for developers?
Understanding Git's core workflow (initialization, staging, and committing) is crucial for effective version control. It allows developers to track changes, collaborate efficiently, and manage their codebase effectively, both in personal and team projects.
Final Reflection: Embracing the Power of Version Control
The journey through Git's core workflow – initialization, staging, and committing – reveals more than just a technical process; it unveils a fundamental approach to managing change and collaboration. Understanding this sequence is not merely about writing code; it's about crafting a narrative of progress, ensuring clarity, and fostering teamwork in the digital age. In a world increasingly reliant on software and collaborative development, mastering these foundational Git concepts is paramount for any aspiring or seasoned developer.
The impact of Git extends far beyond the realm of software engineering. It has subtly, yet profoundly, influenced how we approach versioning and collaboration in various fields, from writing and design to project management. Personally, I've witnessed its transformative power in streamlining workflows and preventing countless hours of lost work. Version control is not just a tool; it's a mindset. It's about embracing change, learning from mistakes, and building upon the collective knowledge of a team.
This quote encapsulates the essence of Git's enduring legacy.
Now, as you close this tutorial, I encourage you to reflect on how you can integrate these principles into your own projects and workflows. Consider how meticulous staging and thoughtful commit messages can enhance your collaboration and improve the maintainability of your work. Embrace the power of version control, not just as a technical skill, but as a philosophy that promotes clarity, collaboration, and continuous improvement in all your endeavors.
Okay, here's a CTA tailored for an article titled "Git's Core Workflow: Mastering the Sequence of Initialization, Staging, and Committing," intended for "Git and Version Control Hub":
Solidify Your Git Skills: Unlock the Power of Seamless Commits!
Thank you for diving into the essential world of Git workflow! You've now grasped the foundational steps to track and manage your projects effectively. Ready to put that knowledge into action and elevate your Git game?
Here's how you can take your understanding to the next level:
- Immediately initialize a new Git repository on your local machine. Start tracking changes to a simple project to solidify your understanding of the 'init', 'add', and 'commit' sequence. This is the most critical step!
- Explore interactive Git tutorials online! Many resources offer hands-on practice with branching, merging, and resolving conflicts in a safe, simulated environment.
- Share your newfound Git knowledge with a colleague or friend! Teaching reinforces your own understanding and helps build a community of version control enthusiasts.
What's the first commit message you'll write today? Share your most insightful commit message tips in the comments below!