
The Git Undo Cheat Sheet: Reset, Revert, Checkout at a Glance

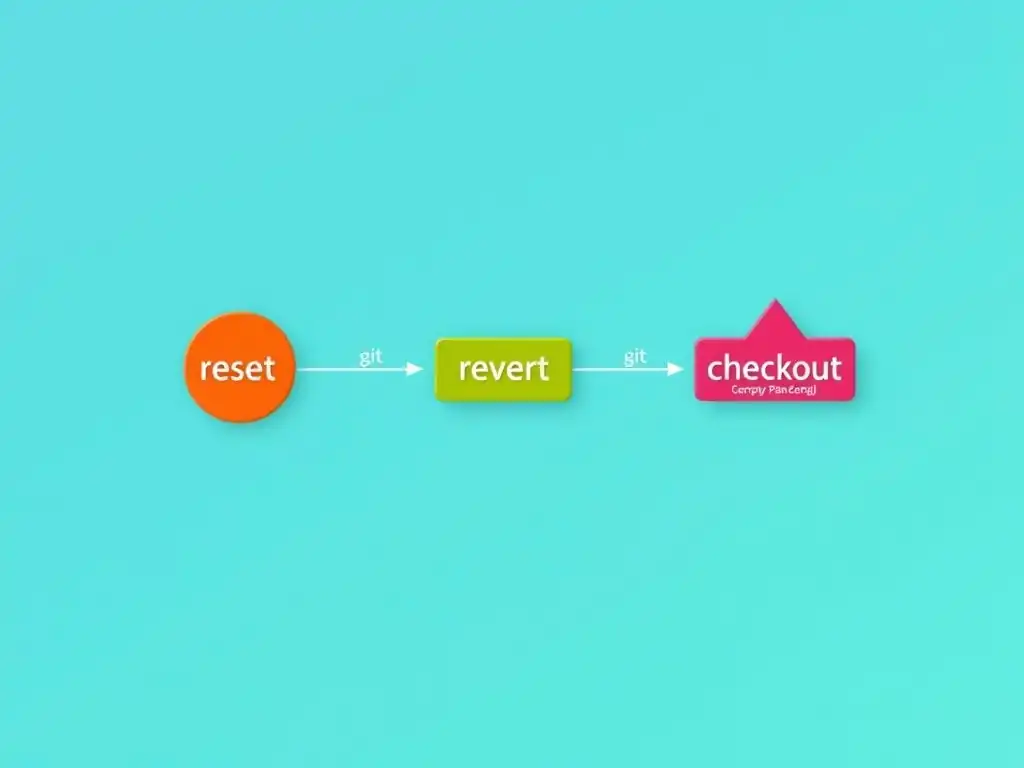
Welcome to Git and Version Control Hub, your central resource for mastering the art of version control! Are you ready to untangle yourself from those Git command mishaps? Dive into our comprehensive guide, " The Git Undo Cheat Sheet: Reset, Revert, Checkout at a Glance," and discover how to confidently navigate the often-tricky world of Git undo commands explained. Uncover the secrets to safely reversing changes and recovering from mistakes, empowering you to streamline your workflow and collaborate with confidence. Curious to learn more? Let's begin!
The Git Undo Cheat Sheet: Reset, Revert, Checkout at a Glance
- Git Undo Commands Explained: A Quick Reference Guide
- Core Git Undo Operations: Reset, Revert, and Checkout
- Git Reset vs. Revert vs. Checkout: Key Differences and Use Cases
- Practical Scenarios: When to Use Each Git Undo Command
- Advanced Git Undo Techniques
- Best Practices for Using Git Undo Commands
- Git Undo Cheat Sheet: Command Summary
- Mastering Git Undo: A Step Towards Becoming a Git Pro
- Frequently Asked Questions
- Final Reflection: Embracing Imperfection in Version Control
- Empower Your Workflow: Master Git Undoing Now!
Git Undo Commands Explained: A Quick Reference Guide
In the world of software development, mistakes are inevitable. Thankfully, Git, the widely adopted version control system, provides powerful tools to undo changes and rectify errors effectively. Mastering Git's undo capabilities is crucial for any developer, whether working solo or collaboratively. This article serves as your comprehensive cheat sheet, breaking down the essential Git undo commands: reset, revert, and checkout. We will explore each command in detail, explaining their nuances, use cases, and potential impact on your Git repository. By the end of this guide, you'll have a clear understanding of how to confidently navigate and correct your Git history, ensuring a cleaner and more robust project development process.
This guide is structured to provide you with a quick reference and in-depth explanations. We will begin by understanding why undoing changes is so vital in version control, before diving into the specifics of each command. Through practical examples and clear comparisons, you'll learn when to use git reset, git revert, and git checkout to handle various undo scenarios, from correcting local mistakes to safely addressing issues in shared branches. We will also touch upon advanced techniques and best practices to solidify your understanding and proficiency with Git undo commands explained.
Understanding the Importance of Undoing Changes in Git
Version control systems like Git are not just about tracking changes; they are also about providing a safety net. The ability to undo changes is fundamental because it allows developers to experiment fearlessly, knowing that mistakes can be easily rectified without catastrophic consequences. Imagine writing code and realizing you've taken a wrong turn – Git’s undo commands are your time machine, enabling you to step back and correct your course. This capability is not merely about fixing errors; it's about fostering a more iterative and exploratory development process.
Furthermore, in collaborative environments, the importance of undoing changes is amplified. Teams rely on Git to manage contributions from multiple developers, and inevitably, situations arise where changes need to be undone, whether it's reverting a feature that introduced a bug, correcting a merge conflict, or simply cleaning up experimental code. Understanding and effectively using Git undo commands ensures that teams can maintain a stable and reliable codebase, even when faced with the complexities of collaborative development. The ability to confidently use git reset, git revert, and git checkout is therefore not just a personal skill but a crucial team capability for efficient and error-resilient software development.
Core Git Undo Operations: Reset, Revert, and Checkout
Git provides three primary commands for undoing changes: reset, revert, and checkout. While they might seem similar at first glance, they operate on different levels and have distinct effects on your Git repository, particularly on your commit history and working directory. Understanding the differences between these commands is essential for choosing the right tool for the job and avoiding unintended consequences. Each command addresses different scenarios, from local cleanups to undoing changes in shared repositories.
In the following sections, we will delve into each of these core Git undo operations individually. We'll explore their functionalities, options, and most importantly, when and why you should use each one. By breaking down git reset, git revert, and git checkout, we aim to provide a clear and practical guide to mastering Git undo commands explained, enabling you to confidently manage and correct your project's history and working state.
Git Reset: Rewriting History Locally
git reset is a powerful command used to move the current branch's HEAD to a specified commit. This action effectively "rewinds" your branch to an earlier state, and it can be used to discard commits, stage changes, or even unstage changes while keeping them in your working directory. It's crucial to understand that git reset modifies the commit history of your branch, which can have significant implications, especially in collaborative environments. Therefore, it's generally recommended to use git reset primarily for local cleanup and when working on private branches where rewriting history is less problematic.
git reset comes with three main options, each affecting different parts of your Git repository: --hard, --mixed (which is the default if no option is specified), and --soft. These options determine what happens to the staging area (also known as the index) and the working directory when the HEAD is moved. Choosing the right reset mode is critical to achieve the desired outcome without losing valuable work unintentionally. Let's explore each of these options in detail to understand their specific behaviors and use cases within the context of Git undo commands explained.
Hard Reset: Discarding Changes Completely
The git reset --hard <commit> command is the most aggressive form of reset. It not only moves the HEAD of your current branch to the specified <commit> but also completely discards any changes in the staging area and the working directory since that commit. This means that all commits made after the target commit are removed from the branch history, and any modifications in your files since that commit are permanently deleted. --hard reset should be used with extreme caution, especially when working on branches that have been pushed to remote repositories, as it can lead to data loss if not used carefully.
A practical example of when to use --hard reset is when you've been experimenting on a local branch and want to completely discard all changes and revert to a clean state. For instance, if you started a new feature, made several commits, and then decided to abandon that feature entirely, a git reset --hard <commit-before-feature> would effectively erase all traces of that feature from your local branch. It's like pressing a "reset" button, bringing your branch back to the exact state it was at the specified commit. Remember, this action is irreversible for the discarded changes, so ensure you have backups or are certain about removing these changes before executing a --hard reset.
Mixed Reset: Staging Area Reset, Working Directory Untouched
git reset --mixed <commit> (or simply git reset <commit>) is the default reset mode. It moves the HEAD of your current branch to the specified <commit> and resets the staging area to match that commit. However, unlike --hard reset, --mixed reset leaves your working directory untouched. This means that all the changes made after the target commit are preserved in your working directory as unstaged changes. This is a useful option when you want to undo commits but keep the changes you made to potentially rework them or stage them differently.
Consider a scenario where you've made a few commits that you want to undo because they were based on a flawed approach. Using git reset --mixed HEAD~2 (to undo the last two commits) would remove those commits from your branch history and unstage all the changes introduced by those commits. However, these changes would still be present in your working directory, allowing you to modify them, stage them selectively, and create new, more appropriate commits. --mixed reset is a versatile tool for cleaning up commit history while retaining the flexibility to reorganize your work, making it a frequently used Git undo commands explained technique for local adjustments.
Soft Reset: Moving the Branch Pointer
git reset --soft <commit> is the least destructive of the reset options. It only moves the HEAD of your current branch to the specified <commit> without altering the staging area or the working directory. This means that all the changes from the commits made after the target commit remain staged, ready to be committed again. --soft reset is particularly useful when you want to rewrite your commit history without losing any of your work. It's often used to combine multiple commits into a single, more meaningful commit or to amend the commit message of the last commit.
Imagine you've made several small commits that are logically part of a single feature. Using git reset --soft HEAD~3 (to undo the last three commits) would effectively "undo" those commits but leave all the changes staged. You could then make adjustments to the staged changes if needed, and then create a single, consolidated commit that represents the entire feature. Another common use case is amending the last commit. If you realize you forgot to stage a file or made a typo in the commit message, you can use git reset --soft HEAD~1 (or git reset --soft HEAD^) to uncommit the last commit, make your corrections, stage the additional file (if needed), and then use git commit --amend to create a corrected commit, effectively rewriting the last commit with your changes. --soft reset is a powerful tool for refining your commit history and is a key component of mastering Git undo commands explained.
Git Revert: Creating a New Commit to Undo a Previous One
git revert <commit> is a safer and more collaborative way to undo changes compared to git reset. Instead of rewriting history, git revert creates a new commit that undoes the changes introduced by a specific commit. This new commit effectively reverses the effects of the target commit, while keeping the original commit in the history. This approach is particularly advantageous when working in shared branches, as it avoids rewriting history that others might have already built upon. git revert ensures a non-destructive way to undo changes, maintaining a clear and linear commit history that is easier to follow in collaborative projects.
When you execute git revert <commit>, Git automatically figures out the changes introduced by the specified commit and generates a new commit that reverses those changes. Git will typically open your default text editor, prompting you to write a commit message for the revert commit. Once you save the commit message and close the editor, Git creates the revert commit, which is added to your branch's history. This new commit effectively undoes the impact of the commit you reverted, making git revert a crucial command for safely undoing changes in collaborative Git workflows, especially when discussing Git undo commands explained in a team context.
Why Use Git Revert Instead of Reset for Shared Branches?
The primary reason to choose git revert over git reset in shared branches is to avoid rewriting commit history that has already been pushed to a remote repository and potentially shared with other developers. Rewriting history on shared branches using git reset can cause significant problems for collaborators, as their local branches may diverge from the rewritten remote branch, leading to confusion and conflicts. When you git reset a branch that has been pushed, you're essentially altering the past, which can create inconsistencies and force collaborators to perform complex operations to synchronize their repositories.
git revert, on the other hand, is a non-destructive operation. It adds a new commit to the history that explicitly undoes the changes of a previous commit, without altering the existing commit history. This approach is much safer for shared branches because it maintains a consistent and linear history that all collaborators can easily follow. When others pull changes after a git revert, they simply see a new commit that undoes a previous change, without any history rewriting or potential synchronization issues. Therefore, for any undo operation on a branch that is shared or has been pushed remotely, git revert is the recommended and safest method, embodying best practices for Git undo commands explained in collaborative settings.
Reverting Specific Commits
git revert allows you to target and undo specific commits in your history. You can revert a single commit by simply providing its commit hash to the git revert command, like git revert <commit-hash>. Git will then create a new commit that reverses the changes introduced by that particular commit. This is incredibly useful when you identify a specific commit that introduced a bug or an unwanted change, and you want to undo its effects without affecting any other commits in your history.
Furthermore, you can revert a range of commits using the -n or --no-commit option in combination with commit ranges. For example, to revert the last two commits, you could use git revert HEAD~2..HEAD -n. This will stage the changes required to revert those two commits but will not automatically create a revert commit. You can then review the staged changes, potentially make adjustments, and then manually commit the revert. Reverting specific commits or ranges provides fine-grained control over undoing changes, allowing you to selectively address issues in your Git history with precision using Git undo commands explained techniques.
Handling Conflicts During Revert
While git revert is generally straightforward, conflicts can arise during the revert process. This typically happens when the changes introduced by the commit you are reverting have been modified by subsequent commits. When a conflict occurs, Git will pause the revert process and indicate the conflicting files. You'll need to manually resolve these conflicts, similar to how you would resolve merge conflicts. Git will mark the conflicting sections in the affected files, allowing you to edit them to reconcile the changes between the commit being reverted and the current state of your branch.
After resolving the conflicts, you need to stage the resolved files using git add <resolved-file> and then continue the revert process using git revert --continue. If you decide to abort the revert process due to unresolved conflicts or any other reason, you can use git revert --abort to return to the state before you started the revert. Understanding how to handle conflicts during git revert is crucial for effectively using this command in real-world scenarios. Conflict resolution is a standard part of Git workflows, and mastering it ensures you can confidently handle even complex revert operations when using Git undo commands explained.
Git Checkout: Switching Branches and Restoring Files
git checkout is a versatile command with two primary functions related to undoing changes. First, it is used to switch between branches, allowing you to move your working directory and staging area to a different branch or commit. Second, it can be used to restore specific files to a previous state, effectively undoing local changes to those files or even reverting them to a version from a specific commit. While git checkout doesn't directly undo commits in the way reset and revert do, it plays a vital role in navigating your Git repository and undoing changes at the file level or by switching contexts.
Understanding both aspects of git checkout is important for mastering Git undo commands explained. Switching branches allows you to discard local changes by moving to a different branch where those changes are not present. Restoring files allows for selective undoing of modifications within your working directory, providing granular control over reverting specific file changes. Let's explore both of these functionalities of git checkout in more detail.
Checkout to Switch Branches
The most common use of git checkout is to switch between branches. When you run git checkout <branch-name>, Git updates your working directory and staging area to reflect the state of the specified branch. If you have uncommitted changes in your current branch, Git might prevent you from switching branches to avoid losing those changes. In such cases, you may need to either commit your changes or stash them before checking out a different branch. Switching branches using git checkout can be seen as a form of undoing changes in the sense that you are effectively discarding the current state of your working directory and moving to a different state represented by the target branch.
For instance, if you are working on a feature branch and want to quickly switch back to the main branch to address a hotfix, you would use git checkout main. This command will undo the context of your feature branch and place you in the main branch's context. It's a fundamental operation for navigating your Git repository and is often used in conjunction with other Git undo commands explained techniques to manage different aspects of your project's history and working state.
Checkout to Restore Specific Files: One File Undo
git checkout can also be used to restore specific files to a previous version. To undo changes to a file in your working directory and revert it to the version in the staging area (or the last commit if the file is not staged), you can use git checkout -- <file-path>. This command discards the local modifications you've made to the specified file and replaces it with the version from the staging area. If you want to restore a file to a specific commit, you can use git checkout <commit-hash> -- <file-path>. This will retrieve the version of the file from the specified commit and place it in your staging area and working directory.
For example, if you accidentally made changes to a file named myfile.txt and want to undo those changes, you can run git checkout -- myfile.txt. This will revert myfile.txt to its last committed state. Alternatively, if you want to retrieve an older version of myfile.txt from a commit with hash abcdef123, you would use git checkout abcdef123 -- myfile.txt. This file-level undo capability of git checkout is invaluable for selectively discarding changes and restoring specific files to previous states, making it a key part of Git undo commands explained for granular file recovery.
Git Reset vs. Revert vs. Checkout: Key Differences and Use Cases
While git reset, git revert, and git checkout are all used to undo changes in Git, they differ significantly in their scope, impact on commit history, and typical use cases. Understanding these key differences is crucial for choosing the appropriate command for a given situation. git reset is primarily for local history manipulation, git revert for safe, public history preservation, and git checkout for branch switching and file restoration. The choice between these commands depends largely on whether you are working locally, in a shared environment, and the level of granularity you need for undoing changes.
In the following sections, we will compare these three commands across several key dimensions, including data loss considerations, scope of changes, and impact on branch history. This comparison will help you solidify your understanding of Git undo commands explained and enable you to confidently select the right command for various undo scenarios in your Git workflow.
Comparing Git Reset and Git Revert: Data Loss Considerations
The most critical difference between git reset and git revert lies in their potential for data loss. git reset --hard is a destructive command that can permanently delete commits and working directory changes. If you use --hard reset to move to an older commit, all commits made after that commit are effectively discarded and, unless you have backups or reflogs to recover them, are lost forever. Therefore, --hard reset should be used with extreme caution, especially on shared branches or when you are unsure about the consequences.
git revert, on the other hand, is a non-destructive operation. It never deletes commits or history. Instead, it creates new commits to undo the effects of previous commits. This means that your commit history always remains intact, and there's no risk of permanently losing commits. Because git revert preserves history, it is the safer option, particularly when working in collaborative environments or when you want to ensure that undo operations are auditable and reversible themselves. When considering Git undo commands explained, always prioritize data safety, especially in shared projects, making git revert a preferred choice in many scenarios due to its non-destructive nature.
Comparing Git Checkout and Git Reset: Scope of Changes
git checkout and git reset operate at different scopes when it comes to undoing changes. git reset primarily affects the branch's commit history and can optionally impact the staging area and working directory, depending on the reset mode ( --hard, --mixed, --soft). It's used to rewind the branch to a specific point in history, potentially discarding commits entirely (in the case of --hard reset). git reset changes the branch pointer itself.
git checkout, when used for file restoration ( git checkout -- <file>), operates at the file level within the working directory and staging area. It allows you to undo changes to specific files by reverting them to a previous state from either the staging area or a specified commit. git checkout in this context does not alter the commit history or branch pointers. It's focused on undoing modifications to individual files within your local working environment. Therefore, git checkout is more granular and localized in its scope of undoing changes compared to the broader history manipulation of git reset, showcasing different facets of Git undo commands explained.
Comparing Git Checkout and Git Revert: Impact on Branch History
When comparing git checkout and git revert in terms of their impact on branch history, the distinction is clear. git revert explicitly modifies the branch history by adding new commits. Each git revert operation creates a new commit that represents the undoing of a previous commit. This results in a linear history that clearly shows the undo operations as part of the branch's evolution. The original commits remain in the history, and the revert commits explicitly indicate the reversal of their effects.
git checkout, in its file restoration form ( git checkout -- <file>), does not directly alter the commit history. It only modifies the files in your working directory and staging area. It's used to undo local, uncommitted changes to files or to retrieve older versions of files, but it does not create new commits or change the existing commit history. Branch switching with git checkout also doesn't directly undo changes in the sense of reverting commits, but it changes the context of your working directory and staging area to a different branch's state. Thus, git revert is history-modifying for undo operations, while git checkout for file restoration is history-preserving, highlighting another key difference within Git undo commands explained.
Practical Scenarios: When to Use Each Git Undo Command
To solidify your understanding of when to use git reset, git revert, and git checkout, let's consider some practical development scenarios. Each scenario illustrates a common situation where you might need to undo changes and demonstrates which command is most appropriate and why. These scenarios will help you connect the theoretical knowledge of Git undo commands explained to real-world development workflows.
By walking through these examples, you'll gain a clearer sense of how to choose the right Git undo command based on the specific context and desired outcome, whether it's correcting a local mistake, addressing an issue in a shared branch, or simply recovering a deleted file.
Scenario 1: Accidentally Committing to the Wrong Branch - Using Git Reset
Imagine you are working on a feature branch called feature-x, but accidentally make a commit to the main branch. You realize this mistake immediately after committing. In this situation, you are working locally and haven't pushed the incorrect commit to a shared remote repository yet. This is a perfect scenario to use git reset. Since you are on your local main branch and want to undo the last commit and move the changes back to your working directory to potentially move them to the correct branch, git reset --soft HEAD~1 is the ideal command.
Running git reset --soft HEAD~1 when on the main branch will undo the last commit on main, moving the HEAD back to the commit before your accidental commit. The changes from the undone commit will be preserved in your staging area, ready to be committed again. You can then git checkout feature-x and commit the changes on the correct feature branch. Because you are working locally and haven't pushed the incorrect commit, using git reset is safe and efficient for correcting this local mistake, demonstrating a practical application of Git undo commands explained in a common developer error.
Consider a scenario where you've merged a feature branch into the shared develop branch and pushed it to the remote repository. Later, it's discovered that this feature introduces a critical bug. Since the develop branch is shared with other developers, rewriting its history with git reset is strongly discouraged as it would cause synchronization issues for your team. In this case, git revert is the correct command to use.
To undo the merge commit of the faulty feature, you would use git revert -m 1 <merge-commit-hash>. The -m 1 option is often needed when reverting merge commits to specify which parent to follow (usually the main branch you were merging into, which is typically the first parent). This command creates a new commit on the develop branch that undoes the changes introduced by the faulty feature merge commit. When other developers pull changes from develop, they will see this revert commit, and the bug introduced by the feature will be effectively undone in a safe and collaborative manner. Using git revert in this shared branch scenario exemplifies the importance of choosing non-destructive Git undo commands explained methods in collaborative workflows.
Scenario 3: Recovering a Deleted File - Using Git Checkout
Suppose you accidentally delete a file, say important_document.txt, from your working directory. You haven't staged or committed this deletion yet, but you need to recover the file. git checkout is the perfect tool for this. Since the file was present in your last commit, you can use git checkout HEAD -- important_document.txt to restore it from the HEAD commit (which represents the last commit on your current branch).
Running this command will retrieve the important_document.txt file from the last commit and place it back in your working directory. The file will be in its last committed state, effectively undoing the deletion you performed in your working directory. This scenario highlights the file restoration capability of git checkout as part of Git undo commands explained, specifically for recovering from accidental file deletions or modifications before staging or committing.
Scenario 4: Undoing changes in the Working Directory - Using Git Checkout
Let's say you've made several changes to a file, config.ini, in your working directory, but you haven't staged these changes yet. You decide you don't want to keep these modifications and want to revert config.ini back to its last committed state. Again, git checkout is the appropriate command. You can use git checkout -- config.ini to discard all your uncommitted changes to config.ini and revert it to the version in the HEAD commit.
Executing git checkout -- config.ini will effectively undo all the modifications you've made to config.ini since the last commit. The file in your working directory will be replaced with the version from the HEAD, discarding your local changes. This is a quick and easy way to undo unwanted modifications in your working directory before staging or committing them, showcasing another practical application of git checkout within the realm of Git undo commands explained for managing local file changes.
Advanced Git Undo Techniques
Beyond the basic reset, revert, and checkout commands, Git offers more advanced techniques for undoing changes, especially when dealing with complex scenarios or recovering from mistakes that are not immediately obvious. One powerful tool is git reflog, which acts as a safety net, recording almost every change to your branch tips, even those not reflected in commits. Combining different Git undo commands can also be effective for handling intricate undo requirements.
Mastering these advanced techniques expands your Git undo capabilities and provides you with more options for recovering from errors and navigating complex Git histories. Understanding git reflog and how to combine undo commands are valuable skills for becoming a more proficient Git user and fully leveraging Git undo commands explained functionalities.
Using git reflog to Recover Lost Commits
git reflog is a powerful tool for recovering from mistakes, particularly after using destructive commands like git reset --hard. Reflog, short for "reference log," records updates to the tip of branches and other references in your local repository. It essentially keeps a history of where your HEAD and branch pointers have been, even if those points are no longer reachable through normal branch history after actions like resets or rebases. This makes git reflog invaluable for recovering commits that seem to be "lost" after rewriting history.
To use git reflog, simply run git reflog. This will display a log of recent actions in your repository, including commit hashes, branch movements, and reset operations. Each entry in the reflog has an index (like HEAD@{2}) and a commit hash. If you've accidentally performed a git reset --hard and want to recover the commits you discarded, you can use git reflog to find the commit hash of your branch before the reset. Once you have this hash, you can use git reset --hard <commit-hash-from-reflog> to restore your branch to that state, effectively "undoing" the hard reset. git reflog is a crucial safety net and a powerful technique for recovering from potentially destructive Git operations, making it an essential part of advanced Git undo commands explained strategies.
Combining Git Undo Commands for Complex Scenarios
In some complex situations, a single Git undo command might not be sufficient to achieve the desired outcome. In these cases, combining different undo commands can provide the flexibility needed to handle intricate scenarios. For example, you might use git reset --mixed to undo several commits but keep the changes in your working directory, then use git checkout -- <file> to discard specific unwanted changes within the working directory before creating a new commit.
Another scenario might involve using git revert to undo a specific merge commit on a shared branch, and then using git reset --soft on a local feature branch to combine several subsequent commits into a single, cleaner commit before re-merging. The key is to understand the strengths and limitations of each Git undo command explained and to combine them strategically to address complex undo requirements. By creatively combining reset, revert, and checkout, you can effectively manage and correct even intricate errors in your Git repository, tailoring your undo approach to the specific situation.
Best Practices for Using Git Undo Commands
To use Git undo commands effectively and safely, it's important to follow some best practices. These practices minimize the risk of data loss, prevent confusion in collaborative environments, and ensure that undo operations are performed deliberately and with a clear understanding of their consequences. Adhering to these best practices is crucial for mastering Git undo commands explained and using them responsibly in your development workflow.
By incorporating these guidelines into your Git usage, you'll not only become more proficient at undoing changes but also contribute to a more stable and collaborative development environment.
Always Commit Changes Before Experimenting with Undo Commands
Before you start experimenting with any Git undo commands, especially git reset, it's highly recommended to commit your current changes. This creates a snapshot of your work in the Git history, providing a safe point to which you can easily return if something goes wrong during your undo operations. Even if you're just about to try a seemingly simple git checkout -- <file>, committing first adds an extra layer of safety.
Think of committing before undoing as creating a "save point" in a game. If your undo attempts lead to an undesirable state, you can always revert to this saved commit. This practice is particularly crucial when you are unsure about the exact outcome of a particular undo command or when you are working on a complex undo operation. Committing regularly before potentially history-altering actions is a fundamental best practice for using Git undo commands explained safely and effectively.
Understanding the Implications of Each Command Before Execution
Before running any Git undo command, especially git reset --hard or git revert on shared branches, take the time to fully understand its implications. Consult the Git documentation, use --dry-run options if available (though not directly for reset/revert in the same way as some other commands, understanding their effects through testing on a non-critical branch is key), and consider the potential consequences of the command on your local repository and any shared remote repositories. Mistakes with undo commands, particularly reset --hard, can lead to data loss or synchronization problems in collaborative projects if not used carefully.
If you are unsure about a command, practice it on a test branch or a local clone of your repository first to observe its behavior and ensure it achieves the desired outcome without unintended side effects. Taking a moment to understand the "what ifs" before executing potentially impactful Git undo commands explained is always a worthwhile investment in preventing errors and data loss.
When you need to undo changes on a shared branch, especially using git revert, it's essential to communicate with your team. Let your collaborators know what changes you are reverting and why. This helps avoid confusion and ensures that everyone is aware of the changes being made to the shared branch history. Clear communication is particularly important because git revert adds new commits to the history, and team members need to understand the context of these revert commits.
For more drastic undo operations on shared branches (which should ideally be avoided and revert should be preferred), such as in extremely rare cases where a reset might be considered (and only after very careful consideration and discussion), communication is even more critical. In such scenarios, it's crucial to coordinate with the entire team, explain the necessity of the history rewrite, and guide them on how to synchronize their local repositories after the change. Open communication is paramount for maintaining a smooth and collaborative workflow when dealing with Git undo commands explained, especially in shared branch environments.
Git Undo Cheat Sheet: Command Summary
This section provides a concise cheat sheet summarizing the key Git undo commands: reset, revert, and checkout, along with their common options. This quick reference will help you recall the basic syntax and functionalities of each command at a glance, reinforcing your understanding of Git undo commands explained.
Use this cheat sheet as a handy tool when you need to quickly decide which command to use for a specific undo scenario. Remember to always consider the implications of each command before executing it, especially in collaborative projects.
Reset Command Options: A Concise Overview
git reset --soft <commit>: Moves HEAD to<commit>, staging area and working directory remain unchanged. Use to rewrite commit history while keeping changes staged.git reset --mixed <commit>(default): Moves HEAD to<commit>, resets staging area to match<commit>, working directory remains unchanged. Use to undo commits and unstage changes, keeping them in the working directory.git reset --hard <commit>: Moves HEAD to<commit>, resets staging area and working directory to match<commit>. Discards all changes since<commit>. Use with extreme caution for local cleanup only.
git revert <commit>: Creates a new commit that undoes the changes from<commit>. Use to safely undo changes on shared branches, preserving history.git revert -n <commit>: Starts a revert but does not automatically commit. Useful for reverting multiple commits or handling conflicts manually before committing.git revert --continue: Continues the revert process after resolving conflicts.git revert --abort: Aborts the revert process and returns to the state before starting the revert.
Checkout Command Options: A Concise Overview
git checkout <branch-name>: Switches to the branch<branch-name>.git checkout <commit-hash>: Detaches HEAD at<commit-hash>(goes into "detached HEAD" state).git checkout -- <file-path>: Reverts<file-path>in the working directory to the version in the staging area (or last commit if not staged). Use to discard local changes to a file.git checkout <commit-hash> -- <file-path>: Reverts<file-path>in the working directory and staging area to the version in<commit-hash>. Use to restore a specific version of a file.
Mastering Git Undo: A Step Towards Becoming a Git Pro
Mastering Git undo commands is a significant step towards becoming a proficient Git user. The ability to confidently navigate and correct your Git history is essential for efficient and error-resilient software development, whether you are working individually or as part of a team. By understanding the nuances of reset, revert, and checkout, and by following best practices, you can effectively manage your codebase and contribute more confidently to collaborative projects.
This guide has provided a comprehensive overview of Git undo commands explained, from basic concepts to advanced techniques and practical scenarios. Continue to practice these commands in your daily Git workflow, and you will soon find yourself handling undo operations with ease and expertise. Becoming proficient with Git undo commands is not just about fixing mistakes; it's about gaining greater control over your version history and enhancing your overall software development skills.
Further Resources for Learning More About Git Undo
To deepen your understanding of Git undo commands and explore related topics, consider these resources:
- Official Git Documentation: The most authoritative source for detailed information on all Git commands, including
reset,revert, andcheckout. Refer to the official Git documentation for in-depth explanations and options. - "Pro Git" Book by Scott Chacon and Ben Straub: This free online book provides a comprehensive guide to Git, including detailed chapters on undoing changes and recovering from errors. It's an excellent resource for both beginners and advanced users.
- Online Git Tutorials and Courses: Platforms like GitHub Learning Lab, Coursera, Udemy, and others offer interactive tutorials and courses that cover Git undo commands and related topics. These resources often provide practical exercises and real-world examples.
- Stack Overflow and Git Forums: Online communities like Stack Overflow and dedicated Git forums are invaluable for finding answers to specific questions and learning from the experiences of other Git users. Search for questions related to Git undo commands explained and explore the discussions and solutions provided.
By continuously learning and practicing, you can solidify your understanding of Git undo commands and become a true Git professional.
Frequently Asked Questions
What's the difference between git reset, git revert, and git checkout for undoing changes?
git reset moves the commit history, potentially losing data. git revert creates a new commit that undoes a previous one, preserving history. git checkout can switch branches or restore individual files to a previous state.
When should I use git reset --hard?
Use git reset --hard with extreme caution. It completely discards changes from the staging area and working directory, potentially leading to data loss. Only use it for local, unpushed commits you're absolutely sure you want to eliminate.
How does git revert preserve the commit history?
git revert doesn't erase any commits. Instead, it creates a new commit whose changes are the opposite of the commit you're reverting. This effectively undoes the changes while maintaining a record of the original commit.
Can I undo a git revert if I made a mistake?
Yes! Since git revert creates a new commit, you can undo it just like any other commit. You can use git revert on the revert commit itself, or use git reset to remove it if it hasn't been pushed.
Is it safe to use git reset on a public branch that others are working on?
Generally, no. Using git reset on a shared branch can rewrite history that others have already based their work on. This can cause significant problems and conflicts during merging. It is better to git revert on public branches.
Final Reflection: Embracing Imperfection in Version Control
The power of Git lies not just in its ability to track changes, but also in its capacity to gracefully recover from mistakes. Understanding the nuances of reset, revert, and checkout is crucial for any developer, transforming potential disasters into learning opportunities and fostering a more confident and experimental approach to coding.
The ability to undo changes in Git has profoundly shaped the collaborative software development landscape. It's a safety net that encourages exploration and innovation, knowing that errors are not fatal but rather stepping stones. The only way to do great work is to love what you do.
- Steve Jobs. This sentiment resonates deeply with the freedom Git provides, allowing developers to iterate fearlessly and refine their craft without the constant dread of irreversible errors.
Now, armed with a clearer understanding of Git's undo commands, I encourage you to embrace the inevitable imperfections of the development process. Experiment with confidence, knowing that you possess the tools to navigate any misstep. Let this knowledge empower you to push boundaries, explore new ideas, and ultimately, build better software.
Okay, here's a CTA draft for the article "The Git Undo Cheat Sheet: Reset, Revert, Checkout at a Glance," tailored for GitAndVersionControlHub.com:
Empower Your Workflow: Master Git Undoing Now!
Thanks for diving into the world of Git undos! We hope this cheat sheet has armed you with the knowledge to confidently navigate those tricky "oops" moments and maintain a clean and reliable project history. Now it's time to put that newfound power into practice!
Here's how you can continue your Git mastery journey:
- Boldly experiment: Try out each of the undo commands (reset, revert, checkout) on a test branch in your local repository. Don't be afraid to make mistakes – that's how you learn!
- Share your wisdom:Share this cheat sheet with your fellow developers! Help them become more confident with Git and prevent future headaches.
- Unlock hidden Git secrets: Dive deeper into Git by researching advanced topics or contributing to open-source projects. Expand your version control knowledge further.
What’s the first Git "undo" scenario you're going to tackle today? Share your plans or challenges in the comments below!